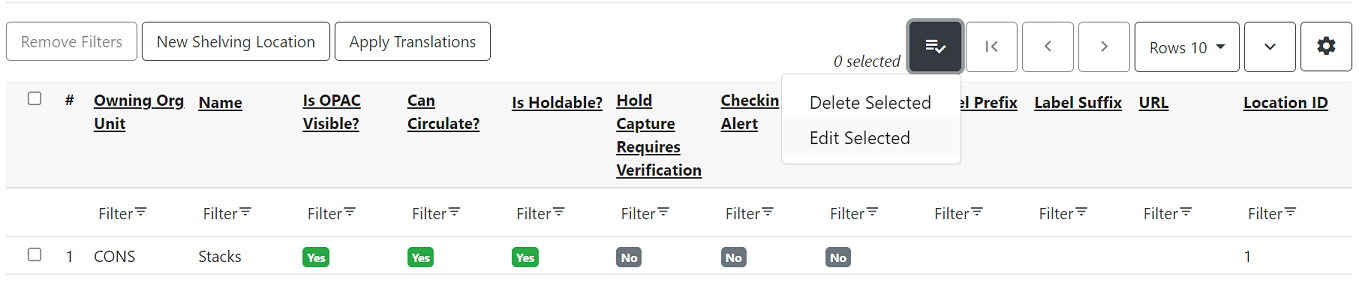
Administering shelving locations
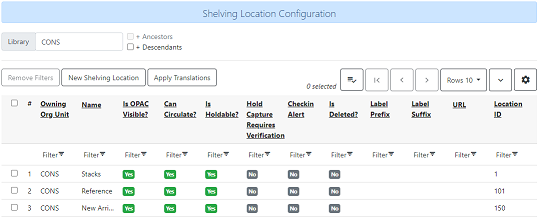
Shelving locations represent where in the library an item can be found. They can be administered at Administration → Local Administration → Shelving Locations Editor.
Creating new shelving locations
To add a shelving location
-
Click New Shelving Location.
-
Select your parameters for your shelving locations.
-
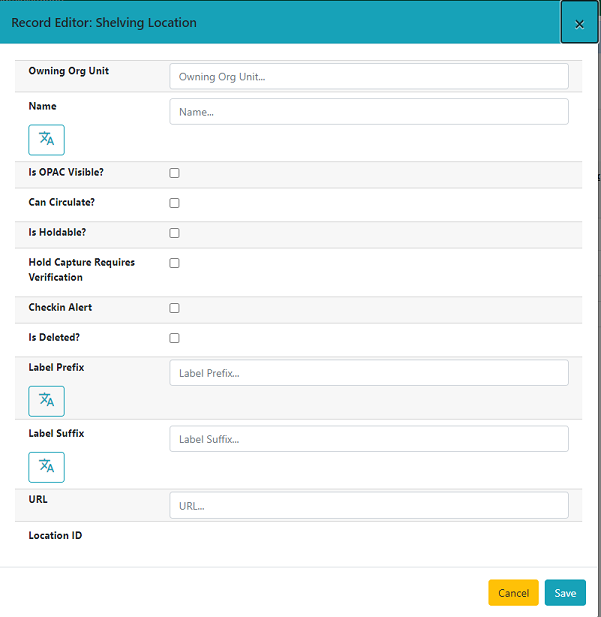
Choose the owning Org Unit of the shelving location.
-
Type the name of the shelving location in the name field.
-
Is OPAC Visible?, choose whether you would like items in this shelving location to appear in the catalog.
-
Can Circulate? can items in this location circulate?
-
Is Holdable? are items in this location holdable?
-
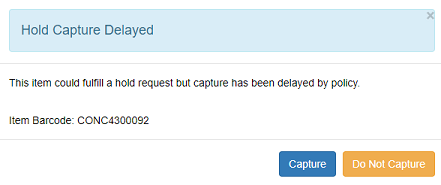
Hold Capture Requires Verification, choose whether or not you want hold capture to be verified. At the time of capture you will be asked to fulfill the hold.
-
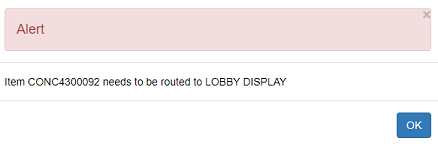
Checkin Alert, choose whether you would like a routing alert to appear when an item in this location is checked in. This is intended for special locations, such as 'Display', that may require special handling, or that temporarily contain items that are not normally in that location.
By default, these alerts will only display when an item is checked in, not when it is used to record an in-house use. To also display these alerts when an item in your location is scanned for in-house use, go to Administration > Local Administration > Library Settings Editor and set Display shelving location check in alert for in-house-use to True. -
Is Deleted?, this sets the deletion flag for a shelving location to yes.
-
If you would like a prefix or suffix to be added to the call numbers of every volume in this location, enter it.
-
If you would like, add a URL to the URL field. When a URL is entered in this field, the associated shelving location will display as a link in the Public Catalog summary display. This link can be useful for retrieving maps or other directions to the shelving location to aid users in finding material.
-
-
Select Save.
| Whether an item can be circulated, is holdable, or visible in the catalog, is controlled by three factors: item status, shelving location, and item attributes (the options in the Copy Editor). Evergreen follows the aforementioned sequence to check the value of each factor until it encounters a NO. An item can be circulated, holdable or visible on OPAC when all three factors are set to YES. |
Editing shelving locations
-
Select Administration → Local Administration → Shelving Locations Editor.
-
Select the shelving location you would like to edit.
-
Select the actions button and select Edit Selected. Or double click on the shelving location.
-
Make your changes and click Save.
Deleting shelving locations
You may only delete a shelving location if:
-
it doesn’t contain any items, or
-
it only contains deleted items.
-
Select Administration → Local Administration → Shelving Locations Editor.
-
Select the shelving location you would like to delete.
-
Select the actions button and select Delete Selected.
Evergreen preserves shelving locations in the database, so no statistical information is lost when a shelving location is deleted.
Modifying shelving location order
By default Evergreen displays shelving locations in alphabetical order. This order can be modified per Org Unit.
To modify the order of shelving locations, Go to Administration → Local Administration → Shelving Location Order
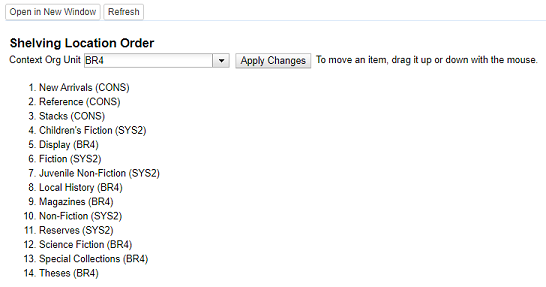
To change the order:
-
Choose the Org Unit you are wanting to reorder.
-
Drag and drop the locations until you are satisfied with their order.
-
Click Apply changes.
Shelving location groups
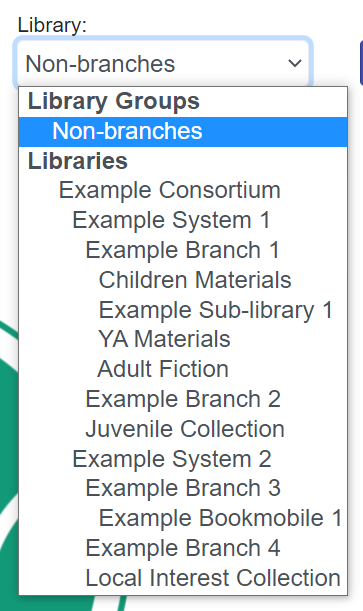
This feature allows staff to create and name sets of shelving locations to use as a search filter in the catalog. OPAC-visible groups will display within the library selector in the Public Catalog. When a user selects a group and performs a search, the set of results will be limited to records that have items in one of the shelving locations within the group. Groups can live at any level of the library hierarchy and may include shelving locations from any parent org unit or child org unit.
| To work with shelving location groups, you will need the ADMIN_COPY_LOCATION_GROUP permission. |
Create a shelving location group
-
Click Administration → Local Administration → Shelving Location Groups.
-
At the top of the screen is a drop down menu that displays the org unit tree. Select the unit within the org tree to which you want to add a shelving location group. The shelving locations associated with the org unit appear in the shelving locations column.
-
In the column called Location Groups, click New.
-
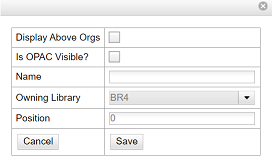
Choose how you want the shelving location group to display to patrons in the catalog’s org unit tree in the OPAC. By default, when you add a new shelving location group, the group displays in the org unit tree beneath any branches or sub-libraries of its parental org unit. If you check the box adjacent to Display above orgs, then the group will appear above the branches or sub-libraries of its parental org unit.
-
To make the shelving location group visible to users searching the public catalog, check the box adjacent to Is OPAC visible?
-
Enter a Name for the shelving location group.
-
Click Save. The name of the shelving location group appears in the location groups.
-
Select the shelving locations that you want to add to the group, and click Add. The shelving locations will populate the middle column, Group Entries.
-
The shelving location group is now visible in the org unit tree in the catalog. Search the catalog to retrieve results from any of the shelving locations that you added to the shelving location group.
Order shelving location groups
If you create more than one shelving location group, then you can order the groups in the org unit tree.
-
Click Administration → Local Administration → Shelving Location Groups.
-
Three icons appear next to each location group. Click on the icons to drag the shelving location groups into the order in which you would like them to appear in the catalog.
-
Search the catalog to view the reorder of the shelving location groups.