Holds Management
Placing Holds
Holds can be placed by staff in the Staff Client and by patrons in the OPAC. In this chapter we demonstrate placing holds in the Staff Client.
Holds Levels
Evergreen has different levels of holds. Library staff can place holds at all levels, while patrons can only place title-level holds, and parts-level holds. The chart below summarizes the levels of holds.
Hold level |
Abbreviation |
When to use |
How to use |
Who can use |
Hold tied to |
Title |
T |
Patron wants first available copy of a title |
Staff or patron click on Place Hold next to title. |
Patron or staff |
Holdings attached to a single MARC (title) record |
Parts |
P |
Patron wants a particular part of title (e.g. volume or disk number) |
Staff or patron selects part on the create/edit hold screen when setting holds notification options. |
Patron or staff |
Holdings with identical parts attached to a single MARC (title) record. |
Volume |
V |
Patron or staff want any title associated with a particular call number |
In the staff client, click on Volume Hold under Holdable? |
Staff only |
Holdings attached to a single call number (volume) |
Copy |
C |
Patron or staff want a specific copy of an item |
In the staff client, click on Copy Hold under Holdable? |
Staff only |
A specific copy (barcode) |
Title Level Hold
|
A default hold expiration date will be displayed if the library has set up a default holds expiration period in their library settings. Uncaptured holds will not be targeted after the expiration date. If you select the Suspend this Hold checkbox, the hold will be suspended and not be captured until you activate it. |
-
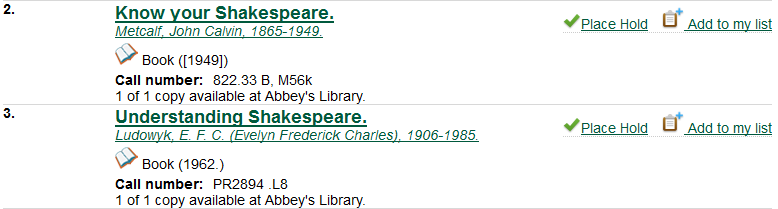
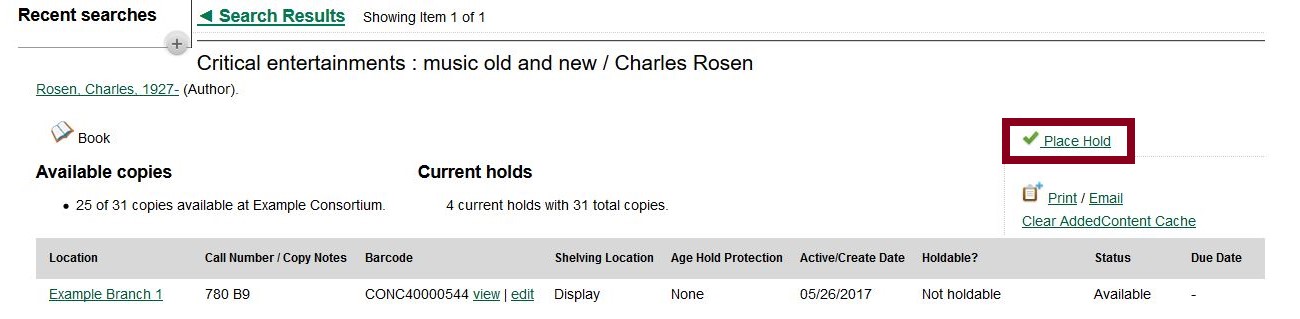
To place a title level hold, retrieve the title record on the catalog and click the Place Hold link beside the title on the search results list, or click the Place Hold link on the title summary screen.
-
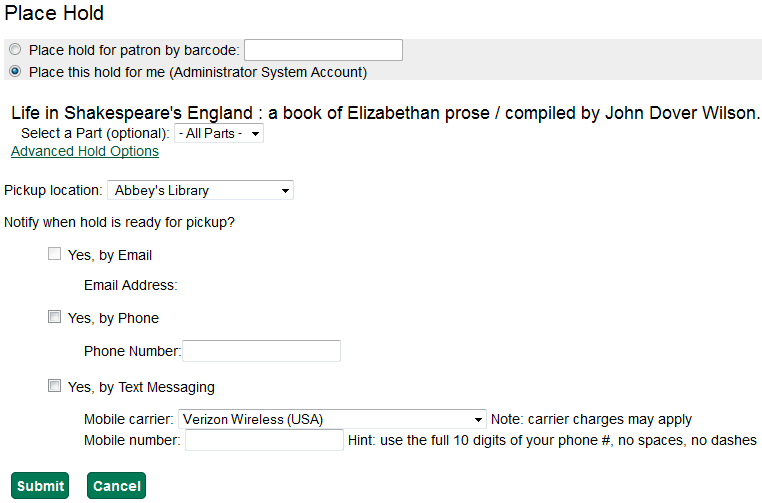
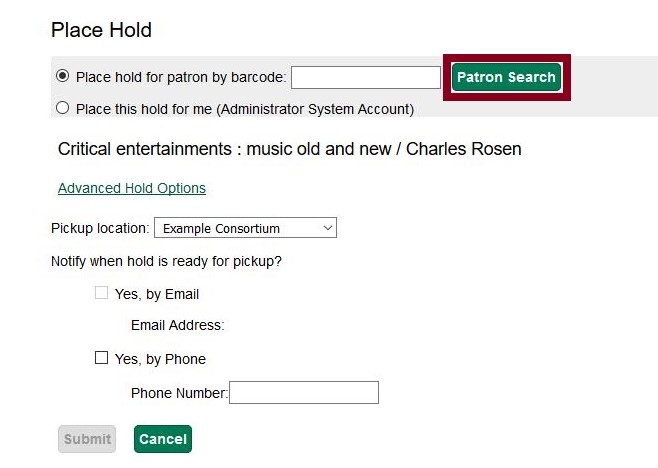
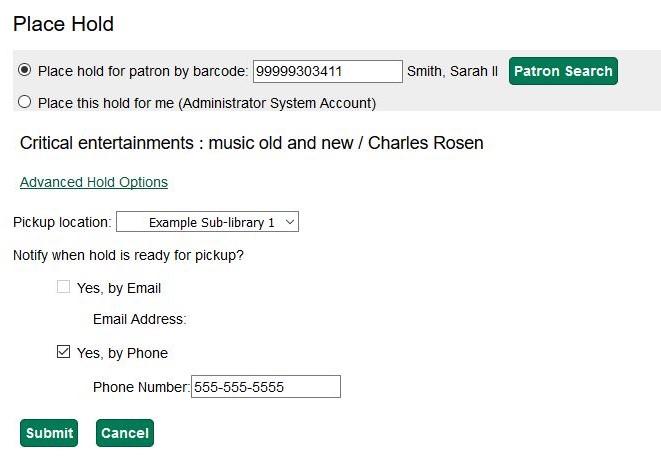
Scan or type patron’s barcode into the Place hold for patron by barcode box, or choose Place this hold for me.
-
If this title contains multiple parts, you can specify which part to request. If you do not select a part, the hold will target any of the other copies on this record, that is, those with no parts attached. Those copies are usually the complete set, containing all the parts.
-
Edit patron hold notification and expiration date fields as required. Be sure to choose a valid Pickup location.
-
Click Submit.
-
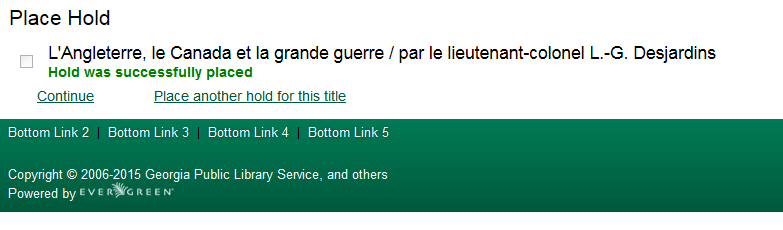
A confirmation screen appears with the message "Hold was successfully placed".

Advanced Hold Options
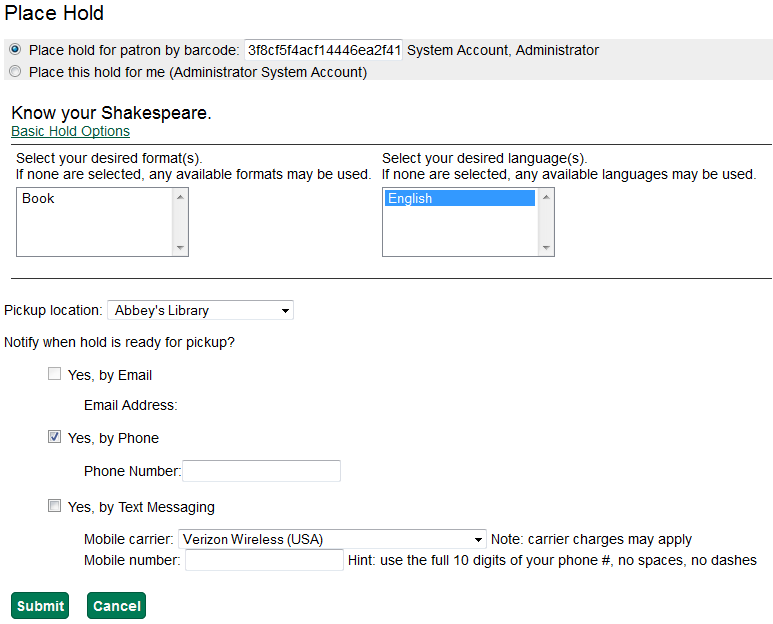
Clicking the Advanced Hold Options link will take you into the metarecord level hold feature, where you can select multiple formats and/or languages, if available.
Selecting multiple formats will not place all of these formats on hold. For example, selecting CD Audiobook and Book implies that either the CD format or the book format is the acceptable format to fill the hold. If no format is selected, then any of the available formats may be used to fill the hold. The same holds true for selecting multiple languages.
Patron Search from Place Hold
Patron Search from Place Hold allows staff members, when placing a hold on behalf of a patron in the web staff client, to search for patrons by names and other searchable patron information, rather than relying on barcode alone.
To use Patron Search From Place Holds:
-
After performing a search in the catalog, staff will retrieve a bibliographic record.
-
Click Place Hold either in the search results or within the detailed bibliographic record. The Place Hold Screen will appear. Note: this feature also appears when placing volume level holds and copy level holds.
-
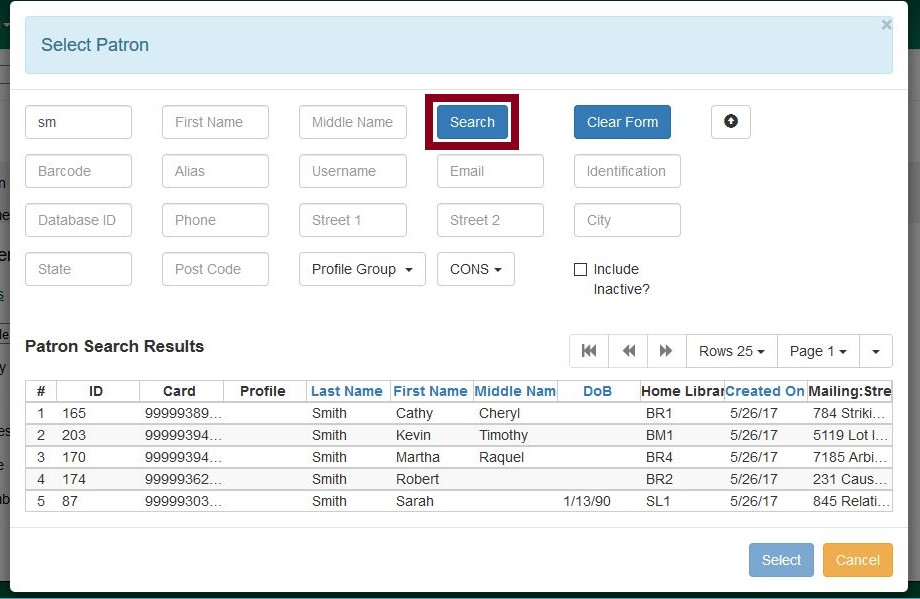
Next to Place Hold for patron by barcode, click on Patron Search. Please note that Patron Search will only appear in this interface when using the web-based staff client. It will not appear in the patron-facing OPAC.
-
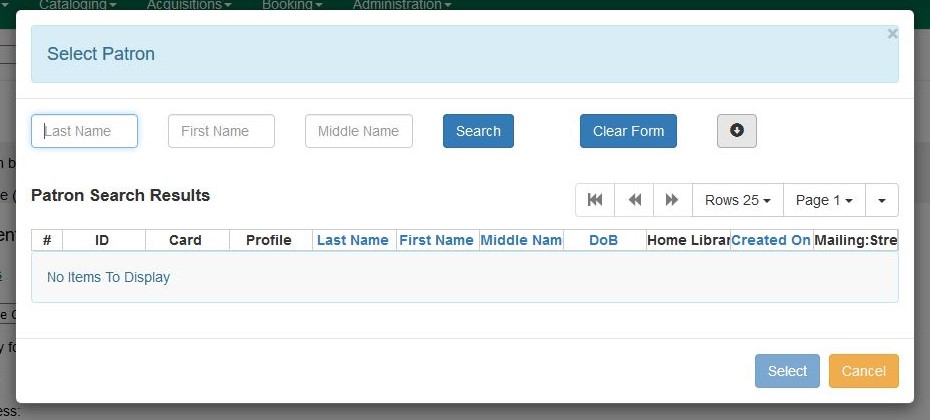
A dialog box will appear with the patron search interface used elsewhere in the staff client. By default, the search scopes to your workstation org unit, and you can search by patron last name, first name, and middle name.
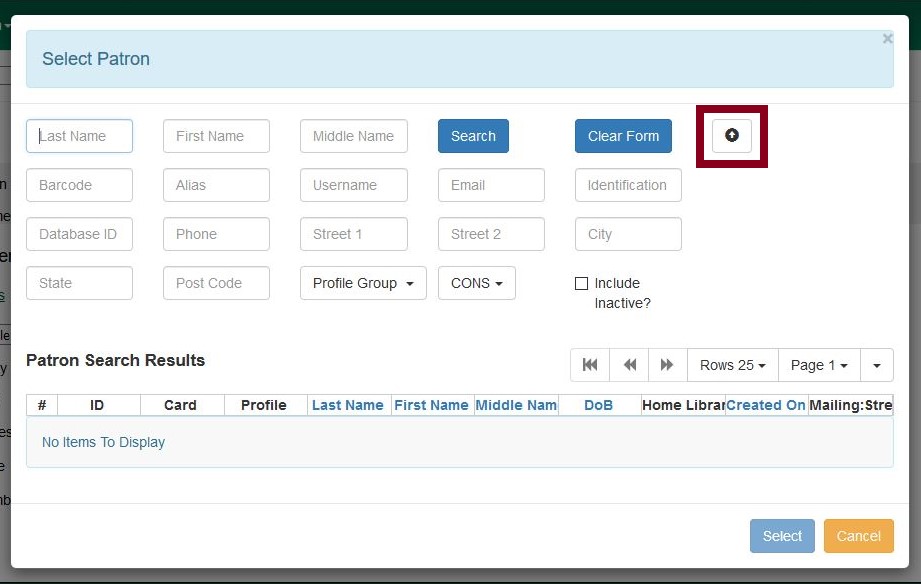
Clicking the arrow icon to the right of Clear Form can either expand or condense the searchable fields display which includes other patron information.
-
To search for a patron, fill out the relevant search fields, and click Search or hit ENTER on your keyboard. Results will appear below in Patron Search Results in the lower half of the screen.
-
Click the row of the desired patron account, and click Select.

-
The dialog box will close and the selected patron’s barcode will appear next to Place Hold for patron by barcode. This will cause the patron’s hold notification preferences to appear in the relevant fields in the bottom half of the screen. Changes to the Hold Notification preferences can be made before clicking Submit to finish placing a hold for the patron.
Parts Level Hold
-
To place a parts level hold, retrieve a record with parts-level items attached to the title, such as a multi-disc DVD, an annual travel guide, or a multi-volume book set.
-
Place the hold as you would for a title-level hold, including patron barcode, notification details, and a valid pickup location.
-
Select the applicable part from the Select a Part dropdown menu.
-
Click Submit.
Requested formats are listed in the Holdable Part column in hold records. Use the Column Picker to display it when the hold record is displayed.
Placing Holds in Patron Records
-
Holds can be placed from patron records too. In the patron record on the Holds screen, click the Place Hold button on the left top corner.
-
The catalog is displayed in the Holds screen to search for the title on which you want to place a hold.
-
Search for the title and click the Place Hold link.
-
The patron’s account information is retrieved automatically. Set up the notification and expiration date fields. Click Place Hold and confirm your action in the pop-up window.
-
You may continue to search for more titles. Once you are done, click the Holds button on the top to go back to the Holds screen. Click the Refresh button to display your newly placed holds.
Placing Multiple Holds on Same Title
After a successful hold placement, staff have the option to place another hold on the same title by clicking the link Place another hold for this title. This returns to the hold screen, where a different patron’s information can be entered.
This feature can be useful for book groups or new items where a list of waiting patrons needs to be transferred into the system.
Managing Holds
Holds can be cancelled at any time by staff or patrons. Before holds are captured, staff or patrons can suspend them or set them as inactive for a period of time without losing the hold queue position, activate suspended holds, phone number, pick-up location (for multi-branch libraries only), expiration date, activation date for inactive holds, etc. Once a hold is captured, staff can change the pickup location and extend the hold shelf time if required.
As of 3.6, staff and patrons can update hold notification preferences on unfulfilled holds. For more information see Update Notification Preferences.
Staff can edit holds in either patron’s records or the title records. Patrons can edit their holds in their account on the OPAC.
|
If you use the column picker to change the holds display from one area of the staff client (e.g. the patron record), it will change the display for all parts of the staff client that deal with holds, including the title record holds display, the holds shelf display, and the pull list display. |
Actions for Selected Holds
-
Retrieve the patron record and go to the Holds screen.
-
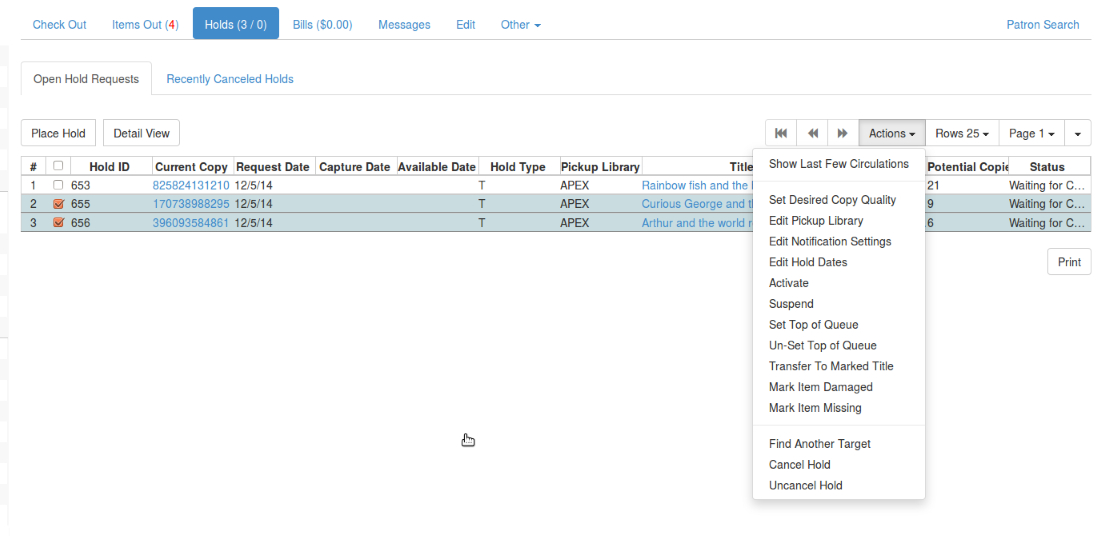
Highlight the hold record, then select Actions.
-
Manage the hold by choosing an action on the list.
-
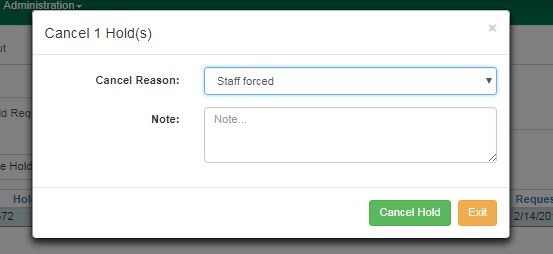
If you want to cancel the hold, click Cancel Hold from the menu. You are prompted to select a reason and put in a note if required. To finish, click Apply.
A captured hold with a status of On Hold Shelf can be cancelled by either staff or patrons. But the status of the item will not change until staff check it in.
-
If you want to suspend a hold or activate a suspended hold, click the appropriate action on the list. You will be prompted to confirm your action. Suspended holds have a No value in the Active? column.
Suspended holds will not be filled but its hold position will be kept. They will automatically become active on the activation date if there is an activation date in the record. Without an activation date, the holds will remain inactive until staff or a patron activates them manually.
-
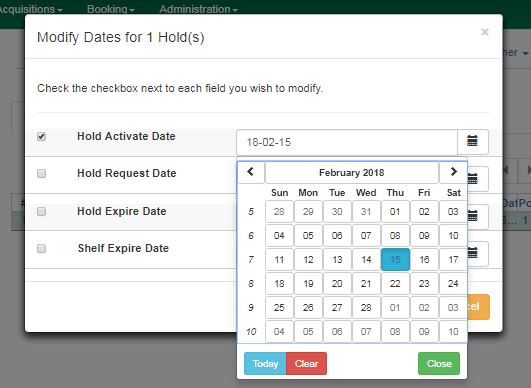
You may edit the Activation Date and Expiration Date by using the corresponding action on the Actions dropdown menu. You will be prompted to enter the new date. Use the calendar widget to choose a date, then click Apply. Use the Clear button to unset the date.
-
Hold shelf expire time is automatically recorded in the hold record when a hold is filled. You may edit this time by using the Edit Shelf Expire Time on the Actions dropdown menu. You will be prompted to enter the new date. Use the calendar widget to choose a date, then click Apply.
-
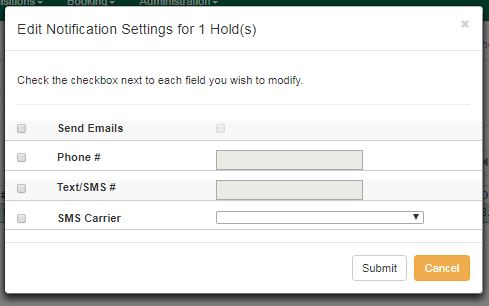
If you want to enable or disable phone notification or change the phone number, click Edit Notification Settings. You will be prompted to enter the new phone number. Make sure you enter a valid and complete phone number. The phone number is used for this hold only and can be different from the one in the patron account. It has no impact on the patron account. If you leave it blank, no phone number will be printed on the hold slip. If you want to enable or disable email notification for the hold, check Send Emails on the prompt screen.
-
Pickup location can be changed by clicking Edit Pickup Library. Click the dropdown list of all libraries and choose the new pickup location. Click Submit.
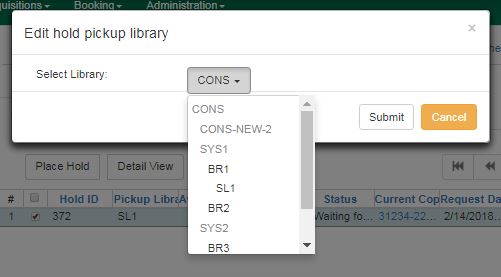
Staff can change the pickup location for holds with in-transit status. Item will be sent in transit to the new destination. Staff cannot change the pickup location once an item is on the holds shelf.
-
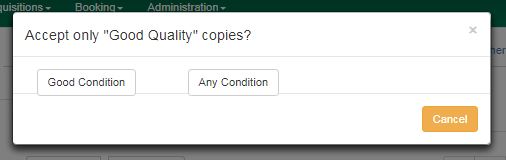
The item’s physical condition is recorded in the copy record as Good or Mediocre in the Quality field. You may request that your holds be filled with copies of good quality only. Click Set Desired Copy Quality on the Actions list. Make your choice in the pop-up window.
-
Transferring Holds
-
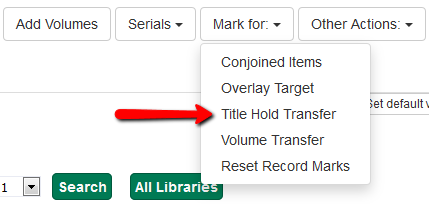
Holds on one title can be transferred to another with the hold request time preserved. To do so, you need to find the destination title and click Mark for: → Title Hold Transfer.
-
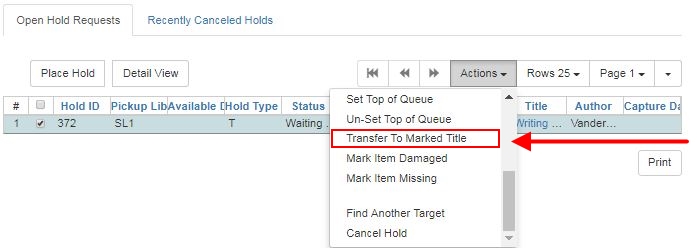
Select the hold you want to transfer. Click Actions → Transfer to Marked Title.
Cancelled Holds
-
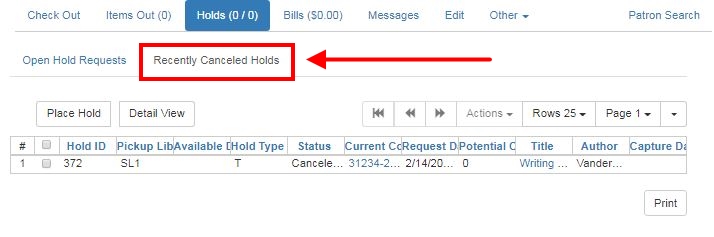
Cancelled holds can be displayed. Click the Recently Cancelled Holds button on the Holds screen.
-
You can un-cancel holds.
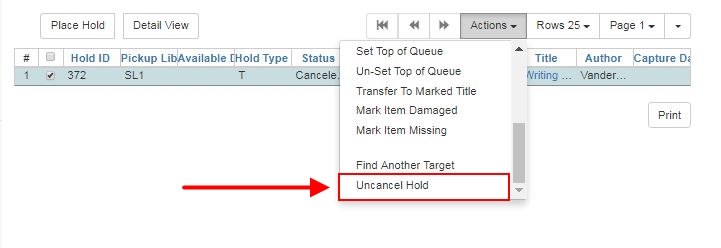
Based on your library’s setting, hold request time can be reset when a hold is un-cancelled.
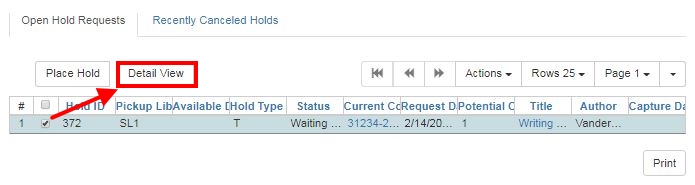
Viewing Details & Adding Notes to Holds
-
You can view details of a hold by selecting a hold then clicking the Detail View button on the Holds screen.
-
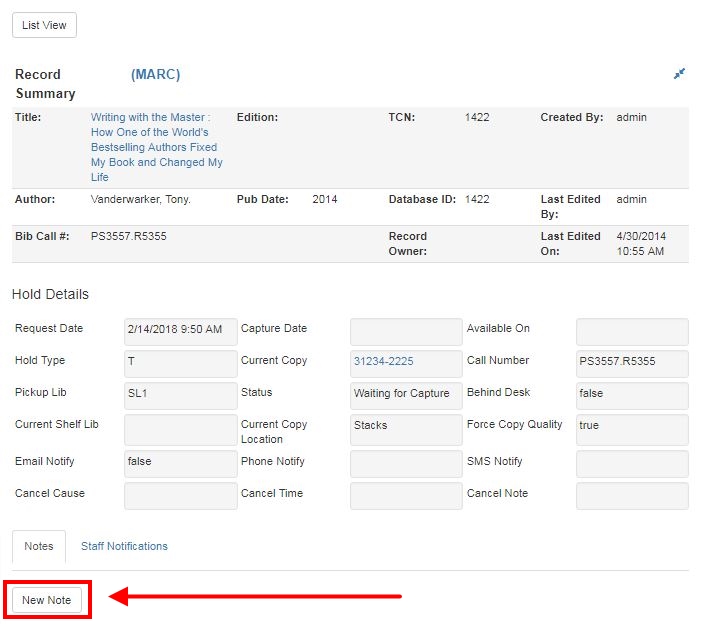
You may add a note to a hold in the Detail View.
-
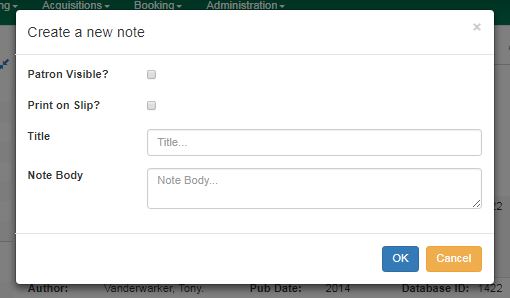
Notes can be printed on the hold slip if the Print on slip? checkbox is selected. Enter the message, then click OK.
Displaying Queue Position
Using the Column Picker, you can display Queue Position and Total number of Holds.

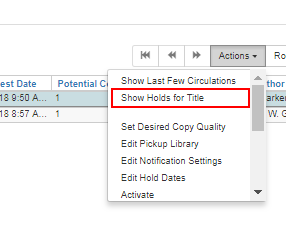
Managing Holds in Title Records
-
Retrieve and display the title record in the catalog.
-
Click Actions → View Holds.
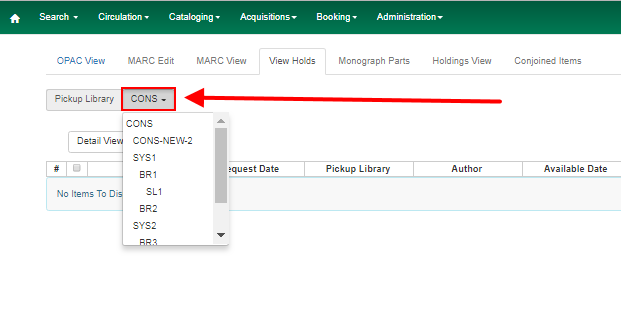
-
All holds on this title to be picked up at your library are displayed. Use the Pickup Library to view holds to be picked up at other libraries.
-
Highlight the hold you want to edit. Choose an action from the Actions menu. For more information see the Actions for Selected Holds section. For example, you can retrieve the hold requestor’s account by selecting Retrieve Patron from this menu.

Retargeting Holds
Holds need to be retargeted whenever a new item is added to a record, or after some types of item status changes, for instance when an item is changed from On Order to In Process. The system does not automatically recognize the newly added items as available to fill holds.
-
View the holds for the item.
-
Highlight all the holds for the record, which have a status of Waiting for Copy. If there are a lot of holds, it may be helpful to sort the holds by Status.
-
Click on the head of the status column.
-
Under Actions, select Find Another Target.
-
A window will open asking if you are sure you would like to reset the holds for these items.
-
Click Yes. Nothing may appear to happen, or if you are retargeting a lot of holds at once, your screen may go blank or seem to freeze for a moment while the holds are retargeted.
-
When the screen refreshes, the holds will be retargeted. The system will now recognize the new items as available for holds.
Pulling & Capturing Holds
Holds Pull List
There are usually four statuses a hold may have: Waiting for Copy, Waiting for Capture, In Transit and Ready for Pickup.
-
Waiting-for-copy: all holdable copies are checked out or not available.
-
Waiting-for-capture: an available copy is assigned to the hold. The item shows up on the Holds Pull List waiting for staff to search the shelf and capture the hold.
-
In Transit: holds are captured at a non-pickup branch and on the way to the pick-up location.
-
Ready-for-pick-up: holds are captured and items are on the Hold Shelf waiting for patrons to pick up. Besides capturing holds when checking in items, Evergreen matches holds with available items in your library at regular intervals. Once a matching copy is found, the item’s barcode number is assigned to the hold and the item is put on the Holds Pull List. Staff can print the Holds Pull List and search for the items on shelves.
-
To retrieve your Holds Pull List, select Circulation → Pull List for Hold Requests.
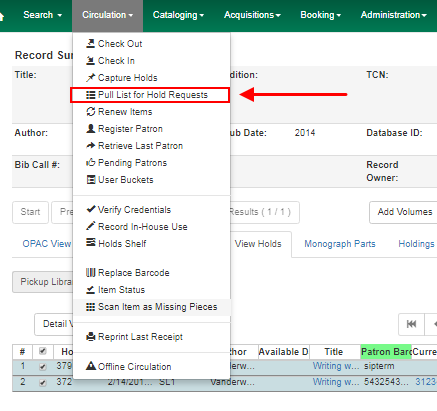
-
The Holds Pull List is displayed. You may re-sort it by clicking the column labels, e.g. Title. You can also add fields to the display by using the column picker.
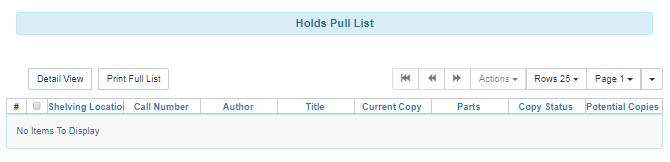
Column adjustments will only affect the screen display and the CSV download for the holds pull list. It will not affect the printable holds pull list.
-
The following options are available for printing the pull list:
-
Print Full Pull List prints Title, Author, Shelving Location, Call Number and Item Barcode. This method uses less paper than the alternate strategy.
-
Print Full Pull List (Alternate Strategy) prints the same fields as the above option but also includes a patron barcode. This list will also first sort by copy location, as ordered under Admin → Local Administration → Copy Location Order.
-
Download CSV – This option is available from the List Actions button (adjacent to the Page "#" button) and saves all fields in the screen display to a CSV file. This file can then be opened in Excel or another spreadsheet program. This option provides more flexibility in identifying fields that should be printed.
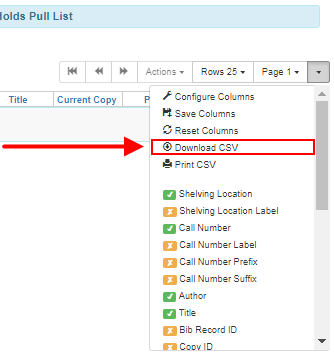
With the CSV option, if you are including barcodes in the holds pull list, you will need to take the following steps to make the barcode display properly: in Excel, select the entire barcode column, right-click and select Format Cells, click Number as the category and then reduce the number of decimal places to 0.
-
-
You may perform hold management tasks by using the Actions dropdown list.
The Holds Pull List is updated constantly. Once an item on the list is no longer available or a hold on the list is captured, the items will disappear from the list. The Holds Pull List should be printed at least once a day.
Capturing Holds
Holds can be captured when a checked-out item is returned (checked in) or an item on the Holds Pull List is retrieved and captured. When a hold is captured, the hold slip will be printed and if the patron has chosen to be notified by email, the email notification will be sent out. The item should be put on the hold shelf.
-
To capture a hold, select Circulation → Capture Holds (or press Shift-F2).

-
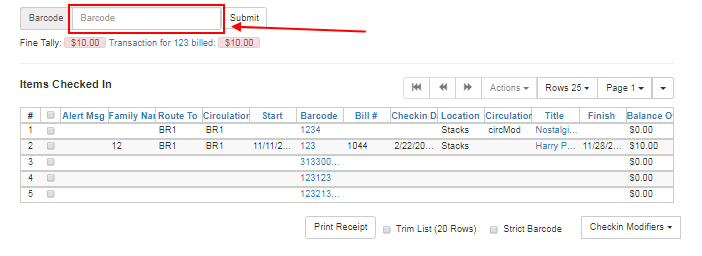
Scan or type barcode and click Submit.
-
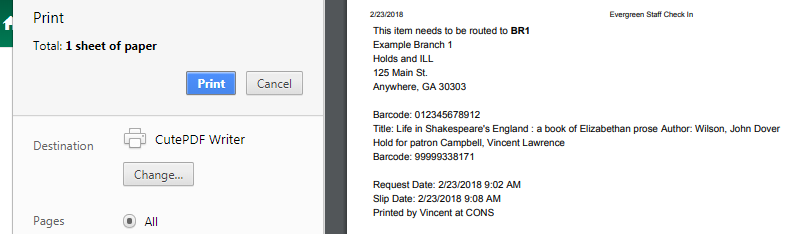
The following hold slip is automatically printed. If your workstation is not setup for silent printing (via Hatch), then a print window will appear.
-
If the item should be sent to another location, a hold transit slip will be printed. If your workstation is not setup for silent printing (via Hatch), then another print window will appear.
If a patron has an OPAC/Staff Client Holds Alias in his/her account, it will be used on the hold slip instead of the patron’s name. Holds can also be captured on the Circulation → Check In Items screen where you have more control over automatic slip printing.
Handling Missing and Damaged Items
If an item on the holds pull list is missing or damaged, you can change its status directly from the holds pull list.
-
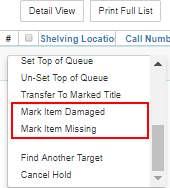
From the Holds Pull List, right-click on the item and either select Mark Item Missing or Mark Item Damaged.
-
Evergreen will update the status of the item and will immediately retarget the hold.
Holds Notification Methods
-
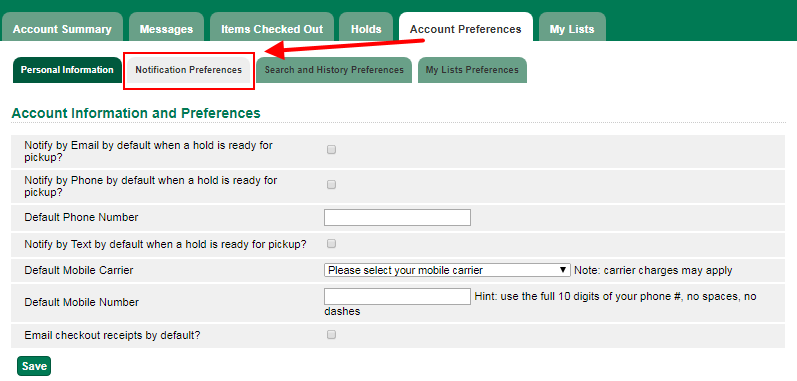
In Evergreen, patrons can set up their default holds notification method in the Account Preferences area of My Account. Staff cannot set these preferences for patrons; the patrons must do it when they are logged into the public catalog.
-
Patrons with a default notification preference for phone will see their phone number at the time they place a hold. The checkboxes for email and phone notification will also automatically be checked (if an email or phone number has been assigned to the account).
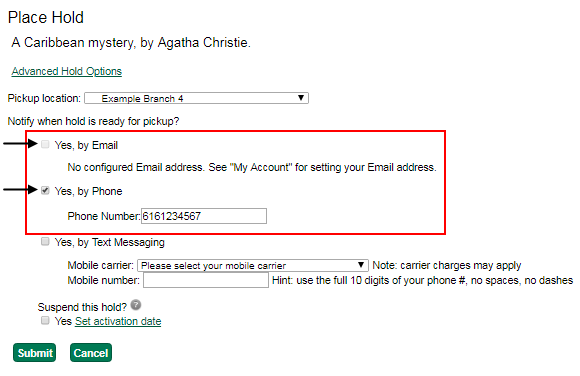
-
The patron can remove these checkmarks at the time they place the hold or they can enter a different phone number if they prefer to be contacted at a different number. The patron cannot change their e-mail address at this time.
-
A patron can update their hold notification preferences any time before a hold is fulfilled. See Update Notification Preferences in the OPAC for more information.
-
When the hold becomes available, the holds slip will display the patron’s e-mail address only if the patron selected the Notify by Email by default when a hold is ready for pickup? checkbox. It will display a phone number only if the patron selected the Notify by Phone by default when a hold is ready for pickup? checkbox.
| If the patron changes their contact telephone number when placing the hold, this phone number will display on the holds slip. It will not necessarily be the same phone number contained in the patron’s record. |
Clearing Shelf-Expired Holds
-
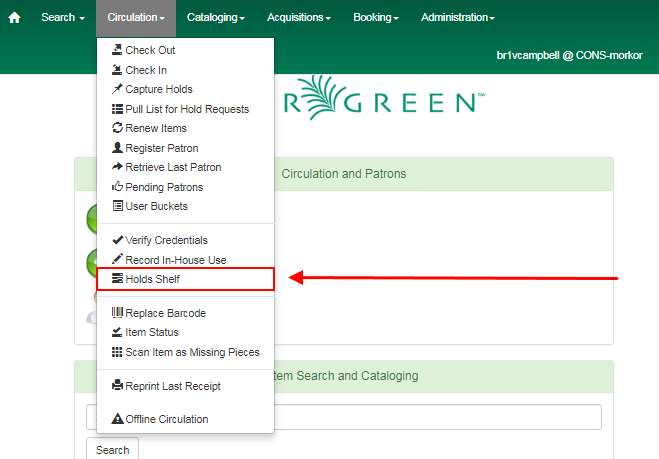
Items with Ready-for-Pickup status are on the Holds Shelf. The Holds Shelf can help you manage items on the holds shelf. To see the holds shelf list, select Circulation → Holds Shelf.
-
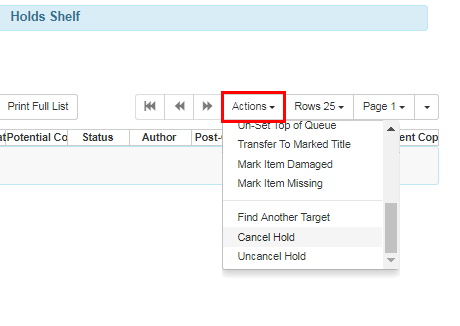
The Holds Shelf is displayed. Note the Actions menu is available, as in the patron record.
You can cancel stale holds here.
-
Use the column picker to add and remove fields from this display. Two fields you may want to display are Shelf Expire Time and Shelf Time.
-
Click the Show Clearable Holds button to list expired holds, wrong-shelf holds and canceled holds only. Expired holds are holds that expired before today’s date.

-
Click the Print Full List button if you need a printed list. To format the printout customize the Holds Shelf receipt template. This can be done in Administration → Workstation → Print Templates.
-
The Clear These Holds button becomes enabled when viewing clearable holds. Click it and the expired holds will be canceled.
-
Bring items down from the hold shelf and check them in.
|
If you cancel a ready-for-pickup hold, you must check in the item to make it available for circulation or trigger the next hold in line. |
Hold shelf expire time is inserted when a hold achieves on-hold-shelf status. It is calculated based on the interval entered in Local Admin → Library Settings → Default hold shelf expire interval.
|
The clear-hold-shelf function cancels shelf-expired holds only. It does not include holds canceled by patron. Staff needs to trace these items manually according to the hold slip date. |
Managing Hopeless Holds
Unfulfillable holds are colloquially known as “hopeless holds.” In previous versions of Evergreen, staff relied on reports to generate lists of unfulfillable holds. New improvements are intended to provide staff with an easy way to retrieve a list of unfulfillable (“hopeless”) holds and perform actions on them to move them out of their hopeless condition.
Identifying a Hopeless Hold
A hold is considered hopeless when there are no copies in hold_copy_map or when all copies in hold_copy_map are in a item status with the new hopeless_prone property set to “True.”
[[hopeless_prone_item_status_property] === Hopeless Prone Item Status Property ===
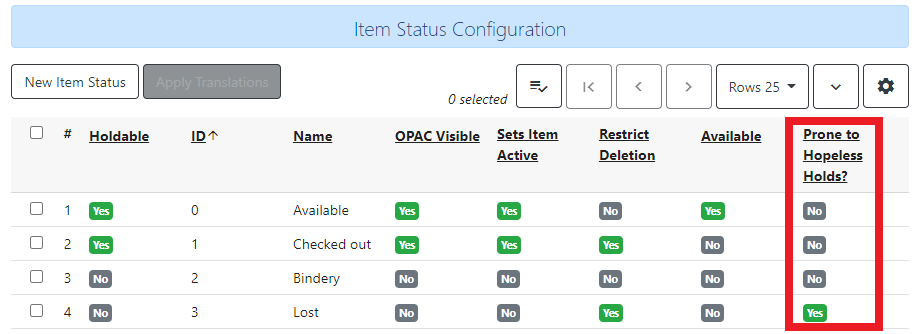
Item statuses have an additional property available called “hopeless prone,” indicating that items within that status may become unfulfillable. This new item status property can be applied to any status that may result in unfulfillable holds, such as “Missing” or “Lost.” The hopeless prone property is set to “false” by default. It can be modified in the Item Statuses interface. Like all item statuses, this is globally applied without regard to Organizational Unit.
Please note that existing hold statuses (e.g., Waiting for Item) continue to work as expected, and no additional hold statuses were created as part of the development of this feature.
Hopeless Holds Interface
The Hopeless Holds interface is used to retrieve a list of unfulfillable holds and perform actions on them. It is accessible through Administration → Local Administration → Hopeless Holds to staff with permissions to view and modify holds.
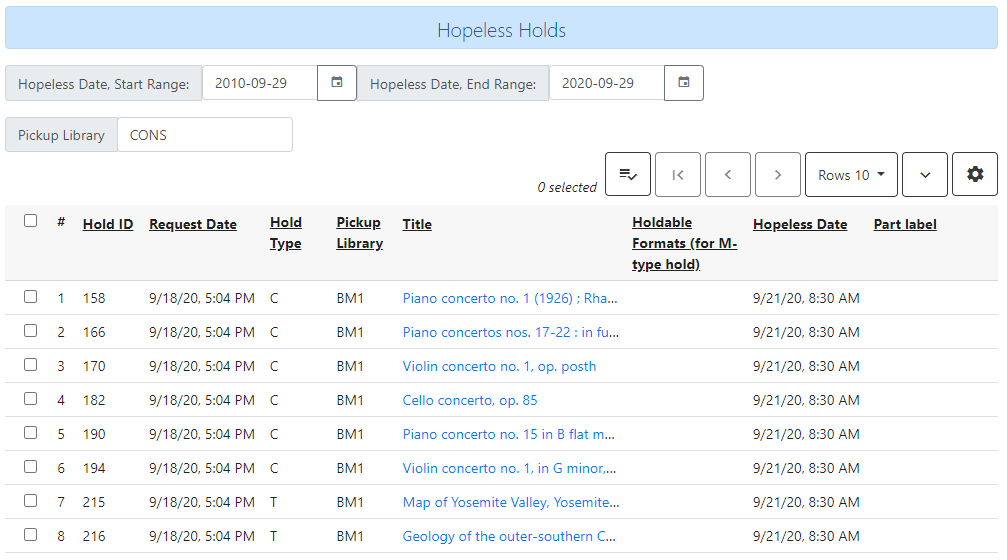
The interface displays a grid similar to that of Holds Requests, with a list of holds that are considered unfulfillable. Requests are added to this list based on whether there is a value in the Hopeless Date field, which is stored in the action.hold_request table.
The hold targeter sets (or unsets) the hopeless date value for every hold request based on whether any eligible copies are found to potentially fill the hold. The first date the hold targeter finds the request unfulfillable is entered in the Hopeless Date field and remains there until unset. Choosing the action “Find Another Target” will reset the Hopeless Date field in addition to its usual function of triggering the hold targeter.
The list of hold requests can be filtered by hopeless date range and/or pickup library. Pickup library defaults to the workstation library and retrieves results for the selected library and its descendents.
All columns in the grid can be sorted by clicking the column header. The following columns are visible by default:
-
Hold ID
-
Patron Barcode
-
Request Date
-
Hold Type
-
Pickup Library
-
Title
-
Holdable Formats
-
Hopeless Date
-
Status
-
Part Label
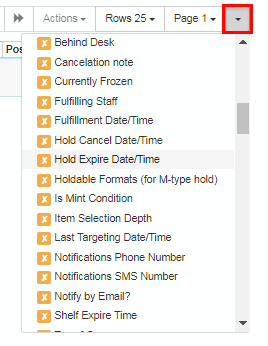
Additional columns are available through the column picker, including the standard column options associated with Holds.
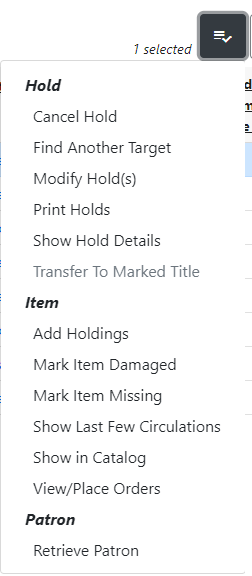
After selecting one or more hold requests from the list, staff can use the Actions menu to perform a variety of tasks. All actions activate new tabs for each selected record. Available actions are similar to those found in other holds-related menus (e.g., Cancel Hold, Modify Hold(s), Find Another Target.)
Additional actions include:
-
Add Holdings - opens the selected bibliographic records in the Holdings Editor for the purposes of adding new items to the records; this action is disabled if there are metarecord holds among the selected requests
-
Show in Catalog - opens the selected bibliographic records in OPAC view
-
View/Place Orders - opens the selected bibliographic records in Acquisitions, where staff can add the titles to a selection list, add the titles to an existing purchase order, or create a new purchase order; this action is disabled if there are metarecord holds among the selected requests
| If you use a popup blocker on your browser, it must be configured to allow multiple popups. If a user selects multiple rows and chooses an action like “Retrieve Patron,” each one appears in a new tab. |
Alternate Hold Pick up Location
Abstract
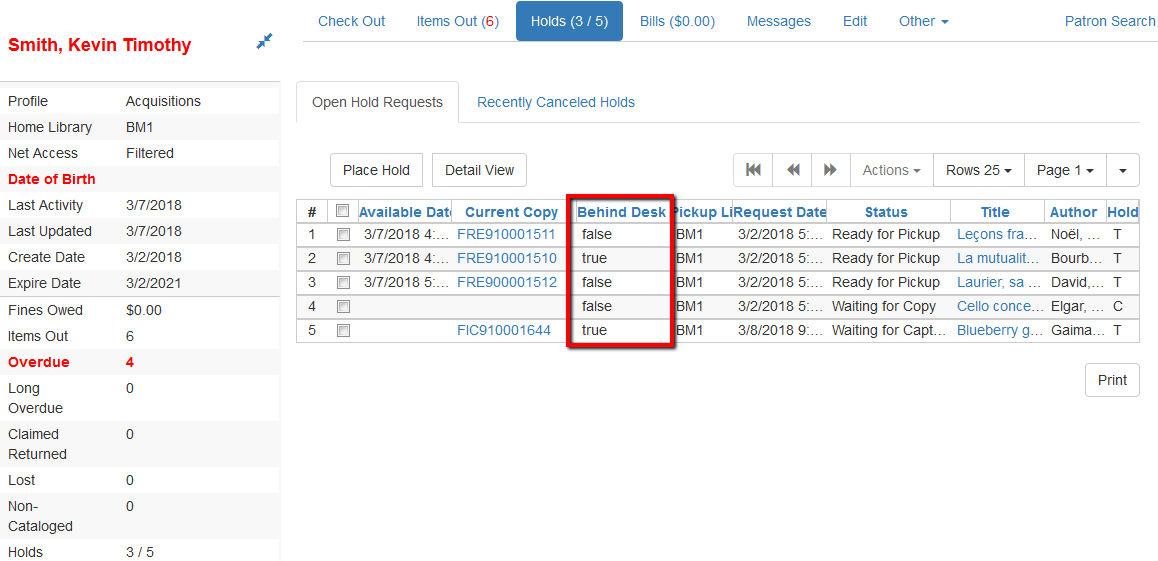
This feature enables libraries to configure an alternate hold pick up location. The alternate pick up location will appear in the staff client to inform library staff that a patron has a hold waiting at that location. In the stock Evergreen code, the default alternate location is called "Behind Desk".
Configuration
The alternate pick up location is disabled in Evergreen by default. It can be enabled by setting Holds: Behind Desk Pickup Supported to 'True' in the Library Settings Editor.
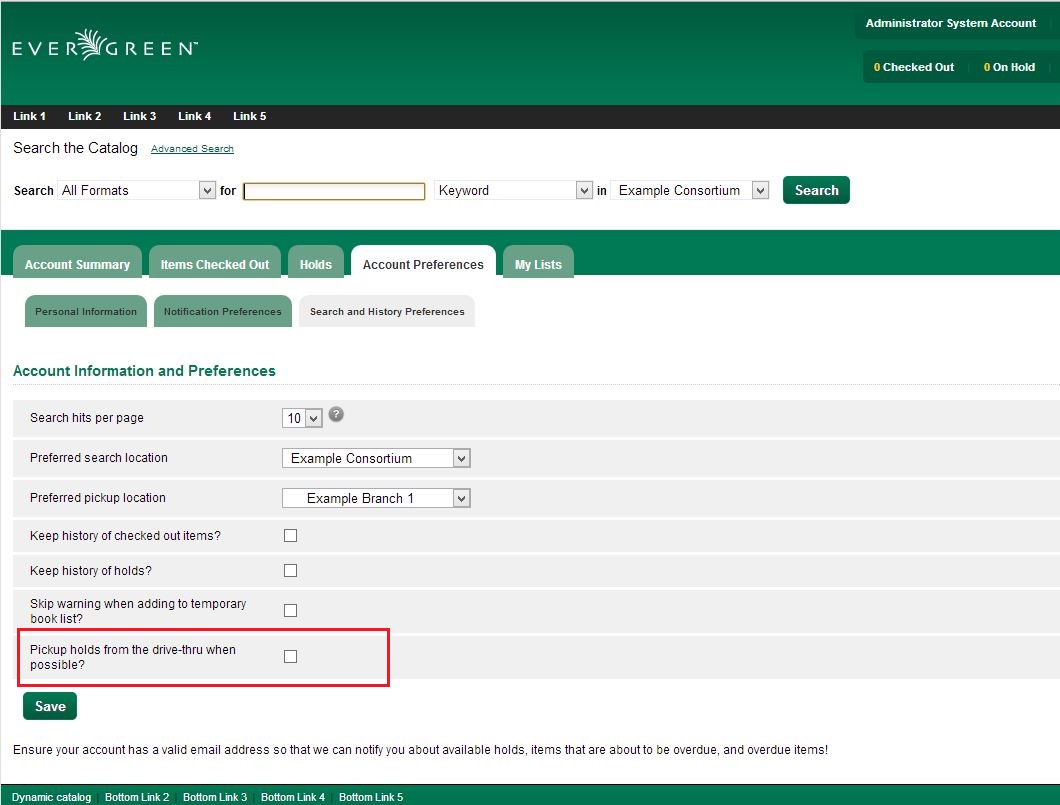
Libraries can also choose to give patrons the ability to opt-in to pick up holds at the alternate location through their OPAC account. To add this option, set the OPAC/Patron Visible field in the User Setting Type Hold is behind Circ Desk to 'True'. The User Setting Types can be found under Administration → Server Administration → User Setting Types.
Display
When enabled, the alternate pick up location will be displayed under the Holds button in the patron account.
If configured, patrons will see the option to opt-in to the alternate location in the Account Preferences section of their OPAC Account.
Display Hold Types on Pull Lists
This feature ensures that the hold type can be displayed on all hold interfaces.
You will find the following changes to the hold type indicator:
-
The hold type indicator will display by default on all XUL-based hold interfaces. XUL-based hold interfaces are those that number the items on the interface. This can be overridden by saving column configurations that remove the Type column.
-
The hold type indicator will display by default on the HTML-based pull list. To access, click Circulation → Pull List for Hold Requests → Print Full Pull List (Alternate Strategy).
-
The hold type indicator can be added to the Simplified Pull List. To access, click Circulation → Pull List for Hold Requests → Simplified Pull List Interface.
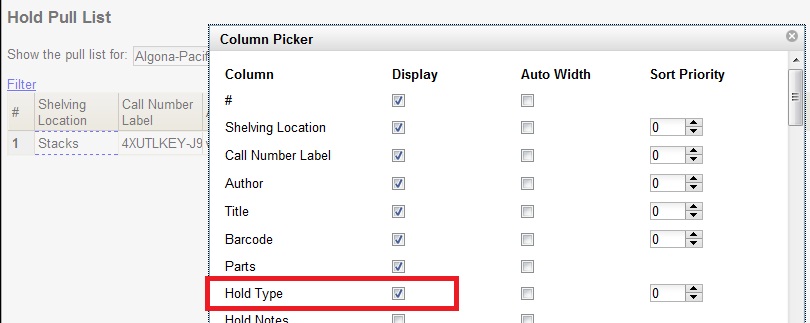
To add the hold type indicator to the simplified pull list, click Simplified Pull List Interface, and right click on any of the column headers. The Column Picker appears in a pop up window. Click the box adjacent to Hold Type, and Click Save. The Simplified Pull List Interface will now include the hold type each time that you log into the staff client.