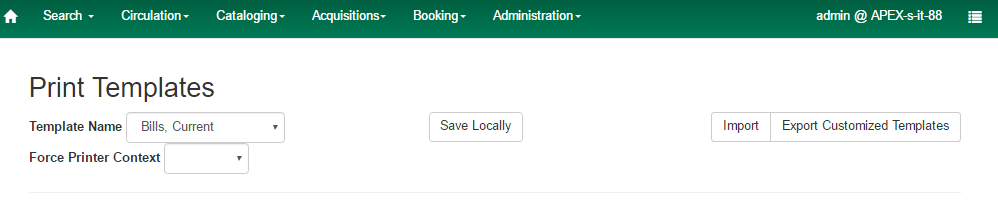
Print (Receipt) Templates
The print templates follow W3C HTML standards (see http://w3schools.com/html/default.asp) and can make use of CSS and Angular JS to a certain extent.
The Receipt Template Editor can be found at: Administration → Workstation → Print Templates
The Editor can also be found on the default home page of the staff client.
Receipts come in various types: Bills, checkout, items, holds, transits and Payments.
Receipt Templates
This is a complete list of the receipts currently in use in Evergreen.
| Bills, Current |
Listing of current bills on an account. |
| Bills, Historic |
Listing of bills that have had payments made on them. This used on the Bill History Transaction screen. |
| Bills, Payment |
Patron payment receipt |
| Checkin |
List of items that have been entered in to the check-in screen. |
| Checkout |
List of items currently checked out by a patron during the transaction. |
| Hold Transit Slip |
This is printed when a hold goes in-transit to another library. |
| Hold Shelf Slip |
This prints when a hold is fulfilled. |
| Holds for Bib Record |
Prints a list of holds on a Title record. |
| Holds for Patron |
Prints a list of holds on a patron record. |
| Hold Pull List |
Prints the Holds Pull List. |
| Hold Shelf List |
Prints a list of hold that are waiting to be picked up. |
| In-House Use List |
Prints a list of items imputed into In-house use. |
| Item Status |
Prints a list of items imputed into Item Status. |
| Items Out |
Prints the list of items a patron has checked out. |
| Patron Address |
Prints the current patrons address. |
| Patron Note |
Prints a note on a patron’s record. |
| Renew |
List of items that have been renewed using the Renew Item Screen. |
| Transit List |
Prints the list of items in-transit from the Transit List. |
| Transit Slip |
This is printed when an items goes in-transit to another location. |
Editing Receipts
To edit a Receipt:
-
Select Administration → Workstation → Print Templates.
-
Choose the Receipt in the drop down list.
-
If you are using Hatch, you can choose different printers for different types of receipts with the Force Content field. If not, leave that field blank. Printer Settings can be set at Administration → Workstation → Printer Settings.
-
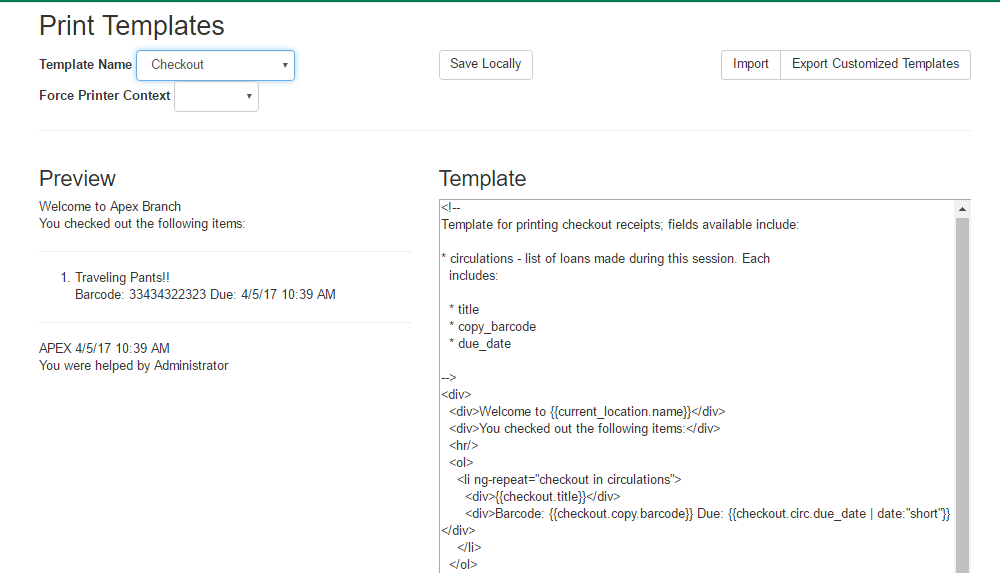
Make edits to the Receipt on the right hand side.
-
Click out of the section you are editing to see what your changes will look right on the Left hand side.
-
Click Save Locally in the Upper right hand corner.
Formatting Receipts
Print templates use variables for various pieces of information coming from the
Evergreen database. These variables deal with everything from the library name
to the due date of an item. Information from the database is entered in the
templates with curly brackets {{term}}.
Example: {{checkout.title}}
Some print templates have sections that are repeated for each item in a list. For example, the portion of the Checkout print template below repeats every item that is checked out in HTML list format by means of the 'ng-repeat' in the li tag.
<ol>
<li ng-repeat="checkout in circulations">
<b>{{checkout.title}}</b><br/>
Barcode: {{checkout.copy.barcode}}<br/>
Due: {{checkout.circ.due_date | date:"short"}}<br/>
</li>
</ol>
Text Formatting
General text formatting
Goal |
Original |
Code |
Result |
Bold (HTML) |
hello |
<b>hello</b> |
hello |
Bold (CSS) |
hello |
<span style="font-weight:bold;">hello</span> |
hello |
Capitalize |
circulation |
<span style="text-transform:capitalize;">circulation</span> |
Circulation |
Currency |
1 |
{{1 | currency}} |
$1.00 |
Date Formatting
If you do not format dates, they will appear in a system format which isn’t easily readable.
Code |
Result |
{{today}} |
2017-08-01T14:18:51.445Z |
{{today | date:'short'}} |
8/1/17 10:18 AM |
{{today | date:'M/d/yyyy'}} |
8/1/2017 |
Currency Formatting
Add " | currency" after any dollar amount that you wish to display as currency.
Example:
{{xact.summary.balance_owed | currency}} prints as $2.50
Conditional Formatting
You can use Angular JS to only print a line if the data matches. For example:
<div ng-if="hold.email_notify == 't'">Notify by email: {{patron.email}}</div>
This will only print the "Notify by email:" line if email notification is enabled for that hold.
Example for checkout print template that will only print the amount a patron owes if there is a balance:
<span ng-if="patron_money.balance_owed">You owe the library
${{patron_money.balance_owed}}</span>
Substrings
To print just a sub-string of a variable, you can use a limitTo function.
{{variable | limitTo:limit:begin}} where limit is the number of characters
you are wanting, and begin (optional) is where you want to start printing
those characters. To limit the variable to the first four characters, you can
use {{variable | limitTo:4}} to get "vari". To limit to the last five
characters you can use {{variable | limitTo:-5}} to get "iable". And
{{variable | limitTo:3:3}} will produce "ria".
Original |
Code |
Result |
The Sisterhood of the Traveling Pants |
{{checkout.title | limitTo:10}} |
The Sisterhood of th |
123456789 |
{{patron.card.barcode | limitTo:-5}} |
56789 |
Roberts |
{{patron.family_name | limitTo:3:3}} |
ber |
Images
You can use HTML and CSS to add an image to your print template if you have the image uploaded onto a publicly available web server. (It will currently only work with images on a secure (https) site.) For example:
<img
src="https://evergreen-ils.org/wp-content/uploads/2013/09/copy-Evergreen_Logo_sm072.jpg"
style="width:150px;padding:5px;">
Sort Order
You can sort the items in an ng-repeat block using orderBy. For example, the following will sort a list of holds by the shelving location first, then by the call number:
<tr ng-repeat="hold_data in holds | orderBy :
['copy.location.name','volume.label']">
Subtotals
You can use Angular JS to add information from each iteration of a loop together to create a subtotal. This involves setting an initial variable before the ng-repeat loop begins, adding an amount to that variable from within each loop, and then displaying the final amount at the end.
<div>You checked out the following items:</div>
<br/>
<div ng-init="transactions.subtotal=0">                (1)
<ol>
<div ng-repeat="checkout in circulations">
  <li ng-init="transactions.subtotal=transactions.subtotal -- checkout.copy.price"> (2)
     <b>{{checkout.title}}</b><br/>
     Barcode: {{checkout.copy.barcode}}<br/>
     Due: {{checkout.circ.due_date | date:"M/d/yyyy"}}
  </li>
</div>
</ol>
<div style="font-weight:bold;">Total Amount Owed: {{patron_money.balance_owed | currency}}</div>
<div style="font-weight:bold;border:1px dotted black; padding:5px;text-align:center;">
You Saved<br/>
{{transactions.subtotal | currency}}<br/>              (3)
by borrowing from the library!</div>
| 1 | This line sets the variable. |
| 2 | This adds the list item’s price to the variable. |
| 3 | This prints the total of the variable. |
Exporting and importing Customized Receipts
Once you have your receipts set up on one machine you can export your receipts, and then load them on to another machine. Just remember to Save Locally once you import the receipts on the new machine.
Exporting templates
As you can only save a template on to the computer you are working on you will need to export the template if you have more than one computer that prints out receipts (i.e., more than one computer on the circulation desk, or another computer in the workroom that you use to checkin items or capture holds with)
-
Export.
-
Select the location to save the template to, name the template, and click Save.
-
Click OK.
Importing Templates
-
Click Import.
-
Navigate to and select the template that you want to import. Click Open.
-
Click OK.
-
Click Save Locally.
-
Click OK.
| Clearing your browser’s cache/temporary files will clear any print template customizations that you make unless you are using Hatch to store your customizations. Be sure to export a copy of your customizations as a backup so that you can import it as needed. |
| If you are modifying your templates and you do not see the updates appear on your printed receipt, you may need to go into Administration → Workstation → Stored Preferences and delete the stored preferences related to the print template that you modified (for example, eg.print.template_context.bills_current). |