My Account
Logging In
Logging into your account from the online catalog:
-
Open a web browser and navigate to your Evergreen OPAC.
-
Click My Account .
-
Enter your Username and Password.
-
By default, your username is your library card number.
-
Your password is a 4 digit code provided when your account was created. If you have forgotten your password, contact your local library to have it reset or use the the section called Password Reset tool.
-
-
Click Login.
-
At the first login, you may be prompted to change your password.
-
If you updated your password, you must enter your Username and Password again.
-
-
Your Account Summary page displays.
To view your account details, click one of the My Account tabs.
To start a search, enter a term in the search box at the top of the page and click Search!
|
If using a public computer be sure to log out! |
Password Reset
To reset your password:
-
click on the Forgot your password? link located beside the login button.
-
Fill in the Barcode and User name text boxes.
-
A message should appear indicating that your request has been processed and that you will receive an email with further instructions.
-
An email will be sent to the email addressed you have registered with your Evergreen library. You should click on the link included in the email to open the password reset page. Processing time may vary.
You will need to have a valid email account set up in Evergreen for you to reset your password. Otherwise, you will need to contact your library to have your password reset by library staff.
-
At the reset email page you should enter the new password in the New password field and re-enter it in the Re-enter new password field.
-
Click Submit.
-
A message should appear on the page indicating that your password has been reset.
-
Login to your account with your new password.
Account Summary
In the My Account → Account Summary page, you can see when your account expires and your total number of items checked out, items on hold, and items ready for pickup. In addition, the Account Summary page lists your current fines and payment history.
Items Checked Out
Users can manage items currently checked out, like renew specific items. Users can also view overdue items and see how many renewals they have remaining for specific item.
As of Evergreen version 2.9, sorting of selected columns is available in the Items Checked Out and Check Out History pages. Clicking on the appropriate column heads sorts the contents from "ascending" to "descending" to "no sort". (The "no sort" restores the original list as presented in the screen.) The sort indicator (an up or down arrow) is placed to the right of the column head, as appropriate.
Within Items Checked Out → Current Items Checked Out, the following column headers can be sorted: Title, Author, Renewals Left, Due Date, Barcode, and Call Number.
Within Items Checked Out → Check Out History, the following column headers can be sorted: Title, Author, Checkout Date, Due Date, Date Returned, Barcode, and Call Number
|
To protect patron privacy, the Check Out History will be completely blank unless the patron has previously opted in under the Account Preferences tab, in the Search and History Preferences area. |
Holds
From My Account, patrons can see Items on Hold and Holds History and manage items currently being requested. In Holds → Items on Hold, the content shown can be sorted by clicking on the following column headers: Title, Author, and Format (based on format name represented by the icon).
Actions include:
-
Suspend - set a period of time during which the hold will not become active, such as during a vacation
-
Activate - manually remove the suspension
-
Cancel - remove the hold request
Edit options include:
-
Change pick up library
-
Change the Cancel unless filled by date, also known as the hold expiration date
-
Change the status of the hold to either active or suspended.
-
Change the If suspended, activate on date, which reactivates a suspended hold at the specified date
To edit items on hold:
-
Login to My Account, click the Holds tab.
-
Select the hold to modify.
-
Click Edit for selected holds.
-
Select the change to make and follow the instructions.
|
To protect patron privacy, the Holds History will be completely blank unless the patron has previously opted in under the Account Preferences tab, in the Search and History Preferences area. |
Hold Groups
Screenshots in this section are taken from the Bootstrap OPAC (BOOPAC), but similar functionality is available in the Template Toolkit OPAC (TPAC).
A patron who is a member of a publicly visible Hold Group will see a new option on the Holds menu of My Account labelled Hold Groups.
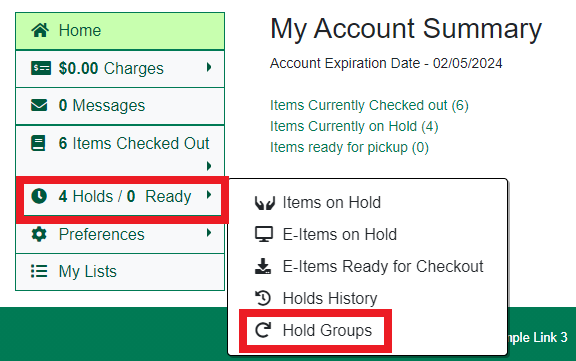
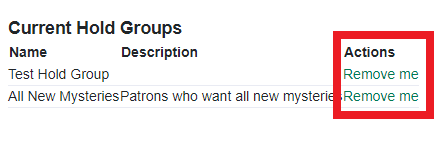
If the Hold Groups menu item is selected, the patron will see a list of Hold Groups of which they are a member, as well as a link for removing themselves from the Hold Group.
Only those Hold Groups that were marked by staff as “publicly visible” are displayed. If the patron does not belong to any publicly visible Hold Groups, the Hold Group menu item is not displayed at all.
Holds placed through a Hold Group can be modified by patrons in the same way as other holds (e.g., suspended, cancelled, etc.).
Account Preferences
From here you can manage display preferences including your Personal Information, Notification Preferences, and Search and History Preferences. Additional static information, such as your Account Expiration Date, can be found under Personal Information.
For example:
-
Personal Information
-
change password - allows patrons to change their password
-
change email address - allows patrons to change their email address.
-
-
Notification Preferences
-
Notify by Email by default when a hold is ready for pickup?
-
Notify by Phone by default when a hold is ready for pickup?
-
Default Phone Number
-
-
Search and History Preferences
-
Search hits per page
-
Preferred pickup location
-
Keep history of checked out items?
-
Keep history of holds?
-
|
Turning off the Keep history of checked out items? or Keep history of holds? features will permanently delete all entries in the relevant patron screens. After this is unchecked, there is no way for a patron to recover those data. |
After changing any of these settings, you must click Save to store your preferences.
Authorize other people to use your account
If your library has enabled it, you can authorize other people to use your account. In the Search and History Preferences tab under Account Preferences, find the section labeled "Allow others to use my account". Enter the name and indicate that the specified person is allowed to place holds, pickup holds, view borrowing history, and check out items on their account. This information will also be visible to circulation staff at your library.
Patron Messages
The Patron Message Center provides a way for libraries to communicate with patrons through messages that can be accessed through the patron’s OPAC account. Library staff can create messages manually by adding an OPAC visible Patron Note to an account. Messages can also be automatically generated through an Action Trigger event. Patrons can access and manage messages within their OPAC account. See Circulation - Patron Record - Patron Message Center for more information on adding messages to patron accounts.
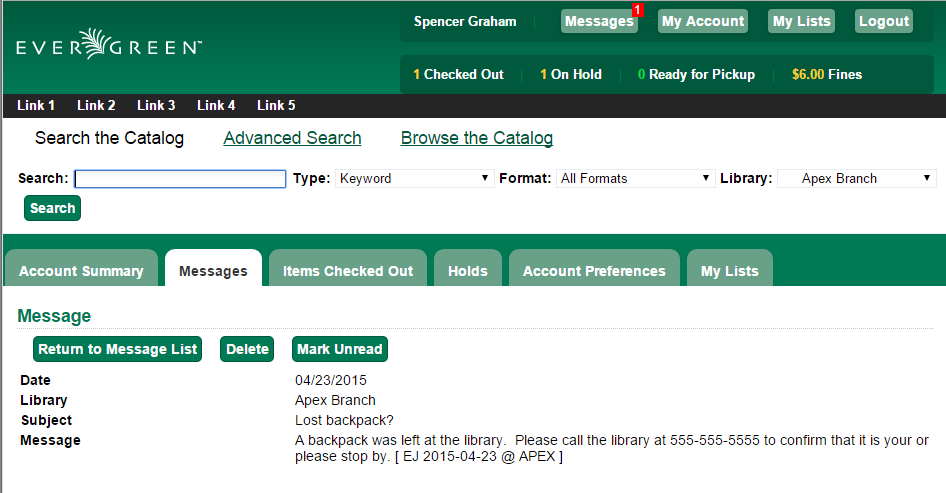
Viewing Patron Messages in the OPAC
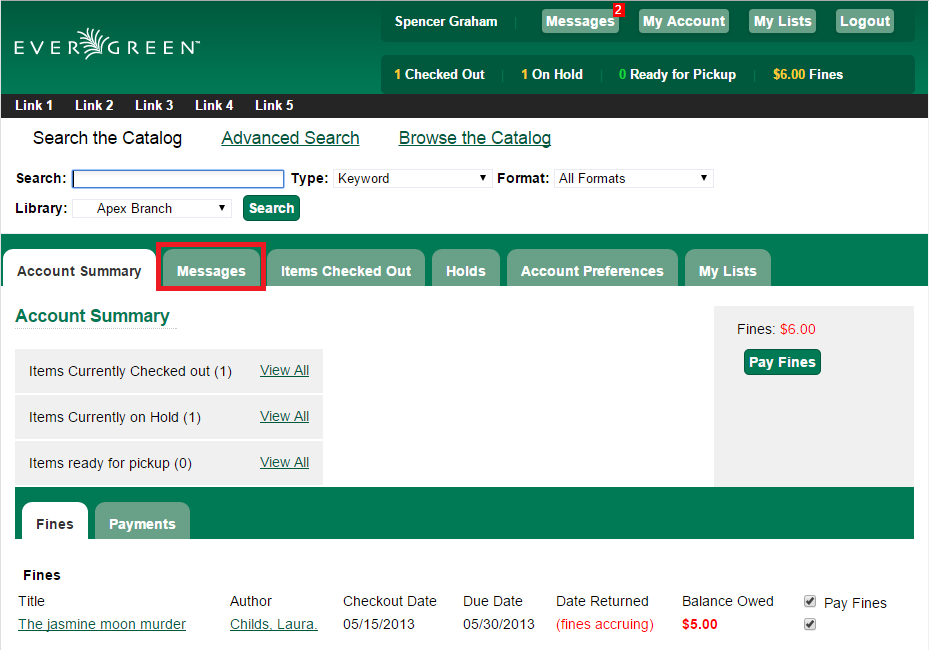
Patrons will see a new tab for Messages in their OPAC account, as well as a notification of Unread Messages in the account summary.
Patrons will see a list of the messages from the library by clicking on the Messages tab.
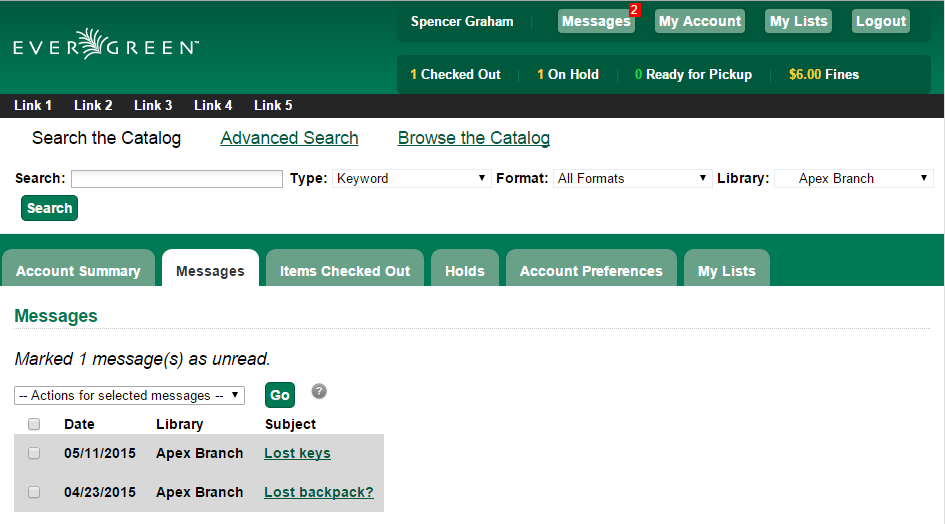
Patrons can click on a message Subject to view the message. After viewing the message, it will automatically be marked as read. Patrons have the options to mark the message as unread and to delete the message.
| Patron deleted messages will still appear in the patron’s account in the staff client under Other → Message Center. |
Reservations
When patrons place a reservation for a particular item at a particular time, they can check on its status using the Reservations tab.
After they initially place a reservation, its status will display as Reserved. After staff capture the reservation, the status will change to Ready for Pickup. After the patron picks up the reservation, the status will change to Checked Out. Finally, after the patron returns the item, the reservation will be removed from the list.
|
This interface pulls its timezone from the Library Settings Editor. Make sure that you have a timezone listed for your library in the Library Settings Editor before using this feature. |