Searching the Catalog
Setting Up Your Search
Before you begin searching, you can set up your search by modifying search preferences or selecting the library you wish to search.
Search preferences only need to be set one time, then they will be saved to the workstation. However, you should always make sure you are searching the correct library.
Search Preferences
| These settings are saved at the workstation level. That is, changing these settings on one workstation will not impact other workstations, but will impact other users of the same workstation. |
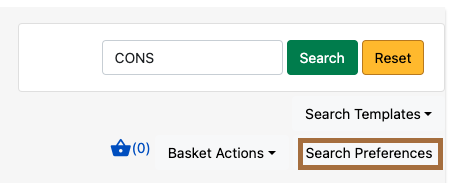
To view and modify all search preferences from the Staff Catalog page, select Search Preferences, which is located to the right of the search form below the location selector. The Search Preferences page opens in the Staff Catalog.
| Some search preferences may also be accessed through the Menu Bar by selecting Administration → Workstation. |
You may modify the following preferences: Default Search Library, Preferred Library, Default Search Pane, Search Results Per Page, and Exclude Electronic Resources.
Changes to these preferences are saved automatically. Select Return at the bottom-left of the Search Preferences page to go back to your catalog search.
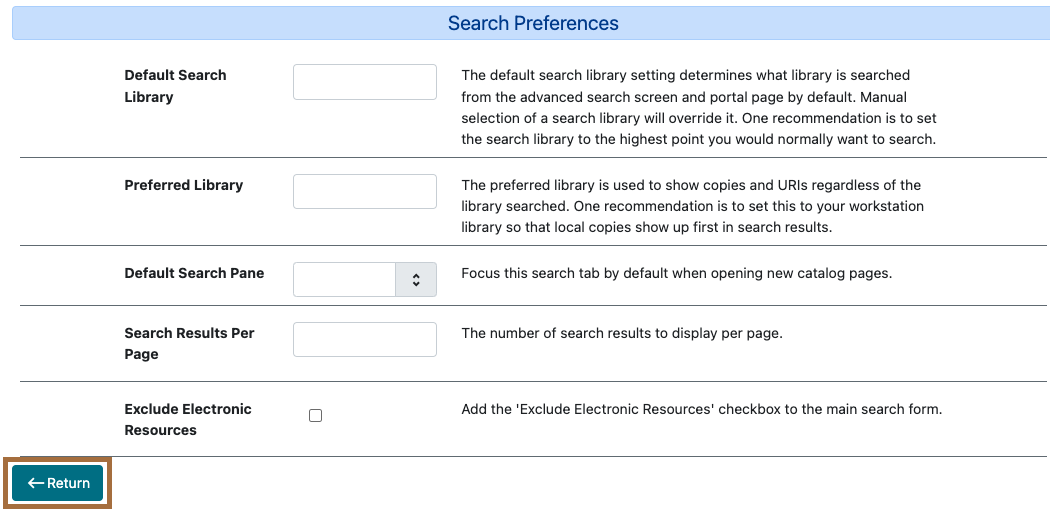
Default Search Library: The selected option will be the default search library for any Staff Catalog searches conducted on the workstation. Manual selection of a library on the Staff Catalog page will override this selection.
| Set the Default Search Library to the highest level you would normally want to search. |
Preferred Library: Available copies, owned copies, and URIs will be displayed for the selected library, regardless of the library searched.
| Set the Preferred Library to your workstation library so local information shows up first in search results. |
Default Search Pane: The selected option will display by default when you open a new Staff Catalog page. You may set this to Keyword Search, Numeric Search, MARC Search, Browse, or Shelf Browse.
Search Results Per Page: Select the number of search results to display per page.
Exclude Electronic Resources: Checking this checkbox adds the Exclude Electronic Resources checkbox to the search form on the Staff Catalog page. Learn more about the Exclude Electronic Resources checkbox in the Search Checkboxes section.
| Checking the Exclude Electronic Resources checkbox in the Search Preferences menu does not make searches exclude electronic resources by default. Rather, it makes the option of excluding or including electronic resources available on the Staff Catalog page. |
Library Selector (Search Library)
The Library Selector is located in the top-right corner of the search form on the Staff Catalog page. This selector allows you to change your search library to the consortium, system, branch, or other organization of your choice.
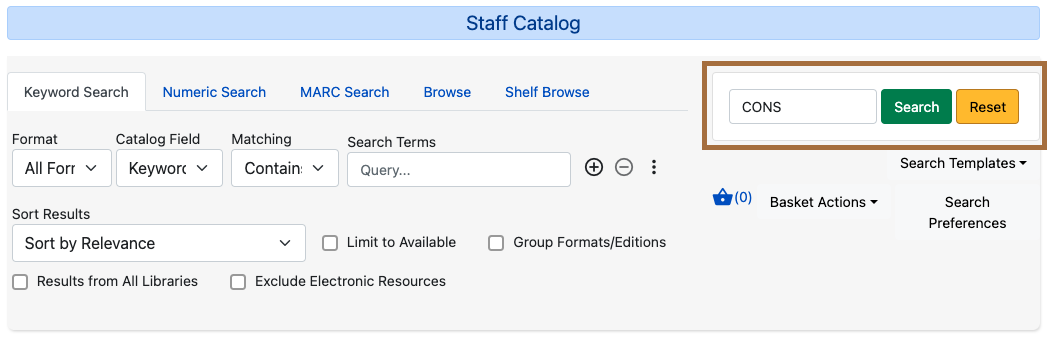
| The default search library for your workstation can be set in Search Preferences. |
To change your search library, select the text box to the left of the Search button and make your selection from the dropdown menu. Then, select Search to begin your search.
| The Library Selector dropdown menu is organized alphabetically in each of the following levels: Consortium, System, Branch, and Sub-library (such as bookmobiles and special collections). |

You may also enter the short name of the library you wish to search directly into the text box. For example, to select Branch 2 from the menu pictured above, you may simply enter "BR2" into the text box.
Your library selection will stay until you leave the Staff Catalog page. Then, it will reset to the workstation’s default search library.
Search Panes
The entire panel at the top of the Staff Catalog page is the search form. The search form contains Search Panes, which give you different tools to use in your searches.
There are five Search Panes available on the Staff Catalog page: Keyword Search, Numeric Search, MARC Search, Browse, and Shelf Browse.
By default, the Staff Catalog page opens to the Keyword Search pane and searchs the highest-level library, but both of these settings can be changed in Search Preferences.
Keyword Search
The Keyword Search pane lets you search the catalog with one or more search terms. You may also apply a variety of filters and sort the results.
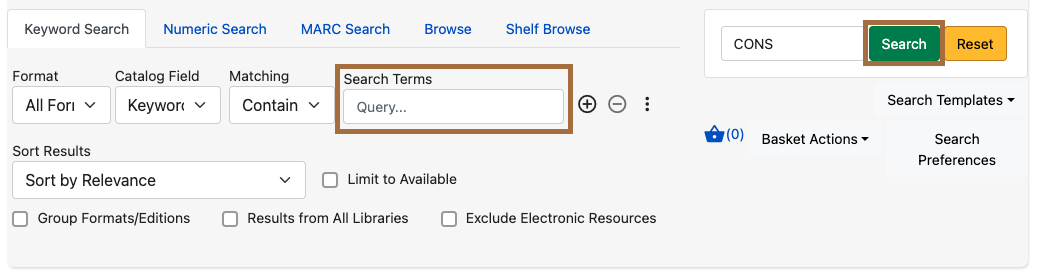
To start a search with the default settings, enter your search terms in the Search Terms text box located near the center of the search form.
Then, select Search, located in the top-right corner. Your search results appear below the search form.
Search Options
There are three options to limit your keyword search: Format, Catalog Field, and Matching.

Format: Make a selection from the Format dropdown menu to specify what type of item you are seeking. Some options for format include: All Books, All Music, All Videos, Braille, DVD, Large Print Book, and Microform.
Catalog Field: Make a selection from the Catalog Field dropdown menu to specify which bibliographic fields you wish to search. You may select Keyword, Title, Journal Title, Author, Subject, or Series.
Matching: Make a selection from the Matching menu to specify how strictly the search should treat your search terms. You may choose from the following options:
-
Contains: The search will look for items that contain your search terms, regardless of how the terms appear in the record.
-
Does not contain: The search will look for items that do not contain your search terms.
-
Contains phrase: The search will look for items that contain your search terms successively in exact order.
-
Matches exactly: The search will look for items that contain only your search terms in exact order. This option is not available when Keyword is selected in the Catalog Field search option.
-
Starts with: The search will look for items that begin with your search terms, regardless of how the terms appear in the record.
| Keyword searches will look through all relevant fields in the bibliographic record, even if they are not displayed in the search results. For example, searching by title also searches the alternate title field, which is not displayed in search results. |
Additional Search Rows
To add an additional search row, select the plus sign (+) to the right of the Search Terms text box. A new search row appears below the first.
The new search row will search the same format as that selected on the first search row.
Additional search rows are joined to preceding search rows with the Boolean operators And or Or, which may be selected in the Join with menu to the left of the additional search row.

To delete a search row, select the minus sign (-) to the right of the row you wish to delete.
Suppose you have a patron who wants a new J.R.R. Tolkien book but has has already read The Hobbit. You could run the search in the image below.

Filters
Filters let you refine your search beyond the options available in the search row.
Access the filters by selecting the three stacked dots to the right of the search row. The filters appear at the bottom of the search form.
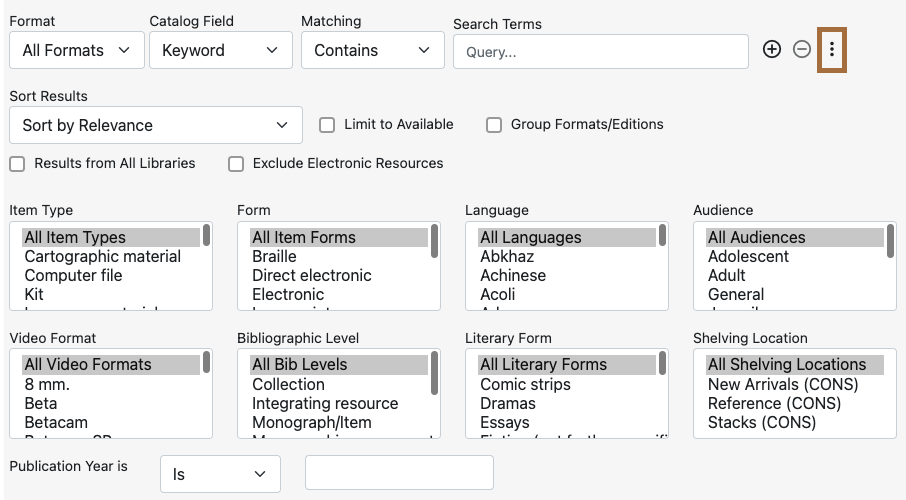
The options available in each filter depend on the library selected in the Library Selector. The available filters are: Item Type, Form, Language, Audience, Video Format, Bibliographic Level, Literary Form, and Shelving Location.
To add a filter, select the desired term from the list in the filter. The selected term will be highlighted and the filter will be applied when you run the search. Use the scroll bar in each filter to view more options.
| Hold CTRL (Windows) or CMD (Mac) to make multiple selections in a single filter. |
To remove a filter, select the first term in the filter’s list that begins with All and is followed by the name of the filter. For example, to remove the Form filter, select All Item Forms.
To remove all filters, select the Reset button in the top-right corner of the search form.
To filter by publication year, first select an option from the dropdown menu to the right of "Publication Year is" at the bottom of the search form. You may select Is, Before, After, or Between. If you select Between, an additional text box will appear to the right of the existing text box.
Then, enter the publication year or years in the text box or text boxes to the right of the dropdown menu.
| Filters will not be applied until you select Search. If you make any changes to filters after beginning a search, you must select Search again to apply your changes. |
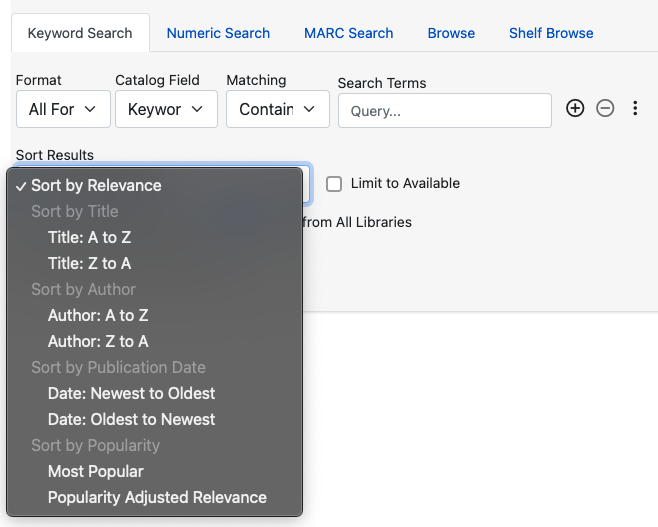
Sorting
Search results can be sorted by relevance, title (A to Z or Z to A), author (A to Z or Z to A), publication date (newest to oldest or oldest to newest), or popularity (most to least popular or popularity adjusted relevance). By default, searches are sorted by relevance.
To change the sorting method before your search, select an option from the Sort Results dropdown menu located below the search row.
To change the sorting method of a search you have already started, select an option from the Sort Results dropdown menu, then select Search in the top-right corner to apply your selection.
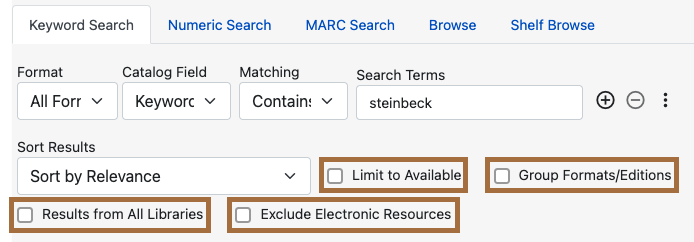
Search Checkboxes
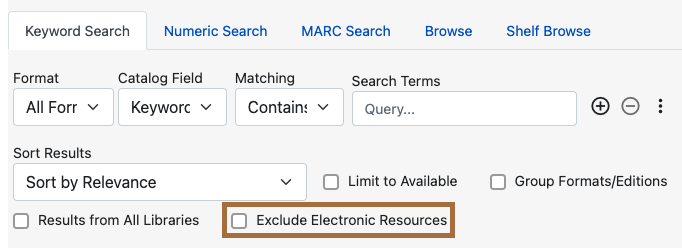
Three checkboxes appear on the Keyword Search pane by default. If the Exclude Electronic Resources checkbox is selected on the workstation’s Search Preferences, the Exclude Electronic Resources checkbox will also appear.
Depending on the size of your browser window, these checkboxes appear to the right of or below the Sort Results dropdown menu, at the bottom of the search form.
The checkboxes appear in the order listed below. The described behavior applies when the box is checked (selected).
| If you check or uncheck a checkbox after beginning your search, you must select Search again to apply your changes. |
Limit to Available: Results will be limited to items with a status of Available or Reshelving.
Group Formats/Editions: Results of the same title with different formats or editions will be combined into a single result.
Results from All Libraries: Results may come from any library in the highest level of your catalog, usually a consortium or system. Checking this box overrides any conflicting workstation Search Preferences and any selection in the Library Selector.
Exclude Electonic Resources: Results will not include any electronic format, such as e-books. If this checkbox is not visible, check the Exclude Electronic Resources checkbox on the Search Preferences page.
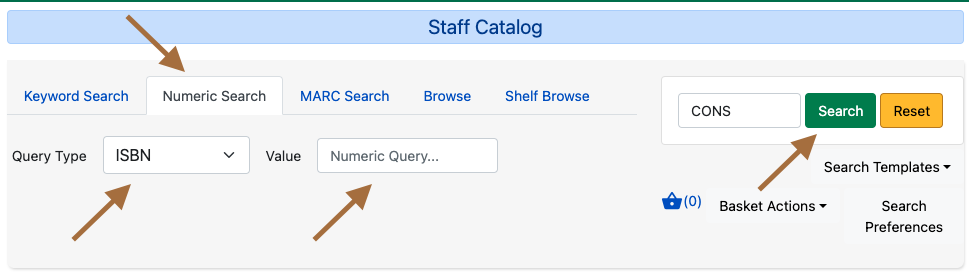
Numeric Search
The Numeric Search pane allows you to search numerical fields in bibliographic records. You may search the following fields: ISBN, UPC, ISSN, LCCN, TCN, and Item Barcode.
| An item may have multiple barcodes on it. Item Barcode refers to the barcode created by your library. It is the barcode you scan to check an item in or out. |
First, select the Query Type from the dropdown menu. Then, enter the numeric value of the search in the Value text box.
Begin the search by selecting the Search button in the top-right corner. Search results appear below the search form.
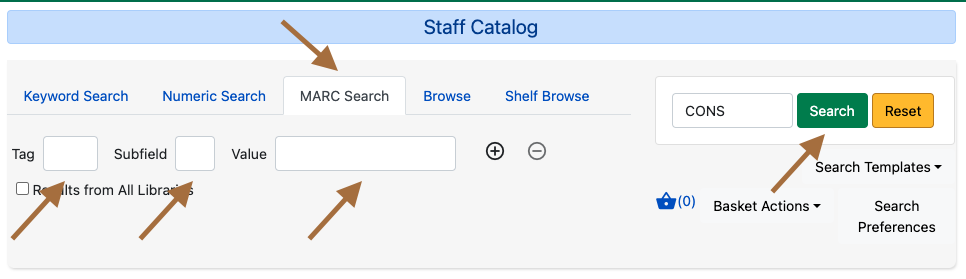
MARC Search
The MARC Search pane allows you to search fields and subfields in MARC records.
Enter the three-digit tag you wish to search in the Tag text box. If desired, enter the subfield you wish to search in the Subfield text box.
Then, enter the value for which you are searching in the Value text box. Begin the search by selecting the Search button in the top-right corner. Search results appear below the search form.
You can only search one tag or subfield per row. To add additional rows, select the plus sign (+) to the right of the search row. To remove rows, select the minus sign (-) to the rigt of the search row.
Browse
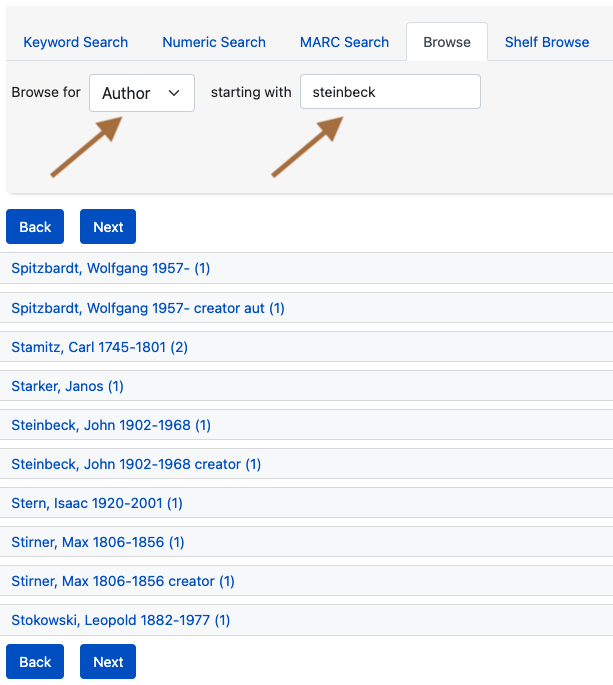
The Browse pane allows you to view bibliographic headings that fall around your search term alphabetically. Each result links to catalog records that contain the indicated bibliographic information. (To browse by call number, see Shelf Browse.)
To use the Browse pane, select the headings you would like to search by making a selection from the Browse for dropdown menu. You may search by title, author, subject, or series.
Then, enter your search term in the Starting with text box and select Search to begin your search. Results appear below the search form.
You may select Next or Back, which appear above and below the results, to view more results.
| Enter the surname first when searching by author in the Browse pane. |
Shelf Browse
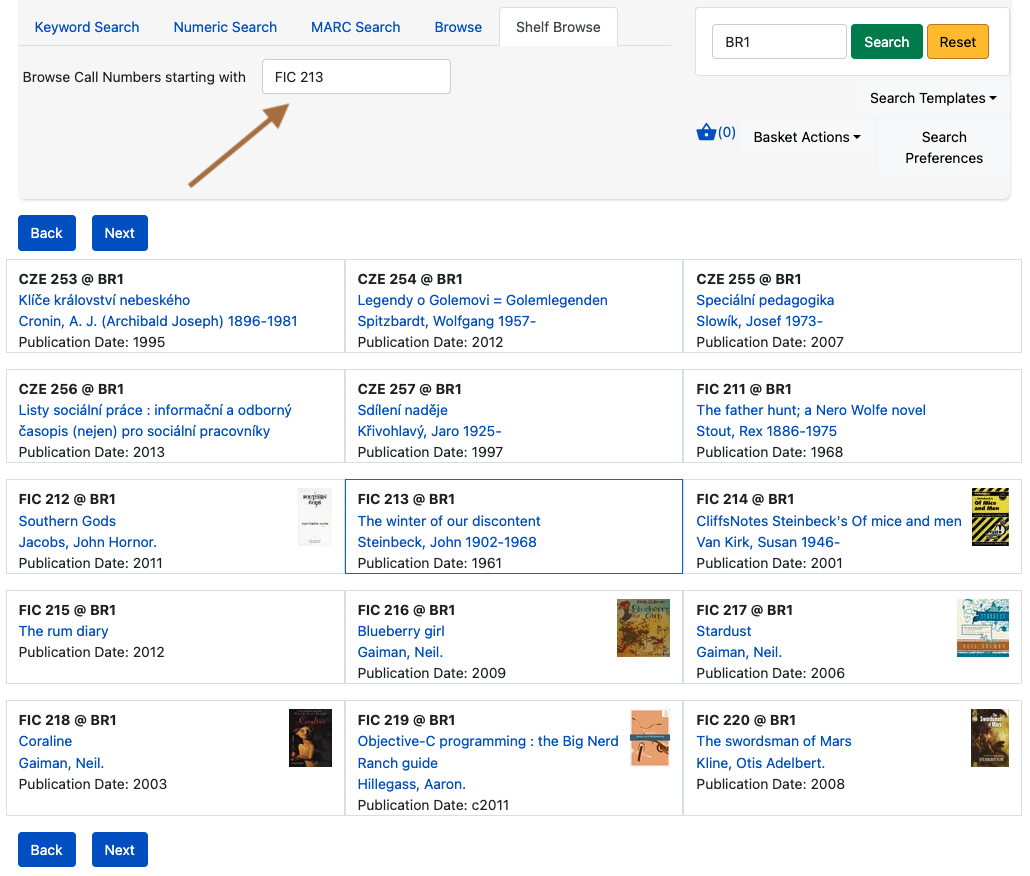
The Shelf Browse pane allows you to browse by call number. It will return results that fall around your search term alphabetically or numerically. Each result links to catalog records. (To browse by bibliographic headings, see Browse.)
In libraries where call numbers include part information, such as volume number, you can use this pane to browse volumes in a series.
To use the Shelf Browse pane, enter a call number in the Browse Call Numbers starting with text box, then select Search. Results appear below the search form.
You may select Next or Back, which appear above and below the results, to view more results.
| Shelf Browse is best used at the smallest appropriate level, usually the branch level, due to possible variations in call number practices. |