Selection Lists and Purchase Orders
Selection Lists
Selection lists allow you to create, manage, and save lists of items that you may want to purchase. To view your selection list, click Acquisitions → My Selection Lists. Use the general search to view selection lists created by other users.
Create a selection list
Selection lists can be created in four areas within the module. Selection lists can be created when you Add Brief Records, Upload MARC Order Records, or find records through the MARC Federated Search. In each of these interfaces, you will find the Add to Selection List field. Enter the name of the selection list that you want to create in that field.
Selection lists can also be created through the My Selection Lists interface:
-
Click Acquisitions → My Selection Lists.
-
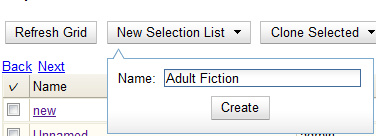
Click the New Selection List drop down arrow.
-
Enter the name of the selection list in the box that appears.
-
Click Create.
Add items to a selection list
You can add items to a selection list in one of three ways: add a brief record; upload MARC order records; add records through a federated search; or use the View/Place Orders menu item in the catalog.
Clone selection lists
Cloning selection lists enables you to copy one selection list into a new selection list. You can maintain both copies of the list, or you can delete the previous list.
-
Click Acquisitions → My Selection Lists.
-
Check the box adjacent to the list that you want to clone.
-
Click Clone Selected.
-
Enter a name into the box that appears, and click Clone.

Merge selection lists
You can merge two or more selection lists into one selection list.
-
Click Acquisitions → My Selection Lists.
-
Check the boxes adjacent to the selection lists that you want to merge, and click Merge Selected.
-
Choose the Lead Selection List from the drop down menu. This is the list to which the items on the other list(s) will be transferred.
-
Click Merge.

Delete selection lists
You can delete selection lists that you do not want to save. You will not be able to retrieve these items through the General Search after you have deleted the list. You must delete all line items from a selection list before you can delete the list.
-
Click Acquisitions → My Selection Lists.
-
Check the box adjacent to the selection list(s) that you want to delete.
-
Click Delete Selected.
Mark Ready for Selector
After an item has been added to a selection list or purchase order, you can mark it ready for selector. This step is optional but may be useful to individual workflows.
-
If you want to mark part of a selection list ready for selector, then you can check the box(es) of the line item(s) that you wish to mark ready for selector. If you want to mark the entire list ready for selector, then skip to step 2.
-
Click Actions → Mark Ready for Selector.
-
A pop up box will appear. Choose to mark the selected line items or all line items.
-
Click Go.
-
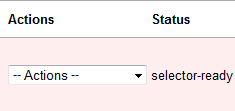
The screen will refresh. The marked line item(s) will be highlighted pink, and the status changes to selector-ready.
Convert selection list to purchase order
Use the Actions menu to convert a selection list to a purchase order.
-
From a selection list, click Actions → Create Purchase Order.
-
A pop up box will appear.
-
Select the ordering agency from the drop down menu.
-
Enter the provider.
-
Check the box adjacent to prepayment required if prepayment is required.
-
Choose if you will add All Lineitems or Selected Lineitems to your purchase order.
-
Check the box if you want to Import Bibs and Create Copies in the catalog.
-
Click Submit.
Purchase Orders
Purchase Orders allow you to keep track of orders and, if EDI is enabled, communicate with your provider. To view purchase orders, click Acquisitions → Purchase Orders.
Naming your purchase order
You can give your purchase order a name.
When creating a purchase order or editing an existing purchase order, the purchase order name must be unique for the ordering agency. Evergreen will display a warning dialog to users, if they attempt to create or edit purchase order names that match the names of already existing purchase orders at the same ordering agency. The Duplicate Purchase Order Name Warning Dialog includes a link that will open the matching purchase order in a new tab.
Purchase Order Names are case sensitive.
Duplicate PO Name Detection When Creating a New Purchase Order
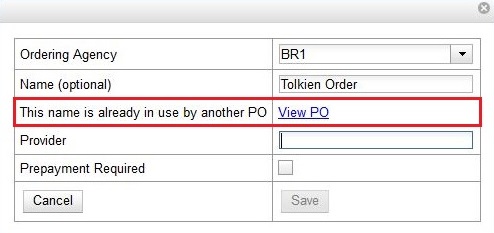
When a duplicate purchase order name is detected during the creation of a new purchase order, the user may:
-
Click View PO to view the purchase order with the matching name. The purchase order will open in a new tab.
-
Click Cancel to cancel the creation of the new purchase order.
-
Within the Name (optional) field, enter a different, unique name for the new purchase order.
If the purchase order name is unique for the ordering agency, the user will continue filling in the remaining fields and click Save.
If the purchase order name is not unique for the ordering agency, the Save button will remain grayed out to the user until the purchase order is given a unique name.
Duplicate PO Name Detection When Editing the Name of an Existing Purchase Order
To change the name of an existing purchase order:
-
Within the purchase order, the Name of the purchase order is a link (located at the top left-hand side of the purchase order). Click the PO Name.
-
A new window will open, where users can rename the purchase order.
-
Enter the new purchase order name.
-
Click OK.
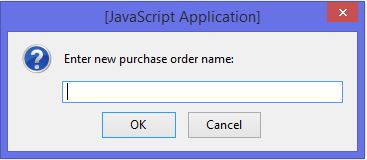
If the new purchase order name is unique for the ordering agency, the purchase order will be updated to reflect the new name. If the purchase order name is not unique for the ordering agency, the purchase order will not be updated with the new name. Instead, the user will see the Duplicate Purchase Order Name Warning Dialog within the purchase order.

When a duplicate purchase order name is detected during the renaming of an existing purchase order, the user may:
-
Click View PO to view the purchase order with the matching name. The purchase order will open in a new tab.
-
Repeat the steps to change the name of an existing purchase order and make the name unique.
Activating your purchase order
When the appropriate criteria have been met the Activate Order button will appear and you can proceed with the following:
-
Click the button Activate Order.
-
When you activate the order the bibliographic records and copies will be imported into the catalog using the Vandelay interface, if not previously imported. See How to Load Bibliographic Records and Items into the Catalog for instructions on using the Vandelay interface.
-
The funds associated with the purchases will be encumbered.
After you click Activate Order, you will be presented with the record import interface for records that are not already in the catalog. Once you complete entering in the parameters for the record import interface, the progress screen will appear. As of Evergreen 2.9, this progress screen consists of a progress bar in the foreground, and a tally of the following in the background of the bottom-left corner:
-
Lineitems processed
-
Vandelay Records processed
-
Bib Records Merged/Imported
-
ACQ Copies Processed
-
Debits Encumbered
-
Real Copies Processed
Activate Purchase Order without loading items
It is possible to activate a purchase order without loading items. Once the purchase order has been activated without loading items, it is not possible to load the items. This feature should only be used in situations where the copies have already been added to the catalog, such as:
-
Cleaning up pre-acquisitions backlog
-
Direct purchases that have already been cataloged
To use this feature, click the Activate Without Loading Items button.
Line item statuses
The purchase orders interface keeps track of various statuses that your line items might be in. This section lists some of the statuses you might see when looking at purchase orders.
Canceled and Delayed Items
In the purchase order interface, you can easily differentiate between canceled and delayed items. Each label begins with Canceled or Delayed. To view the list, click Administration → Acquisitions Administration → Cancel Reasons.
The cancel/delay reason label is displayed as the line item status in the list of line items or as the copy status in the list of copies.

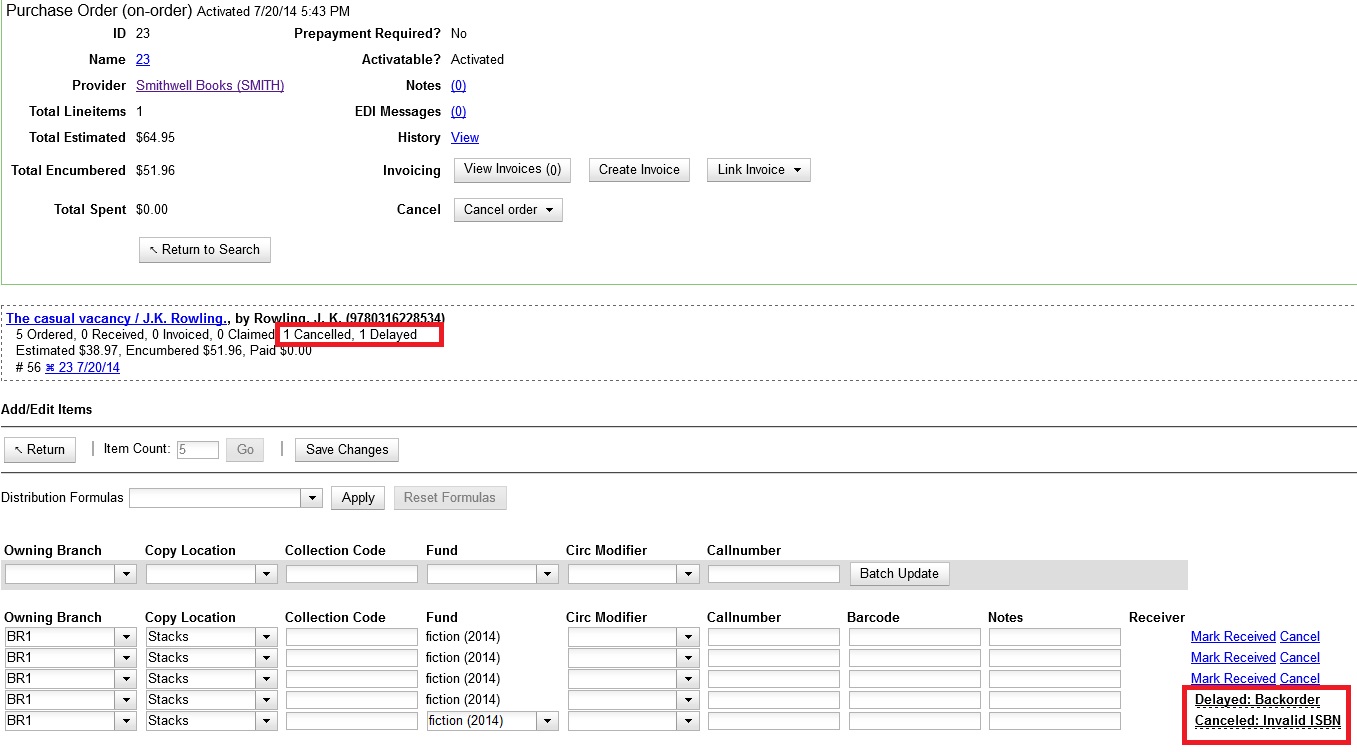
A delayed line item can now be canceled. You can mark a line item as delayed, and if later, the order cannot be filled, you can change the line item’s status to canceled. When delayed line items are canceled, the encumbrances are deleted.
Cancel/delay reasons now appear on the worksheet and the printable purchase order.
|
When all the copies of a line item are canceled through the Acquisitions interface, the parent lineitem is also canceled. The cancel reason will be calculated based on the settings of:
|
Brief Records
Brief records are short bibliographic records with minimal information that are often used as placeholder records until items are received. Brief records can be added to selection lists or purchase orders and can be imported into the catalog. You can add brief records to new or existing selection lists. You can add brief records to new, pending or on-order purchase orders.
Add brief records to a selection list
-
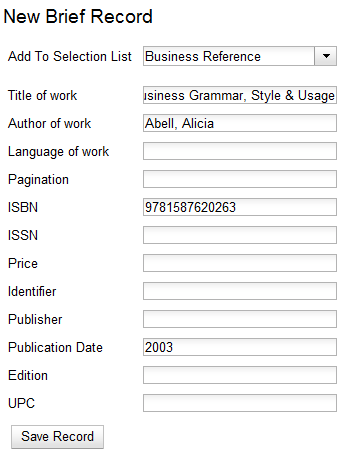
Click Acquisitions → New Brief Record. You can also add brief records to an existing selection list by clicking the Actions menu on the selection list and choosing Add Brief Record.
-
Choose a selection list from the drop down menu, or enter the name of a new selection list.
-
Enter bibliographic information in the desired fields.
-
Click Save Record.
Add brief records to purchase orders
You can add brief records to new or existing purchase orders.
-
Open or create a purchase order. See the section on purchase orders for more information.
-
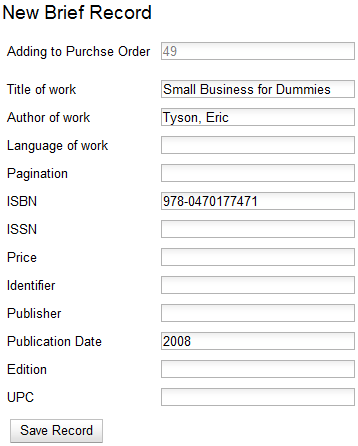
Click Add Brief Record.
-
Enter bibliographic information in the desired fields. Notice that the record is added to the purchase order that you just created.
-
Click Save Record.
MARC Federated Search
The MARC Federated Search enables you to import bibliographic records into a selection list or purchase order from a Z39.50 source.
-
Click Acquisitions → MARC Federated Search.
-
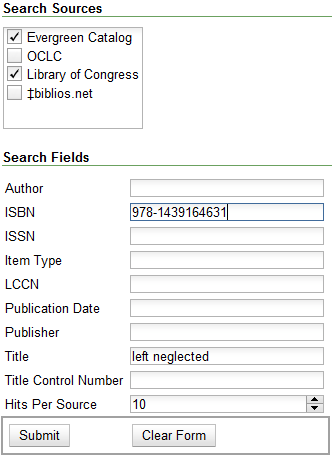
Check the boxes of Z39.50 services that you want to search. Your local Evergreen Catalog is checked by default. Click Submit.
-
A list of results will appear. Click the "Copies" link to add copy information to the line item. See the section on Line Items for more information.
-
Click the Notes link to add notes or line item alerts to the line item. See the section on Line Items for more information.
-
Enter a price in the "Estimated Price" field.
-
You can save the line item(s) to a selection list by checking the box on the line item and clicking Actions → Save Items to Selection List. You can also create a purchase order from the line item(s) by checking the box on the line item and clicking Actions → Create Purchase Order.

Line Items
Return to Line Item
This feature enables you to return to a specific line item on a selection list, purchase order, or invoice after you have navigated away from the page that contained the line item. This feature is especially useful when you must identify a line item in a long list. After working with a line item, you can return to your place in the search results or the list of line items.
To use this feature, select a line item, and then, depending on the location of the line item, click Return or Return to search. Evergreen will take you back to the specific line item in your search and highlight the line item with a colored box.
For example, you retrieve a selection list, find a line item to examine, and click the Copies link. After editing the copies, you click Return. Evergreen takes you back to your selection list and highlights the line item that you viewed.
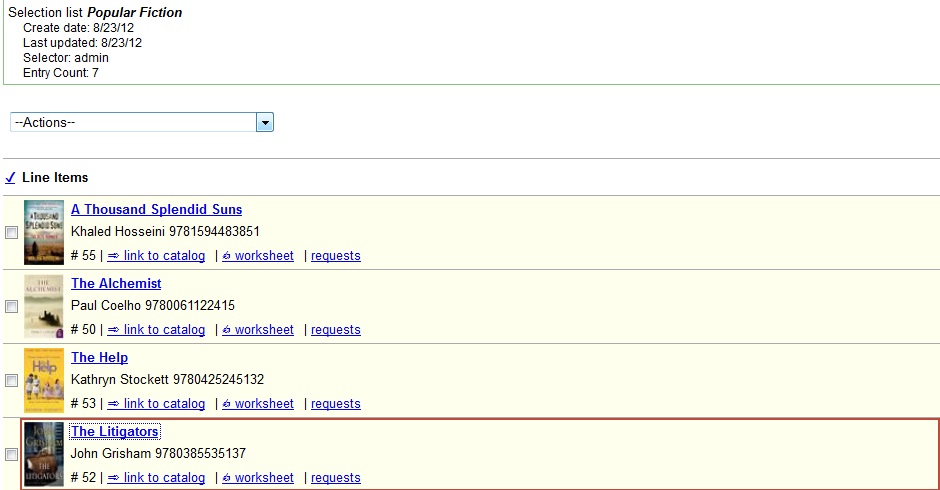
This feature is available in General Search Results, Purchase Orders, and Selection Lists, whenever any of the following links are available:
-
Selection List
-
Purchase Order
-
Copies
-
Notes
-
Worksheet
This feature is available in Invoices whenever any of the following links are available:
-
Title
-
Selection List
-
Purchase Order
Display a Count of Existing Copies on Selection List and Purchase Order Lineitems
When displaying Acquisitions lineitems within the Selection List and Purchase Order interfaces, Evergreen displays a count of existing catalog copies on the lineitem. The count of existing catalog copies refers to the number of copies owned at the ordering agency and / or the ordering agency’s child organization units.
The counts display for lineitems that have a direct link to a catalog record. Generally, this includes lineitems created as "on order" based on an existing catalog record and lineitems where "Load Bibs and Items" has been applied.
The count of existing copies does not include copies that are in either a Lost or a Missing status.
The existing copy count displays in the link "bar" located below the Order Identifier within the lineitem.
If no existing copies are found, a "0" (zero) will display in plain text.
If the existing copy count is greater than zero, then the count will display in bold and red on the lineitem.

The user may also hover over the existing copy count to view the accompanying tooltip.

