Notifications / Action Triggers
Overview
Action Triggers allow administrators to set up actions for specific events, useful for notifications such as hold notifications.
Accessing the Notifications / Action Triggers Module
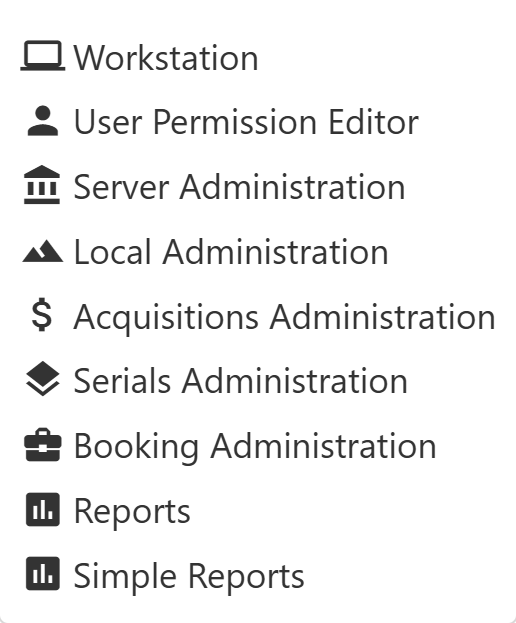
Access the Notifications / Action Triggers from the top menu bar in the staff client by navigating to Administration → Local Administration → Notifications / Action triggers.


|
You must have Local Administrator permissions to access the Notifications / Action Triggers Module. |
Main Parts of Action Triggers
Action triggers are composed of four main components: Event Definitions, Hooks, Reactors, and Validators.
Part |
Description |
Event Definitions |
Define the events and conditions that initiate actions. |
Hooks |
Specify the Fieldmapper class and link to the IDL class. |
Reactors |
Connect triggers to the actions to be executed. |
Validators |
Establish validation tests to determine if actions should be executed. |
Each of these components has a corresponding tab in the Notifications / Action Triggers module. Selecting a tab displays a grid of relevant data with options to add, edit, or delete entries.

Event Definitions
Event Definitions is the main tab and contains the key fields when working with action triggers. An event definition is a set of fields that will be returned to the validators and/or reactors for processing. Normally, when you create a new action trigger, you will start here. Evergreen comes with a set of predefined hooks, validators, and reactors that can be used to create new action triggers.
Field |
Description |
Owning Library |
The shortname of the library for which the action / trigger / hook is defined. |
Name |
The name of the trigger event, that links to a trigger event environment containing a set of fields that will be returned to the Validators and/or Reactors for processing. |
The name of the trigger for the trigger event. The underlying |
|
Enabled |
Sets the given trigger as enabled or disabled. This must be set to enabled for the Action trigger to run. |
Processing Delay |
Defines how long after a given trigger / hook event has occurred before the associated action ("Reactor") will be taken. |
Processing Delay Context Field |
Defines the field associated with the event on which the processing delay is calculated. |
Processing Group Context Field |
Used to batch actions based on its associated group. |
Reactor |
Links the action trigger to the Reactor. |
The subroutines receive the trigger environment as an argument and return either 1 if the validator is true or 0 if the validator returns false. |
|
Event Repeatability Delay |
Allows events to be repeated after this delay interval. |
Failure Cleanup |
After an event is reacted to and if there is a failure a cleanup module can be run to clean up after the event. |
Granularity |
Used to group events by how often they should be run. |
Max Event Validity Delay |
Allows events to have a range of time that they are valid. |
Message Library Path |
Defines the org_unit object for a Patron Message Center message. |
Message Template |
A Template Toolkit template that can be used to generate output for a Patron Message Center message. |
Message Title |
The title that will display on a Patron Message Center message. |
Message User Path |
Defines the user object for a Patron Message Center message. |
Opt-In Settings Type |
Choose which User Setting Type will decide if this event will be valid for a certain user. |
Opt-In User Field |
Set to the name of the field in the selected hook’s core type that will link the core type to the actor.usr table. |
Success Cleanup |
After an event is reacted to successfully a cleanup module can be run to clean up after the event. |
Template |
A Template Toolkit template that can be used to generate output. |
Hooks
Hooks define the class in the Fieldmapper that an action trigger will listen for. Essentially, a hook represents an event that may occur in the system.
Field |
Description |
Hook Key |
A unique name given to the hook. |
Core Type |
Used to link the action trigger to the IDL class in |
Description |
Text to describe the purpose of the hook. |
Passive |
Indicates whether or not an event is created by direct user action or is circumstantial. |
Passive vs. Active Hooks
Passive Hooks: These hooks require a periodic check by a cron job to determine whether an event has occurred. Examples include:
-
Checking if an item is overdue by a certain number of days.
-
Sending notifications for upcoming due dates.
These hooks rely on background jobs to scan the database and create relevant events when conditions are met.
Active Hooks: These hooks are triggered automatically when a predefined event occurs. Examples include:
-
A hold becoming available.
-
An item being checked in.
Since these events are already occurring within the system’s normal workflow, the action trigger framework can immediately create an event without requiring a periodic check.
Reactors
Reactors link the trigger definition to the action to be carried out.
Field |
Description |
Module Name |
The name of the Module to run if the action trigger is validated. It must be defined as a subroutine in |
Description |
Description of the Action to be carried out. |
CallHTTP Reactor
The CallHTTP reactor allows Evergreen to send HTTP or HTTPS requests to an external service. This is useful for integrations, such as sending push notifications or making API calls to external applications. The HTTP request is configured using a Template Toolkit template that formats the request.
CallHTTP Reactor Template Syntax
The template should output data that can be parsed by the Config::General Perl module. See: https://metacpan.org/pod/Config::General
Top-level settings should include the HTTP method and the url.
A block called Headers can be used to supply arbitrary HTTP headers.
A block called Parameters can be used to append CGI parameters to the URL, most useful for GET form submission.
A HEREDOC called content can be used with POST or PUT to send an arbitrary block of content to the remote server.
If the requested URL requires Basic or Digest authentication, the template can include top-level configuration parameters to supply a user, password, realm, and hostname:port location.
A default user agent string of "EvergreenReactor/1.0" is used when sending requests. This can be overridden using the top-level agent setting.
Example template for the bib.edit hook:
method   post
url      https://example.com/api/incoming-update
agent    MySpecialAgent/0.1

user     updater
password uPd4t3StufF
realm    "Secret area"
location example.com:443

<Headers>
  Accept-Language en
</Headers>

<Parameters>
  type bib
  id   [% target.id %]
</Parameters>

content <<MARC
[% target.marc %]
MARC
Validators
Validators set the validation test to be performed to determine whether the action trigger is executed.
Field |
Description |
Module Name |
The name of the subroutine in |
Description |
Description of validation test to run. |
A validator function runs when the action trigger executes and returns either true or false. For example, a validator for overdue notices may check whether the item is still checked out before sending the notification.
Creating Action Triggers
-
Make sure you are in the Event Definitions tab of the Notifications / Action Triggers module.
In most scenarios, you will not need to create new hooks, validators, or reactors, but advanced users may find it useful to do so to add custom functionality.
-
Select the New Event Definition button.
 Figure 5. New Event Definition Button
 -
Fill out all fields for the event definition. Refer to the Table 2. Event Definition Fields for details.
Selecting the new event definition button will open the Record Editor: Trigger Event Definition form.
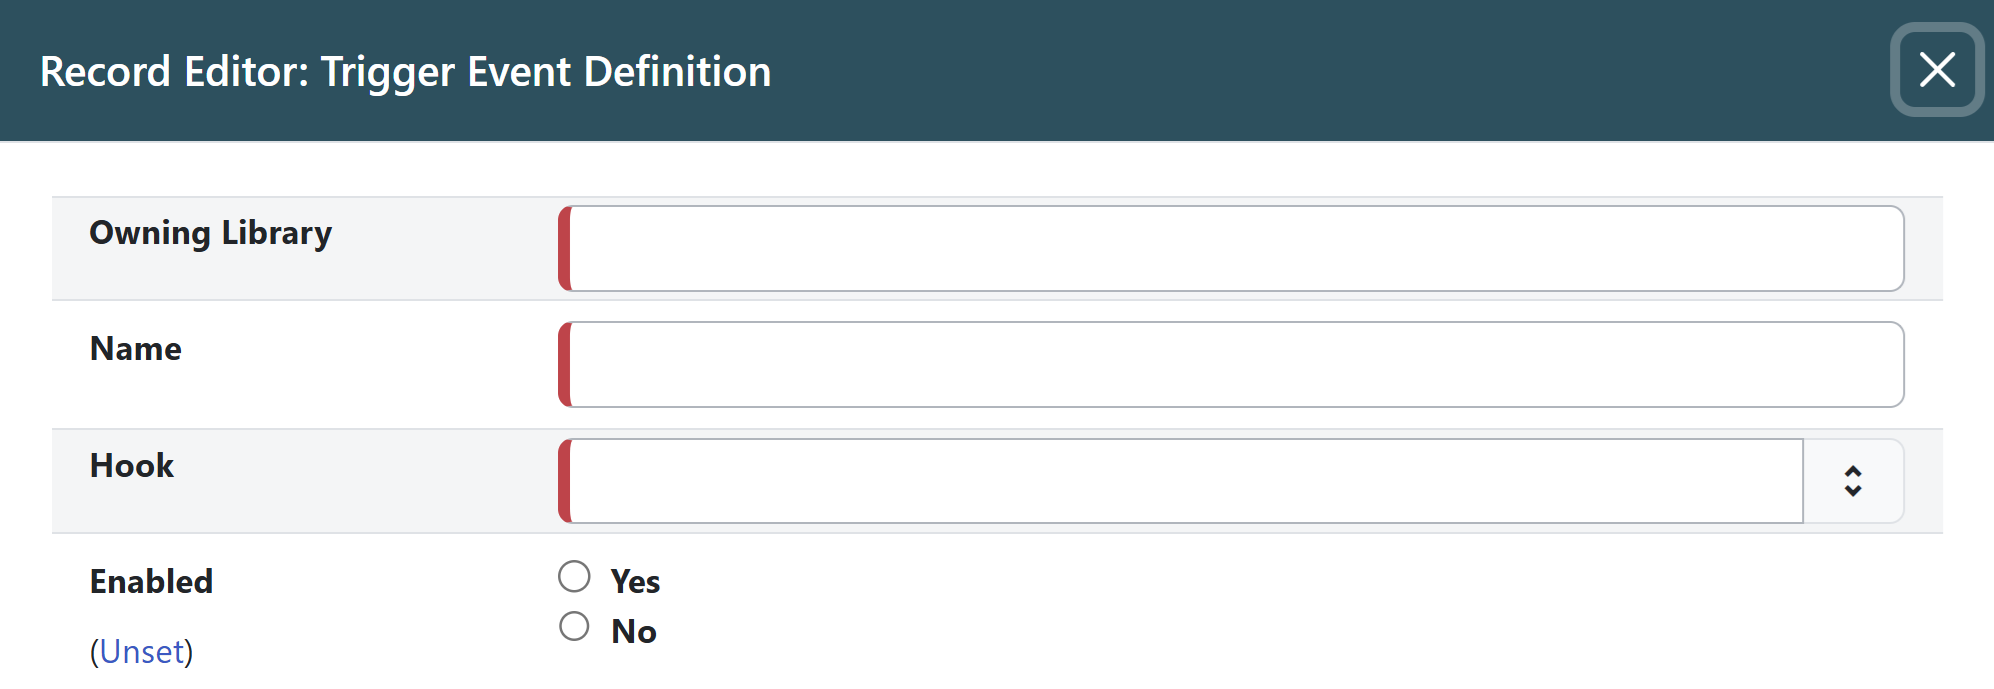 Figure 6. The first few fields of the New Event Definition form.
Here is an example of a simple event definition for sending a 3 Day Courtesy Notice via email:
Table 6. Table of Event Definition Configuration Field
Value
Owning Library
CONS
Name
3 Day Courtesy Notice
Hook
checkout.due
Enabled
Yes
Processing Delay
-3 days
Processing Delay Context Field
due_date
Processing Group Context Field
usr
Reactor
SendEmail
Validator
CircIsOpen
Event Repeatability Delay
-2 days
Definition ID
6
Opt-In Setting Type
circ.default_overdue_notices_enabled
Opt-In User Field
usr
Template
Sample Template for Sending a 3 Day Courtesy Notice via Email:
[%- USE date -%] [%- user = target.0.usr -%] To: [%- params.recipient_email || user.email %] From: [%- params.sender_email || default_sender %] Date: [%- date.format(date.now, '%a, %d %b %Y %T -0000', gmt => 1) %] Subject: Courtesy Notice Auto-Submitted: auto-generated Dear [% user.family_name %], [% user.first_given_name %] As a reminder, the following items are due in 3 days. [% FOR circ IN target %] [%- copy_details = helpers.get_copy_bib_basics(circ.target_copy.id) -%] Title: [% copy_details.title %] Author: [% copy_details.author %] Barcode: [% circ.target_copy.barcode %] Due: [% date.format(helpers.format_date(circ.due_date), '%Y-%m-%d') %] Item Cost: [% helpers.get_copy_price(circ.target_copy) %] Library: [% circ.circ_lib.name %] Library Phone: [% circ.circ_lib.phone %] [% END %] -
Once you are satisfied with your new event trigger, click the Save button located at the bottom of the form.
|
A quick and easy way to create new action triggers is to clone an existing action trigger. |
Creating Alternate Message Templates
As of version 3.9, there is the ability to create alternate templates for Action Triggers that will generate locale-specific output for Action Triggers.
To use the feature, the following UI elements have been added:
-
When you double-click on an Event Definition under Notifications / Action Triggers to edit it, there will be a tab option for Edit Alternate Template if the reactor is ProcessTemplate, SendEmail, or SendSMS.
-
In the Patron Registration and Patron Editor screens, staff members may select a locale for a patron and edit it in the Patron Preferred Language field.
-
Patrons may set their own locale in the My Account interface off the OPAC by going to Preferences -→ Personal Information and setting the Preferred Language field.
The templates used on the Edit Definition tab are the defaults that are used if there are no alternate templates available that match the preferred language.
Valid locales are the codes defined in the i18n_locale table in the config
schema.
Cloning Existing Action Triggers
-
Right-click on the line of the action trigger you wish to clone, and choose Clone Selected.
-
You will be asked to confirm whether or not you wish to clone the event definition environment along with the action trigger.
-
-
An editing window will open. Notice that the fields will be populated with content from the cloned action trigger. Edit as necessary and give the new action trigger a unique Name.
-
Click Save.
Editing Action Triggers
-
Double-click on the action trigger you wish to edit or right-click on the line of the action trigger you wish to edit, and choose Edit Event Definition.
-
The Edit Definition screen will appear. When you are finished editing, click Save at the bottom of the form. Or click Back to Notification/Action Triggers to exit without saving.
Deleting Action Triggers
-
Right-click on the line of the action trigger you wish to delete.
-
Choose Delete Selected from the action menu.
|
Before deleting an action trigger, you should consider disabling it through the editing form. This way you can keep it for future use or cloning. |
Testing Action Triggers
-
Go to the list of action triggers.
-
Double-click on the action trigger you wish to edit or right-click on the line of the action trigger you wish to edit, and choose Edit Event Definition.
-
Go to the Run Tests tab.
-
If there is a test available, fill in the required information and click Go.
-
View the output of the test.
|
If you are testing an email or SMS notification, use a test account and email as an example. Using the Test feature will actually result in the notification being sent if configured correctly. Similarly, use a test item or barcode when testing a circulation-based event like Mark Lost since the test will mark the item as lost. |
Processing Action Triggers
To run action triggers, an Evergreen administrator will need to run the trigger processing script. This should be set up as a cron job to run periodically. To run the script, use this command:
/openils/bin/action_trigger_runner.pl --process-hooks --run-pending
Option |
Description |
--run-pending |
Run pending events to send emails or take other actions as specified by the reactor in the event definition. |
--process-hooks |
Create hook events. |
--osrf-config=[config_file] |
OpenSRF core config file. Defaults to: /openils/conf/opensrf_core.xml. |
--custom-filters=[filter_file] |
File containing a JSON Object which describes any hooks that should use a user-defined filter to find their target objects. Defaults to: /openils/conf/action_trigger_filters.json. |
--max-sleep=[seconds] |
When in process-hooks mode, wait up to [seconds] for the lock file to go away. Defaults to 3600 (1 hour). |
--hooks=hook1[,hook2,hook3,…] |
Define which hooks to create events for. If none are defined, it defaults to the list of hooks defined in the --custom-filters option. Requires --process-hooks. |
--granularity=[label] |
Limit creating events and running pending events to those only with [label] granularity setting. |
--debug-stdout |
Print server responses to STDOUT (as JSON) for debugging. |
--lock-file=[file_name] |
Sets the lock file for the process. |
--verbose |
Show details of script processing. |
--help |
Show help information. |
Examples:
-
Run all pending events that have no granularity set. This is what you tell CRON to run at regular intervals.
perl action_trigger_runner.pl --run-pending
-
Batch create all "checkout.due" events
perl action_trigger_runner.pl --hooks=checkout.due --process-hooks
-
Batch create all events for a specific granularity and to send notices for all pending events with that same granularity.
perl action_trigger_runner.pl --run-pending --granularity=Hourly --process-hooks
Setting Up Cron Jobs
Many action triggers are processed using cron jobs. Passive hooks require periodic execution, typically scheduled at intervals such as hourly or daily. Stock Evergreen runs the action trigger runner every 30 minutes to process pending events.
Example Cron Job
To periodically check for events and execute action triggers, administrators can set up a cron job with the following command:
/openils/bin/action_trigger_runner.pl --process-hooks --run-pending
This command:
-
Processes hooks (--process-hooks) to create new events.
-
Runs pending events (--run-pending) to execute any triggered actions.
Example Cron Job Setup
A standard Evergreen setup might include cron jobs like:
0 * * * * perl /openils/bin/action_trigger_runner.pl --run-pending
30 * * * * perl /openils/bin/action_trigger_runner.pl --process-hooks
This means:
-
Every hour on the hour (0 * * * *), Evergreen processes pending actions.
-
Every 30 minutes past the hour (30 * * * *), Evergreen scans for new events.
Configure OPAC Record Email and Print
The information displayed in the printout and email is defined and generated
by two Notification/Action Triggers named biblio.record_entry.print and
biblio.record_entry.email.
By default, the printout and email will include the following bibliographic information:
-
Bibliographic Record ID
-
Title statement
-
Author
-
Item Type
-
Publisher
-
Publication date
-
ISBN
-
ISSN
-
UPC
If the OPAC user selects Full display, the following holdings information is included in the printout or email, if relevant:
-
Circulating Library
-
Item Location
-
Call Number (including prefix and suffix)
-
Monograph Parts
-
Item Status
-
Item Barcode
The bibliographic and item information included in the printout or email can be configured by modifying the respective Action Trigger templates.
To configure the maximum number of copies displayed per record for the Full display, follow these steps:
-
Go to Administration → Local Administration → Notifications / Action Triggers.
-
Find the print or email notification/action trigger you wish to modify.
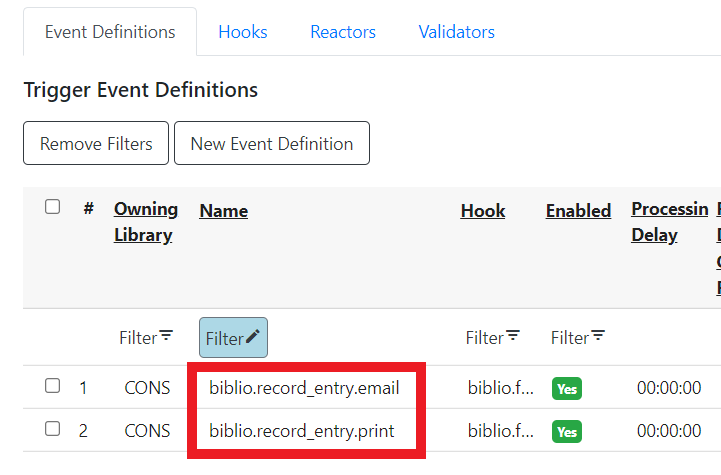 Figure 7. Email and Print Event Definitions
 -
Double-click on the action trigger.
-
Select the Edit Parameters tab.
-
In the upper left-hand corner, select New Parameter to create a new Trigger Event Parameter.
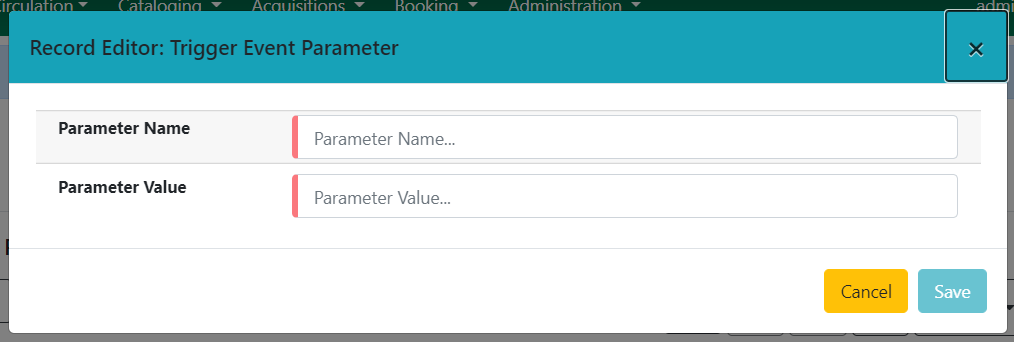 Figure 8. Email and Print Event Parameters
 -
In the Parameter Name field, enter
holdings_limit. -
In the Parameter Value field, enter the maximum number of copies to be displayed per record.
-
Select Save to save your changes.
For more information on how to invoke this functionality from the front end, please refer to the section on printing and emailing records in the OPAC documentation.