Importing and Overlaying Records via Z39.50
Introduction
The Z39.50 interface in Evergreen allows you to import records either to create a new record or overlay an existing record.
To configure various aspects of Z39.50 please see the following documentation:
Overlaying an Existing Record
This feature enables you to replace a catalog record with a record obtained through a Z39.50 search.
To Overlay an Existing Record via Z39.50 Import:
-
Navigate to Cataloging → Import Record from Z39.50
-
Select at least one of the Services and Credentials to have the search fields appear. You can also select Save as Default if you want the same services and credentials saved for the future.
-
Enter search terms in the Search Query section in the top right.
-
Select any Remove Field Groups options if you have those configured.
-
Select the Submit button at the bottom-left of the search form.

-
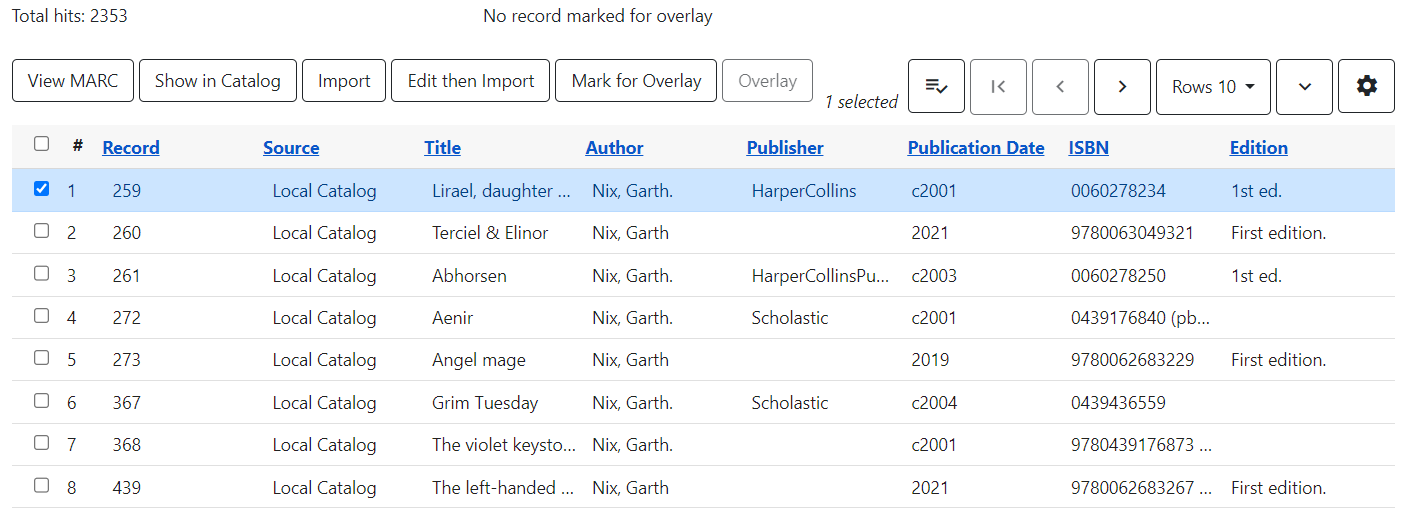
The results will appear in the lower window.

-
You can sort or the results set by clicking column headers. Note that this will only sort results that are already fetched from the local catalog or remote server.
-
-
Select the record in the local catalog that you wish to overlay.
-
Select Mark for Overlay. A confirmation will show as a message above the Mark for Overlay button.
-
Select the record that you want to replace the existing catalog record.
-
Select View Marc to see a MARC display of the record.

-
If the record is correct, close the MARC view and select Overlay. This option will only be executable if you have the incoming record selected.
-
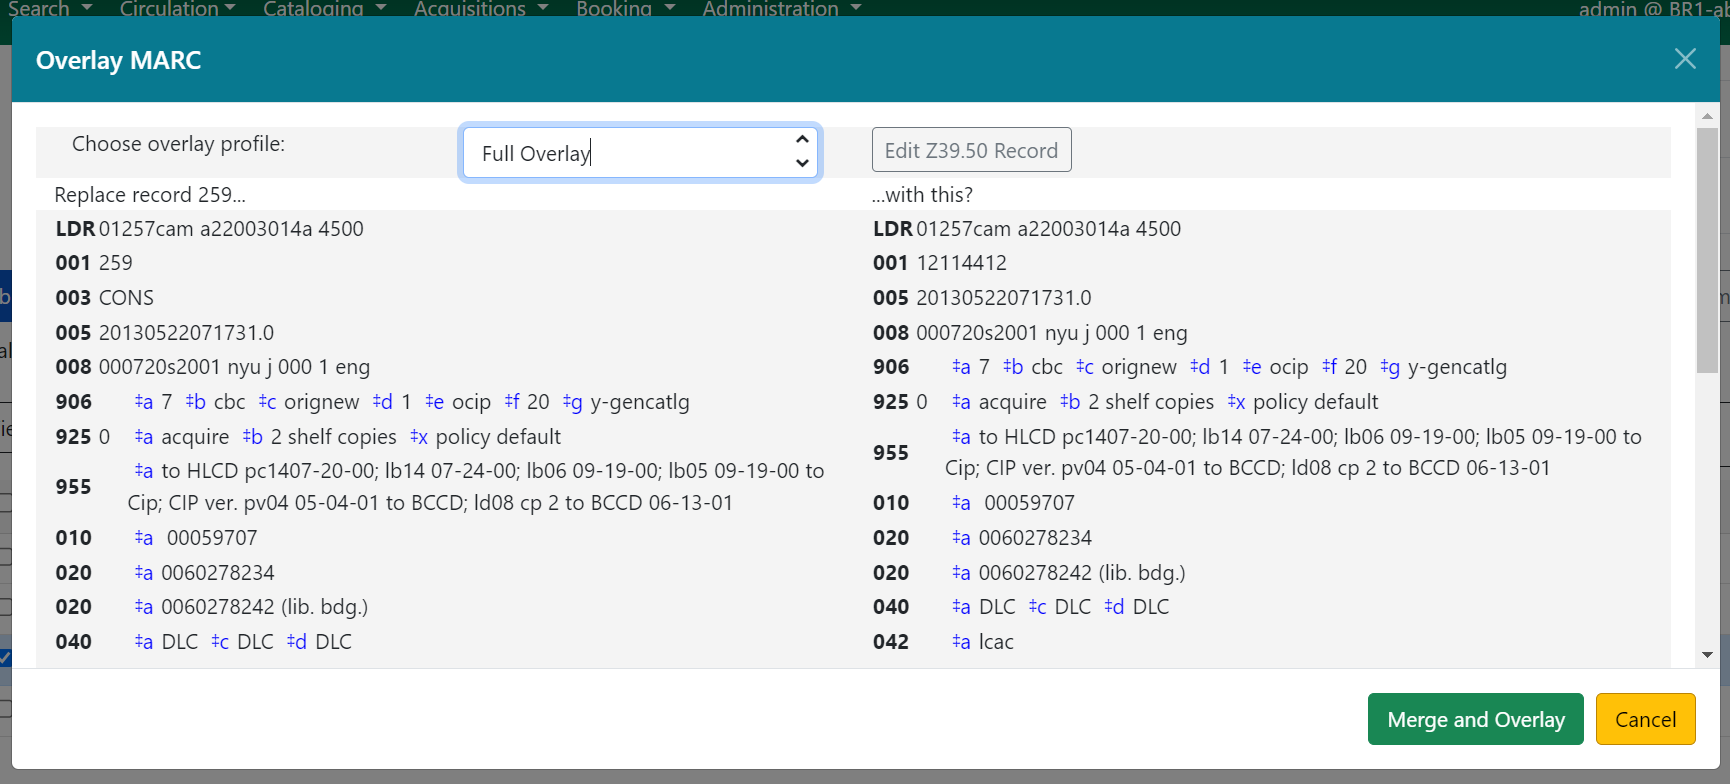
The records that you selected will open in a modal for comparison. Select an overlay profile from the dropdown.

-
If you need to make changes to the incoming record, select the Edit Z39.50 Record button. This will open a MARC editor view.
-
Make your changes to the incoming record and select Save Changes to close the MARC editor view.
-
-
Once you are ready, select the Merge and Overlay button at the bottom-right of the modal.
-
The record will appear in a new browser tab, and the overlay target will be cleared, resulting in the message "No record marked for overlay" displaying at the top of the Z39.50 results grid.
Importing a New Records
To import a new record via Z39.50, follow the directions below:
-
Navigate to Cataloging → Import Record from Z39.50
-
Select at least one of the Services and Credentials to have the search fields appear. You can also select Save as Default if you want the same services and credentials saved for the future.
-
Enter search terms in the Search Query section in the top right.
-
Select any Remove Field Groups options if you have those configured.
-
Select the Submit button at the bottom-left of the search form.
-
The results will appear in the lower window.
-
You can sort or the results set by clicking column headers. Note that this will only sort results that are already fetched from the local catalog or remote server.
-
-
Select the record that you wish to import.
-
Select View Marc to see a MARC display of the record.
-
If the record is correct, close the MARC view and select Import. You will get a confirmation of the record import, along with its local ID number and an option Go to record which will open the record in a new browser tab.
-
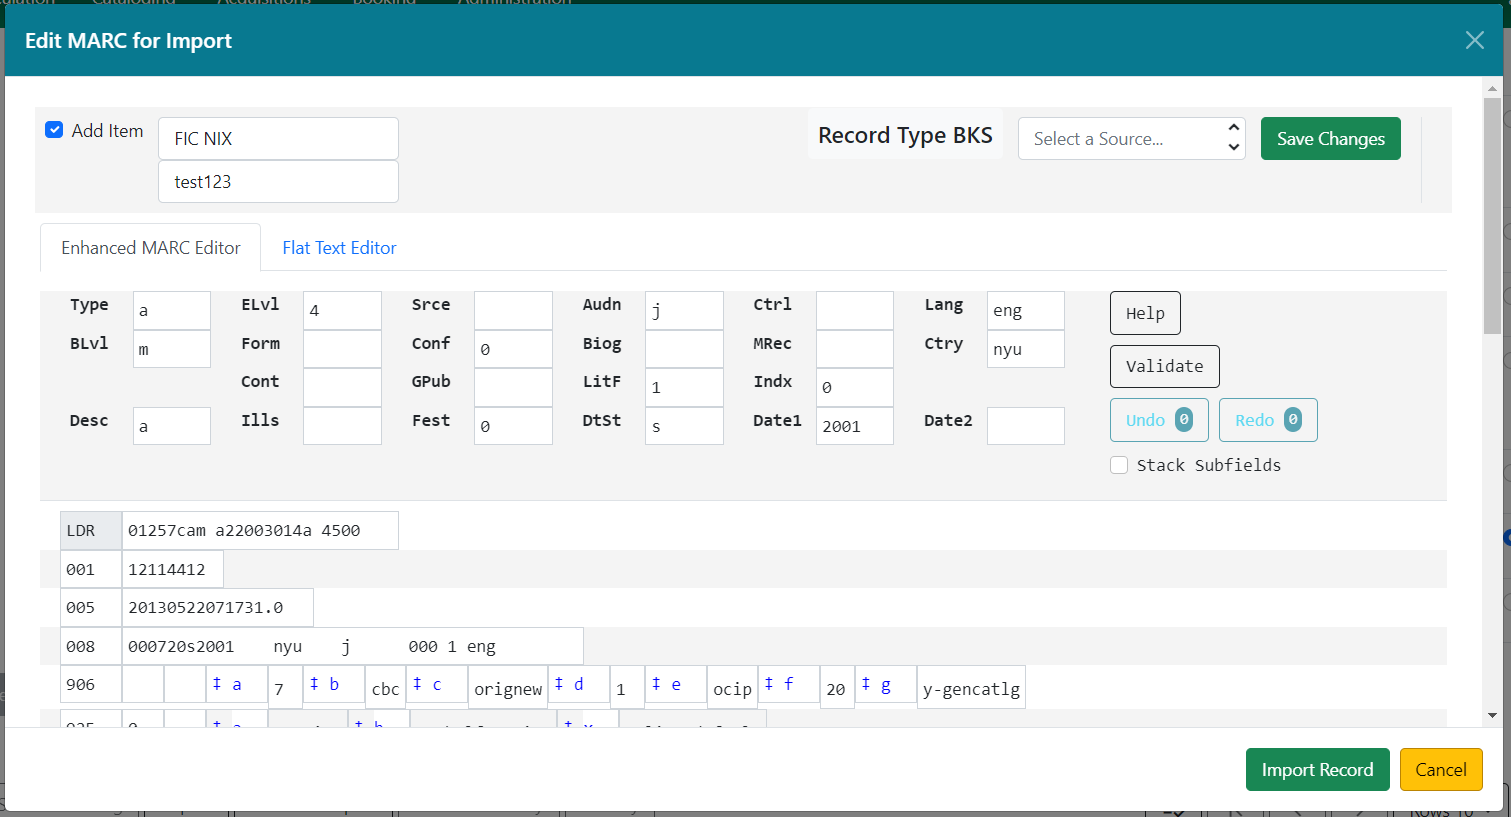
If you wish to make edits to the record before importing, select Edit then Import. This will open a MARC editor view.
-
Make your changes to the incoming record.
-
Add items to the record, if desired, by selecting the Add Item checkbox at the upper-left and entering a call number and barcode.
-
Select Save Changes to save your changes and/or added item.
-
Select Import Record at the bottom-right of the MARC editor view.

-
You will get a confirmation of the record import, along with its local ID number and an option Go to record which will open the record in a new browser tab.
-