Item Tags (Digital Bookplates)
Item Tags allow staff to apply custom, pre-defined labels or tags to items. Item tags are visible in the public catalog and are searchable in both the staff client and public catalog based on configuration. This feature was designed to be used for Digital Bookplates to attach donation or memorial information to items, but may be used for broader purposes to tag items.
Administration
New Permissions:
-
ADMIN_COPY_TAG_TYPES: required to create a new tag type under Server Administration→Item Tag Types
-
ADMIN_COPY_TAG: required to create a new tag under Local Administration→Item Tags
| The existing permission UPDATE_COPY is required to assign a tag to a item |
New Library Settings:
-
OPAC: Enable Digital Bookplate Search: when set to True for a given org unit, the digital bookplate search option will be available in the catalog.
Creating item Tags
There are two components to this feature: Item Tag Types and Item Tags.
Item Tag Types are used to define the type of tag, such as “Bookplates” or “Local History Notes”, as well as the organizational unit scope for use of the tag type.
Item Tags are associated with a Item Tag Type and are used to configure the list of tags that can be applied to copies, such as a list of memorial or donation labels, that are applicable to a particular organizational unit.
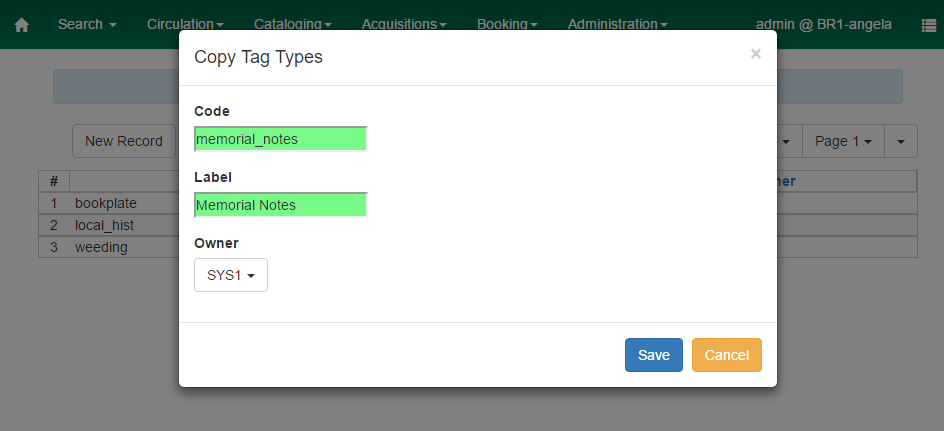
Create Item Tag Types
-
Go to Administration→Server Administration→Item Tag Types.
-
In the upper left hand corner, click New Record. A dialog box will appear. Assign the following to create a new Item Tag Type:
-
Code: a code to identify the item tag type.
-
Label: a label that will appear in drop down menus to identify the item tag type.
-
Owner: the organizational unit that can see and use the item tag type.
-
-
Click Save and the new Item Tag Type will appear in the list. Next create the associated Item Tags.

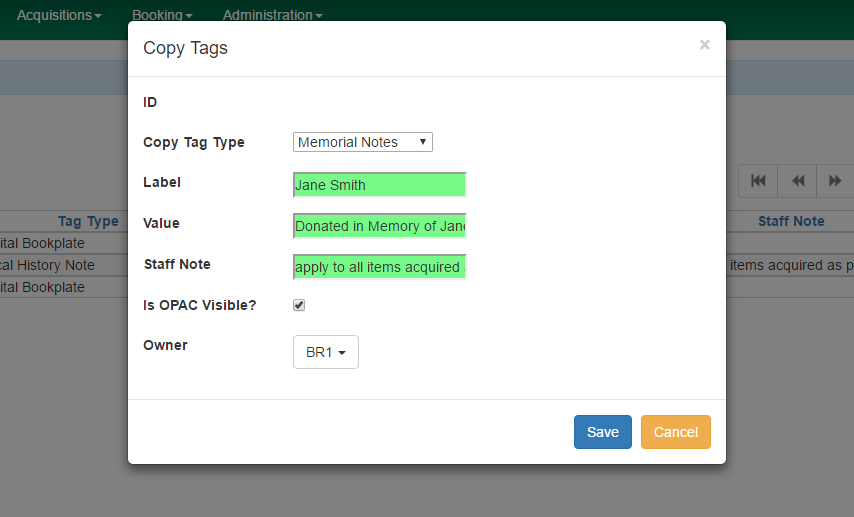
Create Item Tags
-
Go to Administration→Local Administration→Item Tags.
-
In the upper left hand corner, click New Record. A dialog box will appear. Assign the following to create a new Item Tag:
-
Item Tag Type: select the Item Tag Type with which you want to associate the new Item Tag.
-
Label: assign a label to the new item tag.
-
Value: assign a value to the new item tag. This will display in the catalog.
-
Staff Note: a note may be added to guide staff in when to apply the item tag.
-
Is OPAC Visible?: If a item tag is OPAC Visible, it can be searched for and viewed in the OPAC and the staff catalog. If a item tag is not OPAC Visible, it can only be searched for and viewed in the staff catalog.
-
Owner: select the organization unit at which this tag can be seen and used.
-
-
Click Save and the new Item Tag will appear in the list.
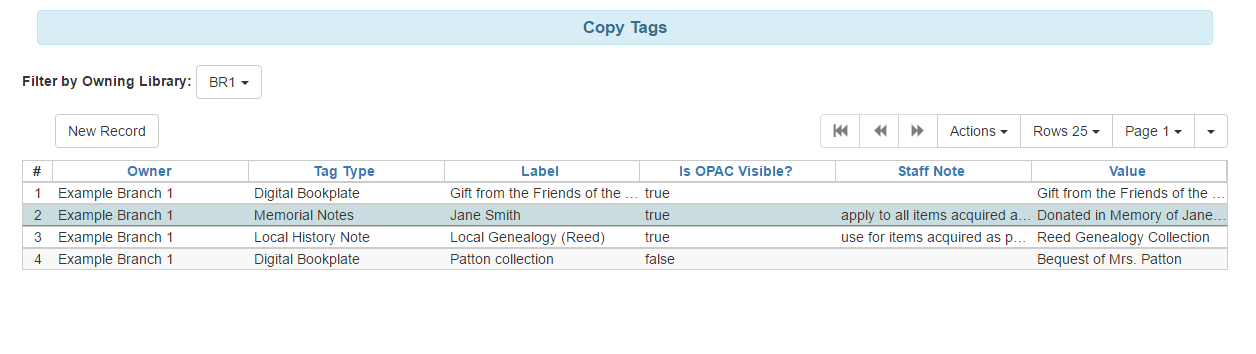
Managing Item Tags
Editing Tags
Existing item tags can be edited by selecting a tag and clicking Actions→Edit Record or right-clicking on a tag and selecting Edit Record. The dialog box will appear and you can modify the item tag. Click Save to save any changes. Changes will be propagated to any items that the tag has been attached to.