Address Alert
The Address Alert module gives administrators the ability to notify staff with a custom message when addresses with certain patterns are entered in patron records.
This feature only serves to provide pertinent information to your library system’s circulation staff during the registration process. An alert will not prevent the new patron account from being registered and the information will not be permanently associated with the patron account.
To access the Address Alert module, select Administration → Local Administration → Address Alerts.
|
You must have Local Administrator permissions or ADMIN_ADDRESS_ALERT permission to access the Address Alert module. |
General Usage Examples
-
Alert staff when an address for a large apartment is entered to prompt them to ask for unit number.
-
Alert staff when the address of a hotel or other temporary housing is entered.
-
Alert staff when an address for a different country is entered.
-
Alert staff when a specific city or zip code is entered if that city or zip code needs to be handled in a special way. If you have a neighboring city that you don’t have a reciprocal relationship with, you could notify staff that a fee card is required for this customer.
Access Control and Scoping
Each address alert is tied to an Org Unit and will only be matched against staff client instances of that Org Unit and its children.
When viewing the address alerts you will only see the alerts associated with the specific org unit selected in the "Context Org Unit" selection box. You won’t see alerts associated with parent org units, so the list of alerts isn’t a list of all alerts that may effect your org unit, only of the ones that you can edit.
The specific permission that controls access to configuring this feature is ADMIN_ADDRESS_ALERT. Local Administrator level users will already have this permission. It is possible for the Local Administrator to grant this permission to other staff.
Adding a new Address Alert
How to add an address to the alert list:
-
Log into the Evergreen Staff Client using a Local Administrator account or another account that has been granted the proper permission.
-
Click on Administration → Local Administration → Address Alerts.
-
Click "New Address Alert."
-
A form will open with the following fields to fill out:
Table 1. New Address Alert Fields Field
Description
Owner
Which Org Unit owns this alert. Set this to your system or branch.
Alert Message
Message that will be displayed to staff when this alert is triggered.
Street (1)
Street 1 field regular expression.
Street (2)
Street 2 field regular expression.
City
City regular expression.
County
County regular expression.
State
State regular expression.
Postal Code
Postal Code regular expression.
Country
Country regular expression.
Billing Address
Check-box that specifies that the alert will only match a billing address if checked.
Mailing Address
Check-box that specifies that the alert will only match a mailing address if checked.
Match All Fields
Check-box that controls if all the fields need to match to trigger the alert(checked), or only at least one field needs to match(unchecked).
Active
Check-box that controls if the alert is active or not. Inactive alerts are not processed.
Address Alert ID
Displays the internal database id for alert after the alert has been saved. This auto-populates.
-
Click save once you have finished.
Editing an Address Alert
To make changes to an existing alert, double click on the alert in the list. The editing form will appear, make your changes and click save or cancel when you are done.
If you don’t see your alerts, make sure the "Context Org Unit" selection box has the correct Org Unit selected.
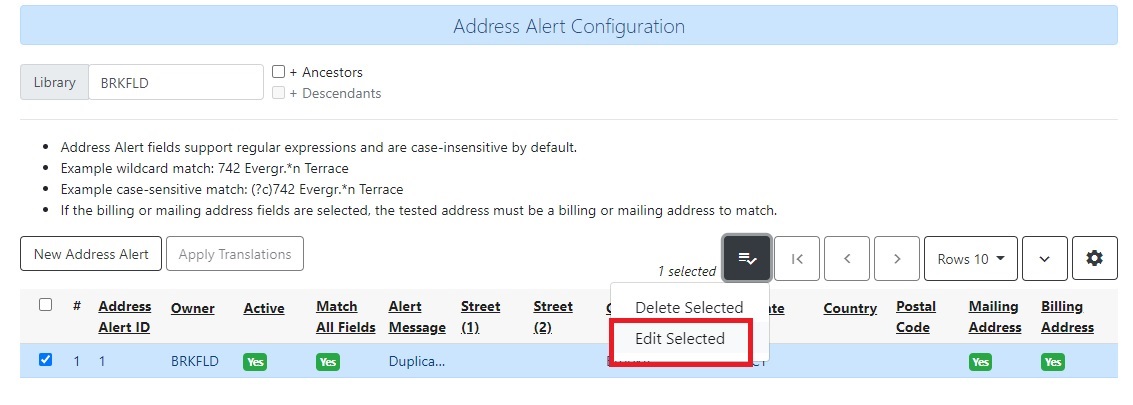
Deleting an Address Alert
To delete an alert or many alerts, click the selection check-box for all alerts you would like to delete. Then click the "Delete Selected" button at the top of the screen.
image::media/delete_address_alert.jpg
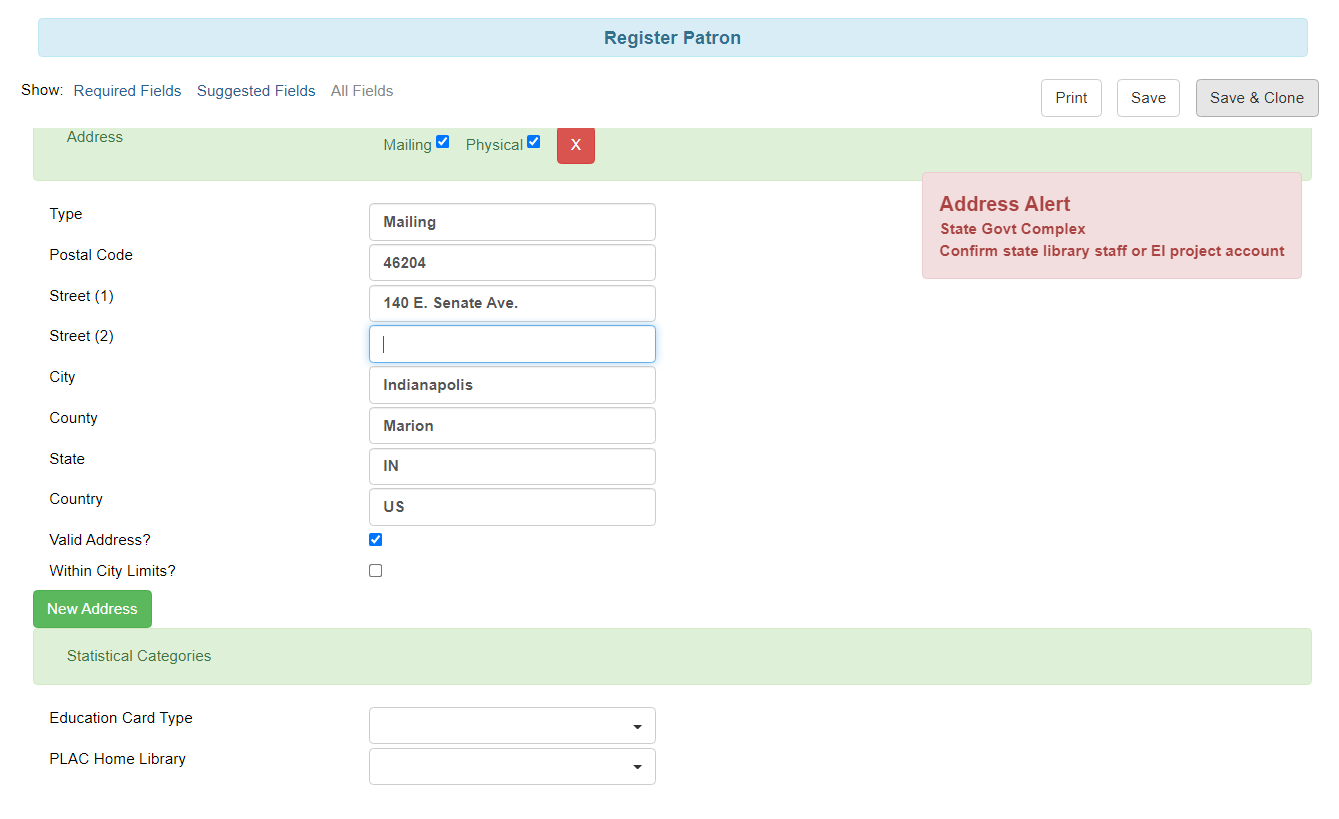
Staff View of Address Alerts
When an Address Alert is triggered by a matching address the staff will see the address block highlighted with a red dashed line, along with an "Address Alert" block which contains the alert message.
Here is an example of what staff would see.
Regular Expressions / Wildcards
All of the patterns entered to match the various address fields are evaluated as case-insensitive regular expressions by default.
|
Address Alerts use POSIX Regular Expressions included in the PostgreSQL database engine. See the PostgreSQL documentation for full details. |
If you want to do a case-sensitive match you need to prepend the pattern with "(?c)"
The simplest regular expression that acts as a wildcard is ".*", that matches any type of character zero or more times.
Examples
Match an apartment address to prompt for unit number.
-
Choose Owner Org Unit.
-
Active = Checked
-
Match All Fields = Checked
-
Alert Message = "This is a large apartment building, Please ask customer for unit number."
-
Street (1) = "1212 Evergreen Lane.*"
-
City = "mytown"
Match all addresses on a certain street. Matches ave and avenue because of ending wildcard.
-
Choose Owner Org Unit.
-
Active = Checked
-
Match All Fields = Checked
-
Alert Message = "This street is in a different county, please setup reciprocal card."
-
Street (1) = ".* Evergreen Ave.*"
-
City = "mytown"
Match several different cities with one alert. Could be used if certain cities don’t have reciprocal agreements. Note the use of parentheses and the | character to separate the different options.
-
Choose Owner Org Unit.
-
Active = Checked
-
Match All Fields = Checked
-
Alert Message = "Customer must purchase a Fee card."
-
City = "(Emeryville|San Jose|San Francisco)"
Development
Links to resources with more information on how and why this feature was developed and where the various source files are located.
-
Launchpad ticket for the feature request and development of address alerts - https://bugs.launchpad.net/evergreen/+bug/898248