Working with the MARC Editor
Editing MARC Records
-
Retrieve the record.
You can retrieve records in many ways, including:
-
If you know its database ID, enter it into Cataloging > Retrieve Bib Record by ID.
-
If you know its control number, enter it into Cataloging > Retrieve Bib Record by TCN.
-
Searching in the catalog.
-
Clicking on a link from the Acquisitions or Serials modules.
-
-
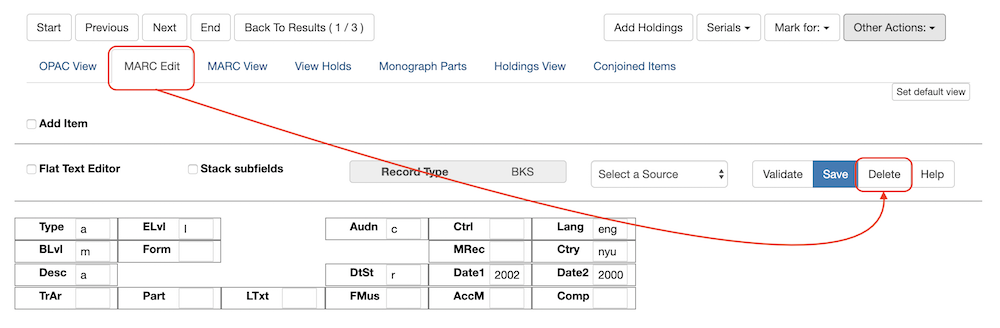
Click on the MARC Edit tab.
-
The MARC record will display.
-
Select viewing and editing options, if desired.
-
Stack subfields to display each subfield on its own line.
-
Flat-Text Editor switches to a plain-text (mnemonic) MARC format. This format can be useful when copying and pasting multiple lines. It also allows the use of tools like MarcEdit (http://marcedit.reeset.net/ ). Uncheck the box to switch back.
-
Note that you can use a backslash character as a placeholder in the flat text editor’s indicators and fixed-length fields.
-
Add Item allows attaching items quickly with call number and barcode. When Save is clicked, the copy editor will open. NOTE: Browser pop-up blockers will prevent this, please allow pop-ups.
-
-
Make changes as desired.
-
Right click into a tag field to add/remove rows or replace tags.
-
To work with the data in a tag or indicator, click or Tab into the required field. Right click to view valid tags or indicators.
You can navigate the MARC Editor using keyboard shortcuts. Click Help to see the shortcut menu from within the MARC Editor.
-
-
When finished, click Save. The record will remain open in the editor. You can close the browser window or browser tab. Or you can switch to another view from the navigation near the top (for example to view it as it appears in the OPAC choose OPAC View).
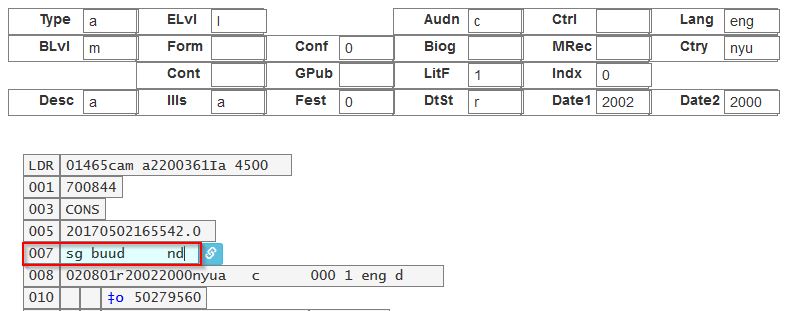
MARC Record Leader and MARC fixed field 008
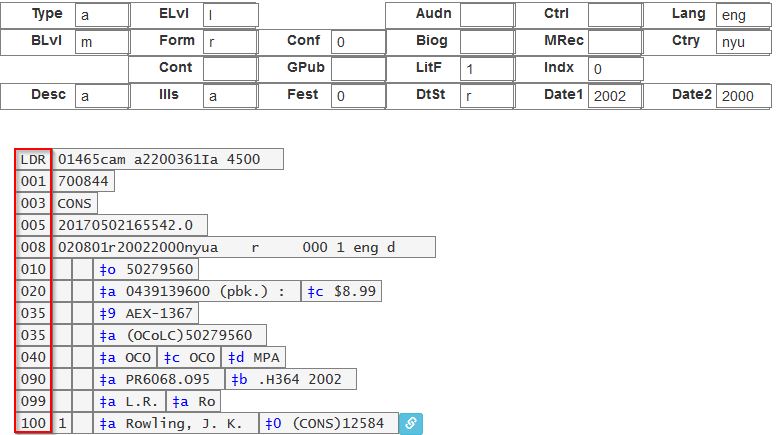
You can edit parts of the leader and the 008 field in the MARC Editor via the fixed field editor box displayed above the MARC record.
To edit the MARC record leader
-
Retrieve and display the appropriate record in MARC Edit view.
-
Click into any box displayed in the fixed field editor.
-
Press Tab or use the mouse to move between fields.
-
Click Save.
-
The OPAC icon for the appropriate material type will display.
OPAC icons for text, moving pictures and sound rely on correct MARC coding in the leader, 007, and 008, as do OPAC search filters such as publication date, item type, or target audience.
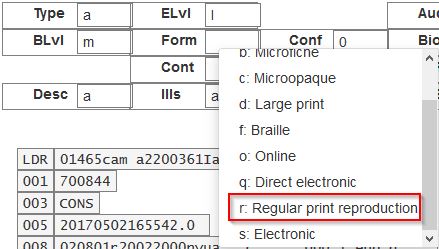
MARC Fixed Field Editor Right-Click Context Menu Options
The MARC Fixed Field Editor provides suggested values for select fixed fields based on the record type being edited. Users can right-click on the value control for a fixed field and choose the appropriate value from the menu options. The Evergreen database contains information from the Library of Congress’s MARC 21 format standards that includes possible values for select fixed fields. The right-click context menu options are available for fixed fields whose values are already stored in the database. Fixed fields that do not contain possible values in the database, the user will receive the default web browser menu (such as cut, copy, paste, etc.).
To Access the MARC Fixed Field Editor Right-Click Context Menu Options:
-
Within the bibliographic record that needs to be edited, select MARC Edit.
-
Make sure that the Flat-Text Editor checkbox is not selected and that you are not using the Flat-Text Editor interface.
-
Right-click on the value control for the fixed field that needs to be edited.

-
Select the appropriate value for the fixed field from the menu options.
-
Continue editing the MARC record, as needed. Once you are finished editing the record, click Save.
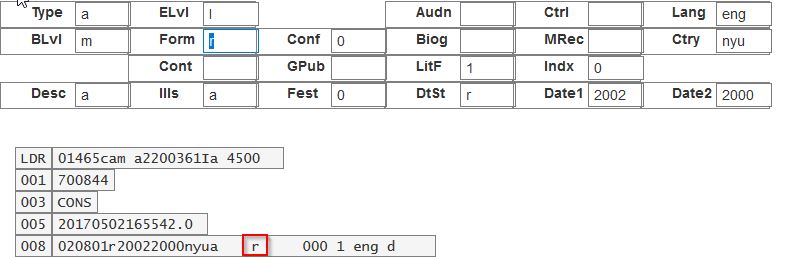
Changing the values in the fixed fields will also update the appropriate position in the Leader or 008 Field and other applicable fields (such as the 006 Field).
MARC Editor users retain the option of leaving the fixed field value blank or entering special values (such as # or | ).
| It may be necessary for MARC Editor users to first correctly pad the fixed fields to their appropriate lengths before making further modifications to the fixed field values. |
Administration The Evergreen database already contains information from the Library of Congress’s MARC 21 format standards that includes possible values for select fixed fields. Users may also add values to these and other fixed fields through the MARC Coded Value Maps interface. Once new values are added, the right-click context menu for the selected fixed field will display those values in the MARC Editor for any Record Type that utilizes that fixed field. There are three relevant tables that contain the values that display in the fixed field context menu options:
-
config.marc21_ff_pos_map describes, for the given record type, where a fixed field is located, its start position, and its length.
-
config.coded_value_map defines the set of valid values for many of the fixed fields and the translatable, human-friendly labels for them.
-
config.record_attr_definition links together the information from the config.marc21_ff_pos_map and config.coded_value_map tables.
MARC Tag-table Service
The tag tables for the web staff client MARC editor are stored in the database. The tag-table service has the following features:
-
specifies whether (sub)fields are optional or mandatory
-
specifies whether (sub)fields are repeatable or not
-
a coded value map can be associated with a subfield to establish a controlled vocabulary for that subfield
-
MARC field and subfield definitions can be overridden by institutions further down in the organizational unit hierarchy. This allows, for example, a library to specify definitions for local MARC tags.
-
values supplied by the tag-table service are used to populate values in context menus in the web staff client MARC editor.
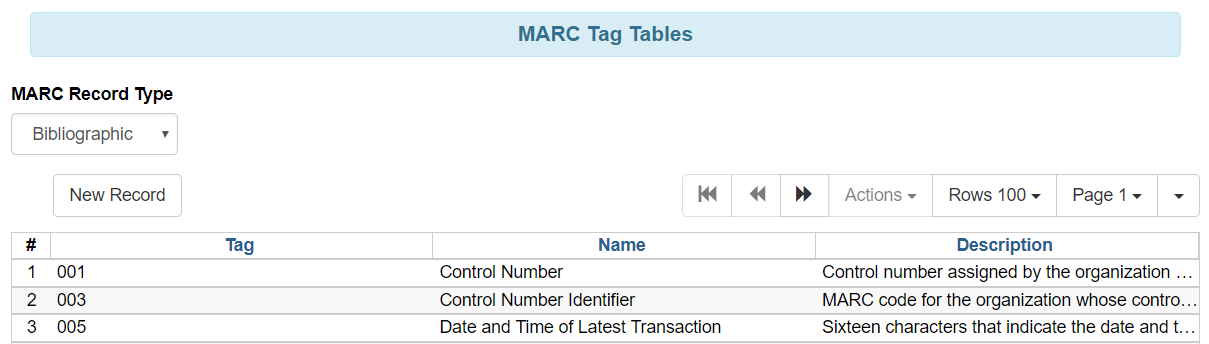
MARC Tag Tables can be found under Administration → Server Administration → MARC Tag Tables.
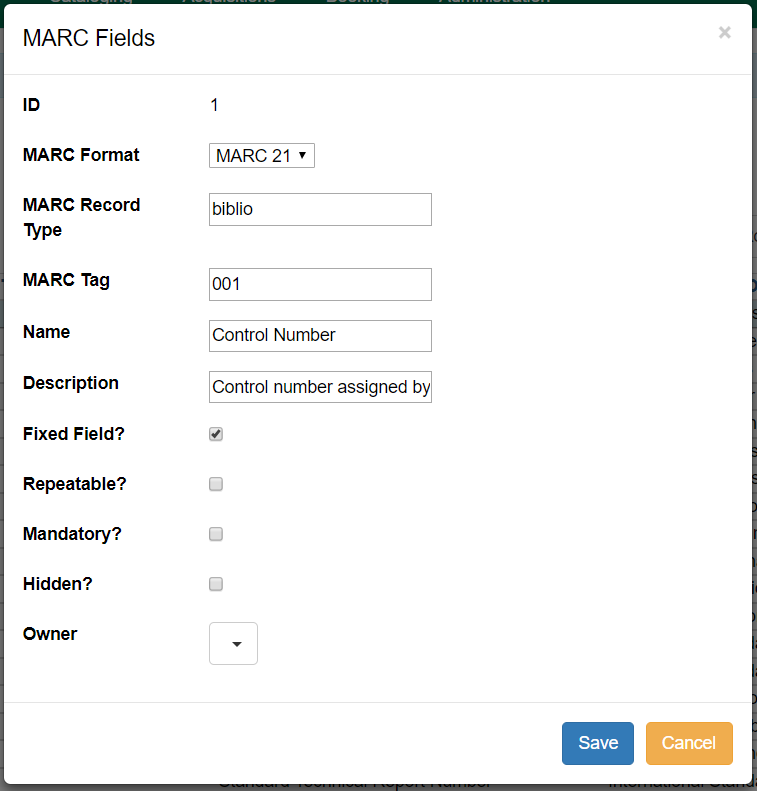
MARC Tag Tables Grid:
MARC Tag Tables Detail:
The initial seed data for the in-database tag table is derived from the current tooltips XML file.
MARC 007 Field Physical Characteristics Wizard
The MARC 007 Field Physical Characteristics Wizard enables catalogers to interact with a database wizard that leads the user step-by-step through the MARC 007 field positions. The wizard displays the significance of the current position and provides dropdown lists of possible values for the various components of the MARC 007 field in a more user-friendly way.
To Access the MARC 007 Field Physical Characteristics Wizard for a Record that Does Not Already Contain the 007 Field (i.e. Creating the 007 Field from Scratch):
-
Within the bibliographic record that needs to be edited, select MARC Edit.
-
Make sure that the Flat-Text Editor checkbox is not selected and that you are not using the Flat-Text Editor interface.
-
Right-click in the MARC field column.
-
Click Add/Replace 007. The 007 row will appear in the record.
-
Click the chain link icon to the right of the field.
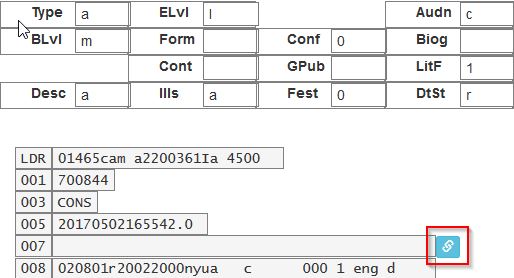
-
Click Physical Characteristics Wizard.
The MARC 007 Field Physical Characteristics Wizard will open.
Using the Physical Characteristics Wizard:
As the user navigates through the wizard, each position will display its corresponding label that describes the significance of that position. Each position contains a selection of dropdown choices that list the possible values for that particular position. When the user makes a selection from the dropdown options, the value for that position will also change.
The first value defines the Category of Material. Users select the Category of Material for the given record by choosing an option from the Category of Material? dropdown menu. The choices within the remaining character positions will be appropriate for the Category of Material selected.
Once the Category of Material is selected, click Next.
Evergreen will display the result of each selection in the preview above. The affected character will be in red.
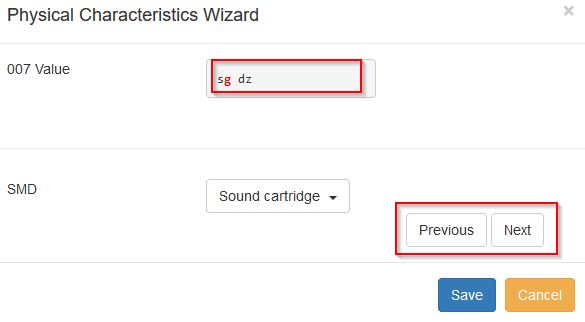
By clicking either the Previous or Next buttons, the user may step forward and backward, as needed, through the various positions in the 007 field.
Once the user enters all of the applicable values for the 007 field and is ready to exit the wizard, click Save.
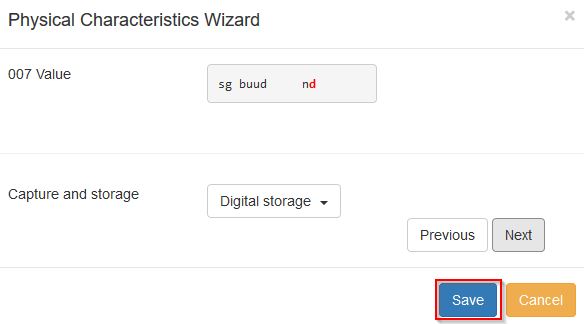
All of the values selected will be stored and displayed within the 007 field of the bibliographic record.
Continue editing the MARC record, as needed. Once the user is finished editing the record, click Save.
