Generating Reports from Templates
Now you are ready to run the report from the template you have created.
-
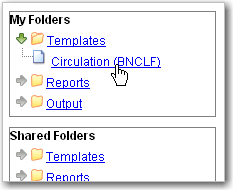
In the My Folders section click the arrow next to Templates to expand this folder and select circulation.
-
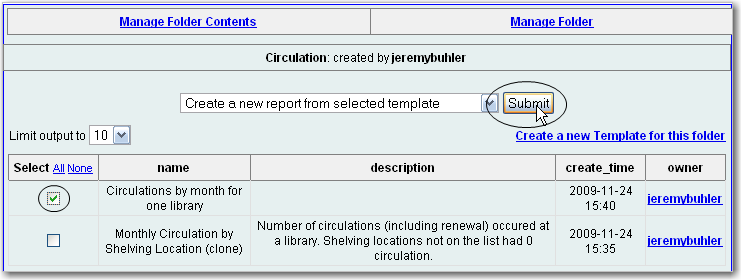
Select the box beside Circulations by month for one library. Select Create a new report from selected template from the dropdown menu. Click Submit.
-
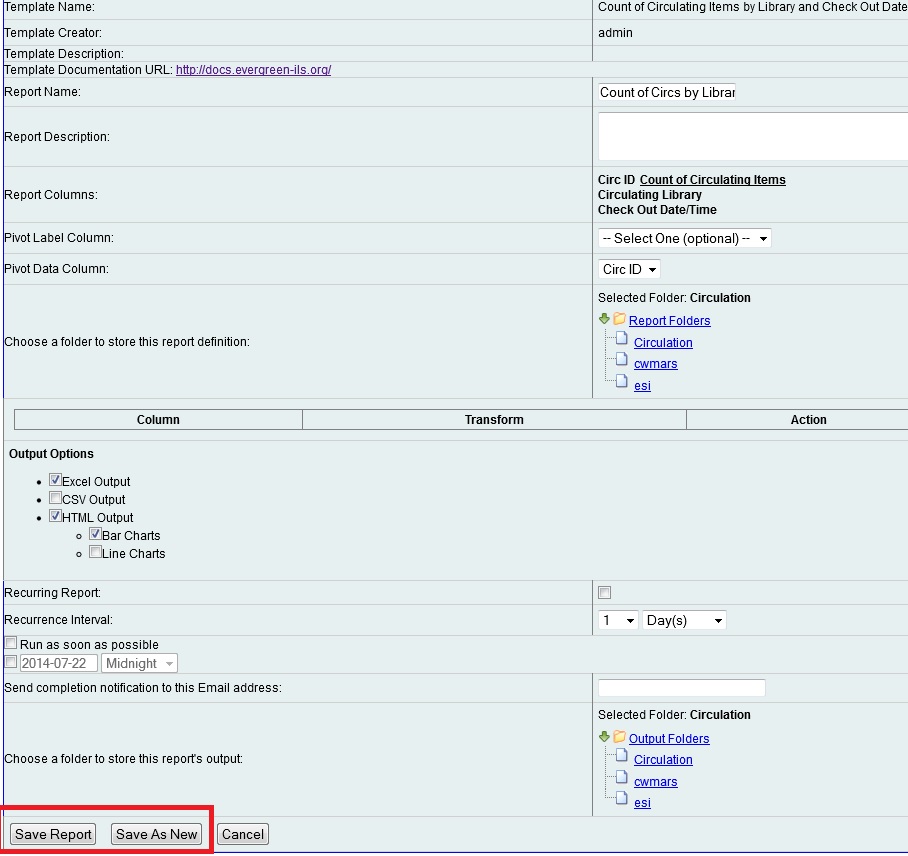
Complete the first part of report settings. Only Report Name and Choose a folder… are required fields.
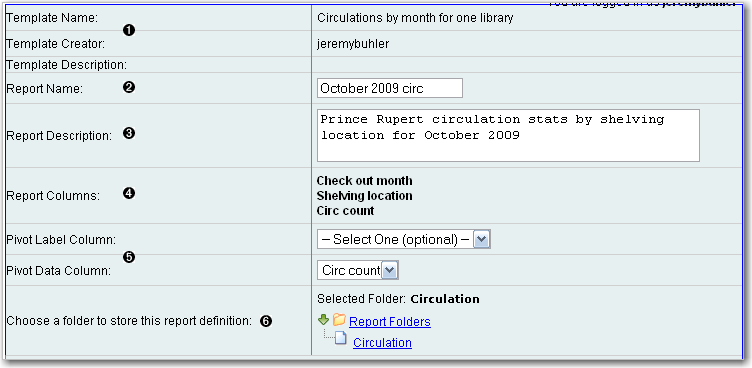
1) Template Name, Template Creator, and Template Description are for informational purposes only. They are hard coded when the template is created. At the report definition stage it is not possible to change them.
2) Report Name is required. Reports stored in the same folder must have unique names.
3) Report Description is optional but may help distinguish among similar reports.
4) Report Columns lists the columns that will appear in the output. This is derived from the template and cannot be changed during report definition.
5) Pivot Label Column and Pivot Data Column are optional. Pivot tables are a different way to view data. If you currently use pivot tables in MS Excel it is better to select an Excel output and continue using pivot tables in Excel.
6) You must choose a report folder to store this report definition. Only report folders under My Folders are available. Click on the desired folder to select it.
-
Select values for the Circulation > Check Out Date/Time. Use the calendar widget or manually enter the desired dates, then click Add to include the date on the list. You may add multiple dates.

The Transform for this field is Year + Month, so even if you choose a specific date (2009-10-20) it will appear as the corresponding month only (2009-10).
It is possible to select relative dates. If you select a relative date 1 month ago you can schedule reports to automatically run each month. If you want to run monthly reports that also show comparative data from one year ago, select a relative date 1 month ago, and 13 months ago.
-
Select a value for the Circulating Library.
-
Complete the bottom portion of the report definition interface, then click Save.
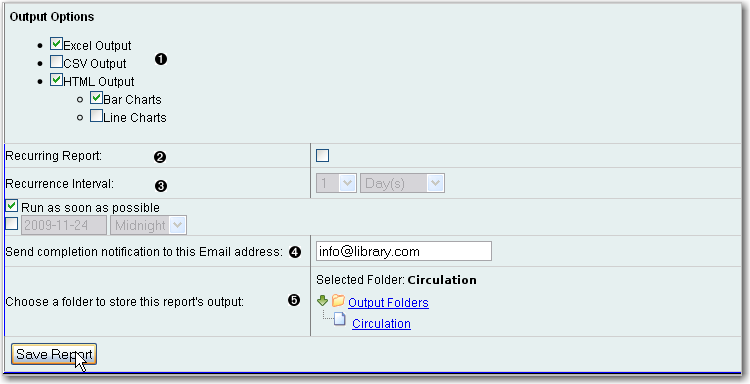
1) Select one or more output formats. In this example the report output will be available as an Excel spreadsheet, an HTML table (for display in the staff client or browser), and as a bar chart.
2) If you want the report to be recurring, check the box and select the Recurrence Interval as described in Recurring Reports. In this example, as this is a report that will only be run once, the Recurring Report box is not checked.
3) Select Run as soon as possible for immediate output. It is also possible to set up reports that run automatically at future intervals.
4) It is optional to fill out an email address where a completion notice can be sent. The email will contain a link to password-protected report output (staff login required). If you have an email address in your Local System Administrator account it will automatically appear in the email notification box. However, you can enter a different email address or multiple addresses separated by commas.
-
Select a folder for the report’s output.
-
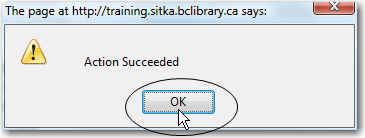
You will get a confirmation dialogue box that the Action Succeeded. Click OK.
Once saved, reports stay there forever unless you delete them.
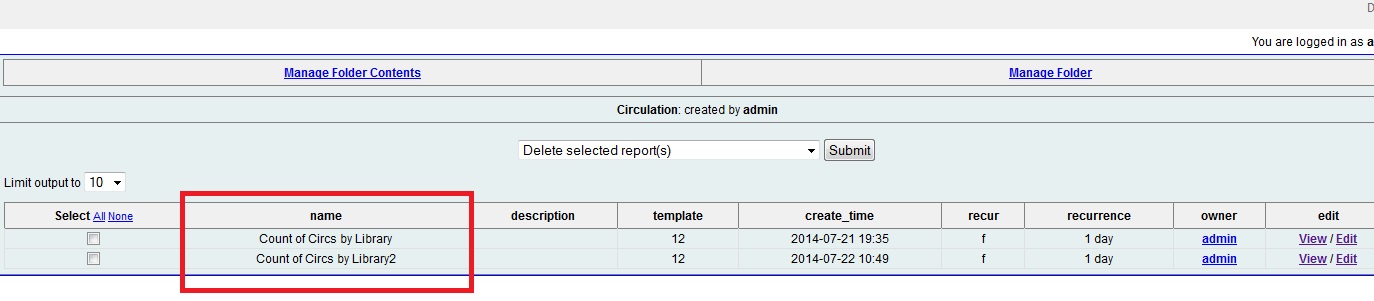
Viewing and Editing Report Parameters
New options to view or edit report parameters are available from the reports folder.
To view the parameters of a report, select the report that you want to view from the Reports folder, and click View. This will enable you to view the report, including links to external documentation and field hints. However, you cannot make any changes to the report.

To edit the parameters of a report, select the report that you want to view from the Reports folder, and click Edit. After making changes, you can Save [the] Report or Save as New. If you Save the Report, any subsequent report outputs that are generated from this report will reflect the changes that you have made.
In addition, whenever there is a pending (scheduled, but not yet started) report output, the interface will warn you that the pending output will be modified. At that point, you can either continue or choose the alternate Save as New option, leaving the report output untouched.
If, after making changes, you select, Save as New, then you have created a new report by cloning and amending a previously existing report. Note that if you create a new report, you will be prompted to rename the new report. Evergreen does not allow two reports with the same name to exist. To view or edit your new report, select the reports folder to which you saved it.