Batch Importing MARC Records
Introduction
The cataloging module includes an enhanced MARC Batch Import interface for loading MARC (and MARCXML) records. In general, it can handle batches up to 5,000 records without a problem. This interface allows you to specify match points between incoming and existing records, to specify MARC fields that should be overlaid or preserved, and to only overlay records if the incoming record is of higher quality than the existing record. Records are added to a queue where you can apply filters that enable you to generate any errors that may have occurred during import. You can print, email or export your queue as a CSV file.
Permissions
To use match sets to import records, you will need the following permission:
ADMIN_IMPORT_MATCH_SET
Record Display Attributes
This feature enables you to specify the tags and subfields that will display in records that appear in the import queue.
Record Match Sets
This feature enables you to create custom match points that you can use to accurately match incoming records with existing catalog records.
Creating a Match Set
In this example, to demonstrate matching on record attributes and MARC tags and subfields, we will create a record match set that defines a match based on the title of the record, in either the 240 or 245, and the fixed field, Lang. You can add multiple record attributes and MARC tags to customize a record match set.
-
Click Cataloging → MARC Batch Import/Export.
-
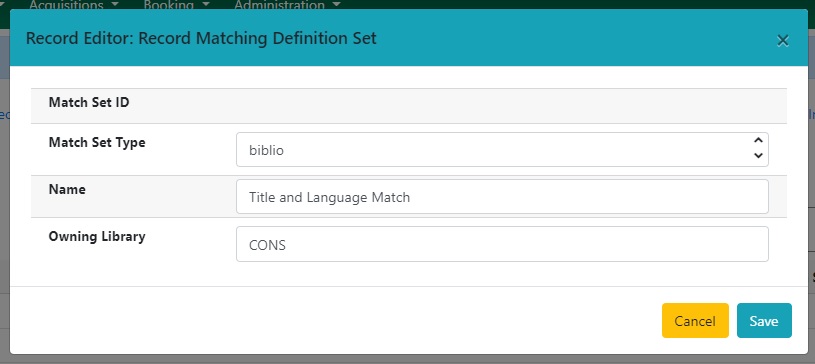
Create a new record match set. Click Record Match Sets → New Match Set.
-
Enter a name for the record match set.
-
Select an Owning Library from the drop down menu. Staff with permissions at this location will be able to use this record match set.
-
Select a Match Set Type from the drop down menu. You can create a match set for authority records or bibliographic records.
-
Click Save.
-
The screen will refresh to list the record match set that you created. Click the link to the record match set.
-
Create an expression that will define the match points for the incoming record. You can choose from two areas to create a match: Record Attribute or MARC Tag and Subfield. You can use the Boolean operators AND and OR to combine these elements to create a match set.
-
Select a Record Attribute from the drop-down menu.
-
Enter a Match Score. The Match Score indicates the relative importance of that match point as Evergreen evaluates an incoming record against an existing record. You can enter any integer into this field. The number that you enter is only important as it relates to other match points. Recommended practice is that you create a match score of one (1) for the least important match point and assign increasing match points to the power of 2 to working points in increasing importance.
-
Check the Negate? box if you want to negate the match point. Checking this box would be the equivalent of applying a Boolean operator of NOT to the match point.

-
Select an operator from the expression tree to the right.
-
Click Add to Selected Node. Once this is selected, the tree will refresh and update with the new expression.
-
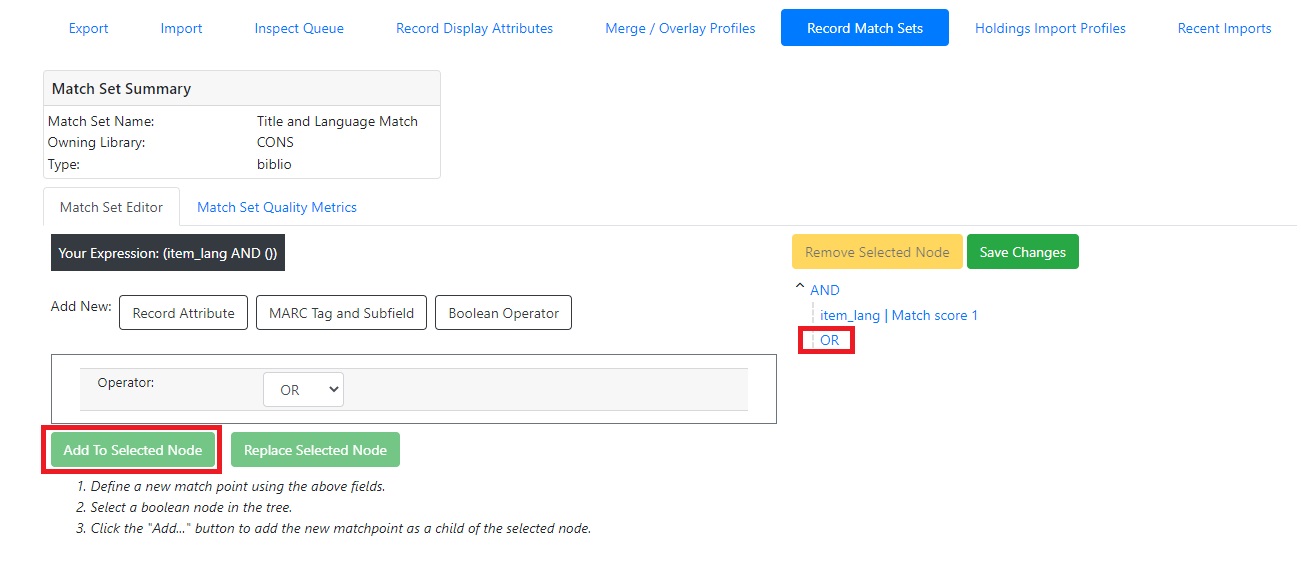
Enter another Boolean Operator to further refine your match set.
-
Click Boolean Operator.
-
Select the OR operator from the drop down menu.
-
Click Add to Selected Node. The operator will appear on the tree.
-
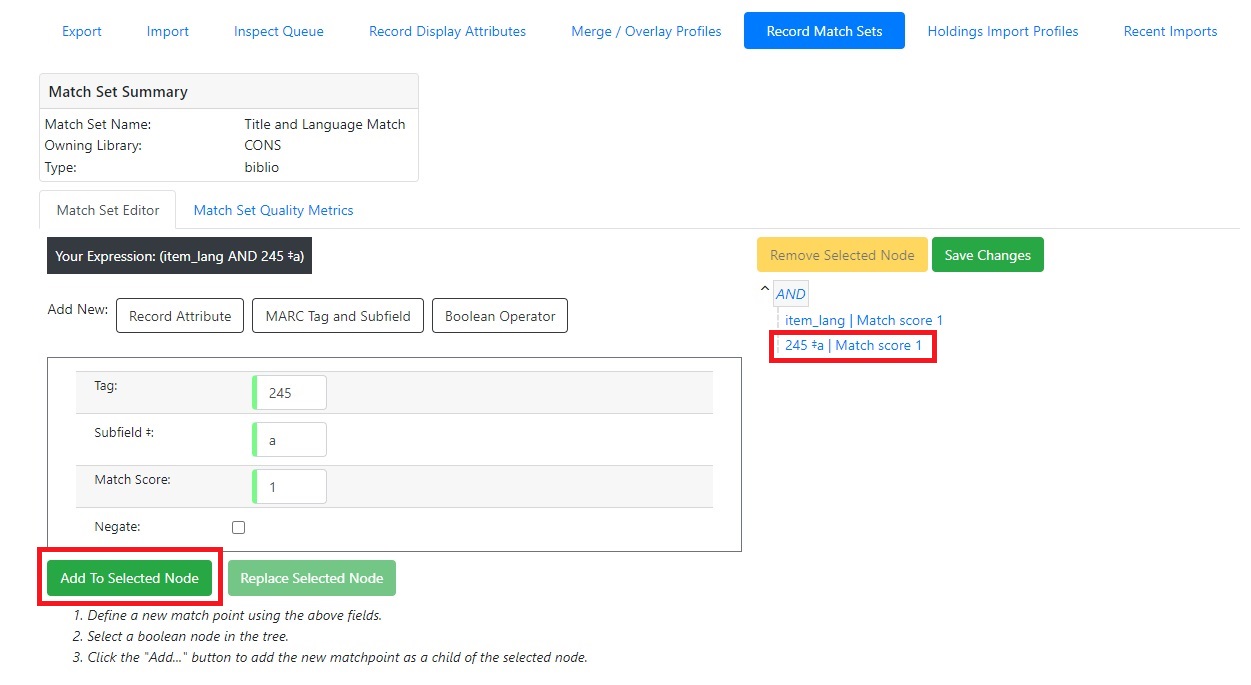
Click MARC Tag and Subfield.
-
Enter a MARC tag on which you want the records to match.
-
Enter a subfield on which you want the records to match.
-
Enter a Match Score. The Match Score indicates the relative importance of that match point as Evergreen evaluates an incoming record against an existing record. You can enter any integer into this field. The number that you enter is only important as it relates to other match points. Recommended practice is that you create a match score of one (1) for the least important match point and assign increasing match points to the power of 2 to working points in increasing importance.
-
Check the Negate? box if you want to negate the match point. Checking this box would be the equivalent of applying a Boolean operator of NOT to the match point.
-
Click Add to Selected Node. Once this is selected, the tree will refresh and update with the new expression.
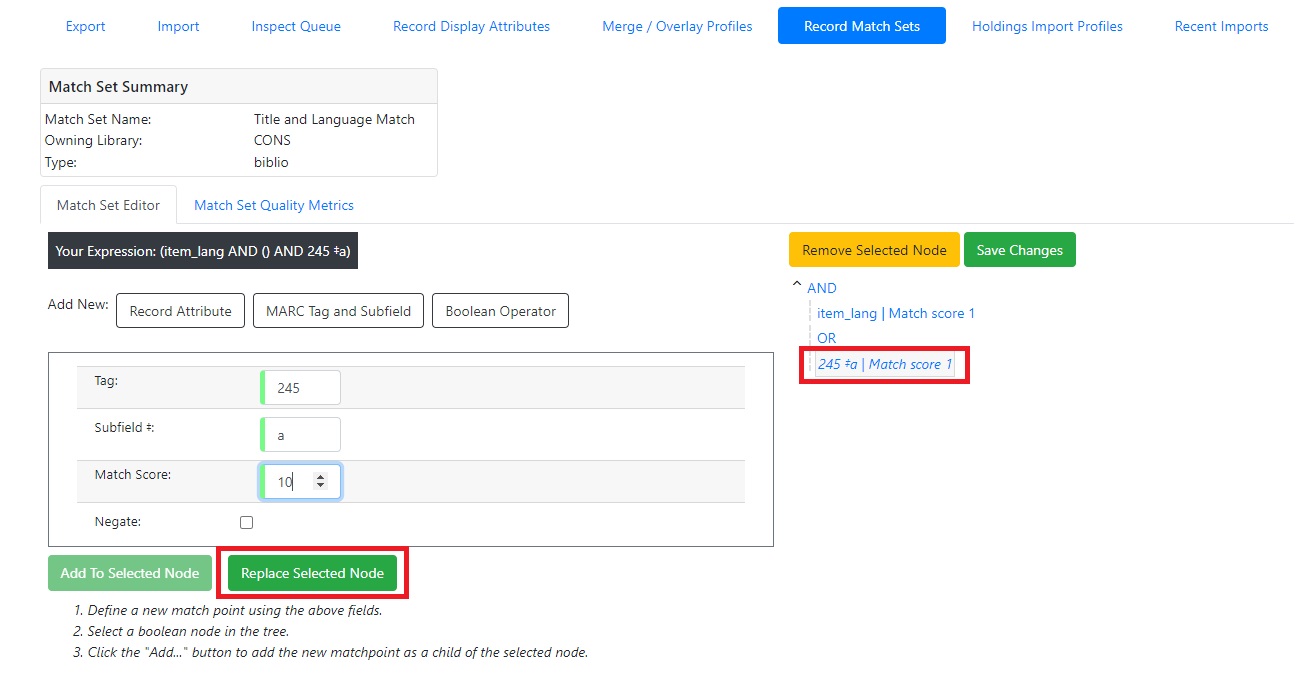
Replace Mode
Replace Mode enables you to replace an existing part of the expression tree with a new record attribute, MARC tag, or Boolean operator. For example, if the top of the tree is AND, in Replace Mode, you could change that to an OR.
-
Create a working match point.
-
Click on an expression in the tree to edit.
-
Make any changes in the form.
-
Click Replace Selected Node.
-
The updated change will display in the tree.
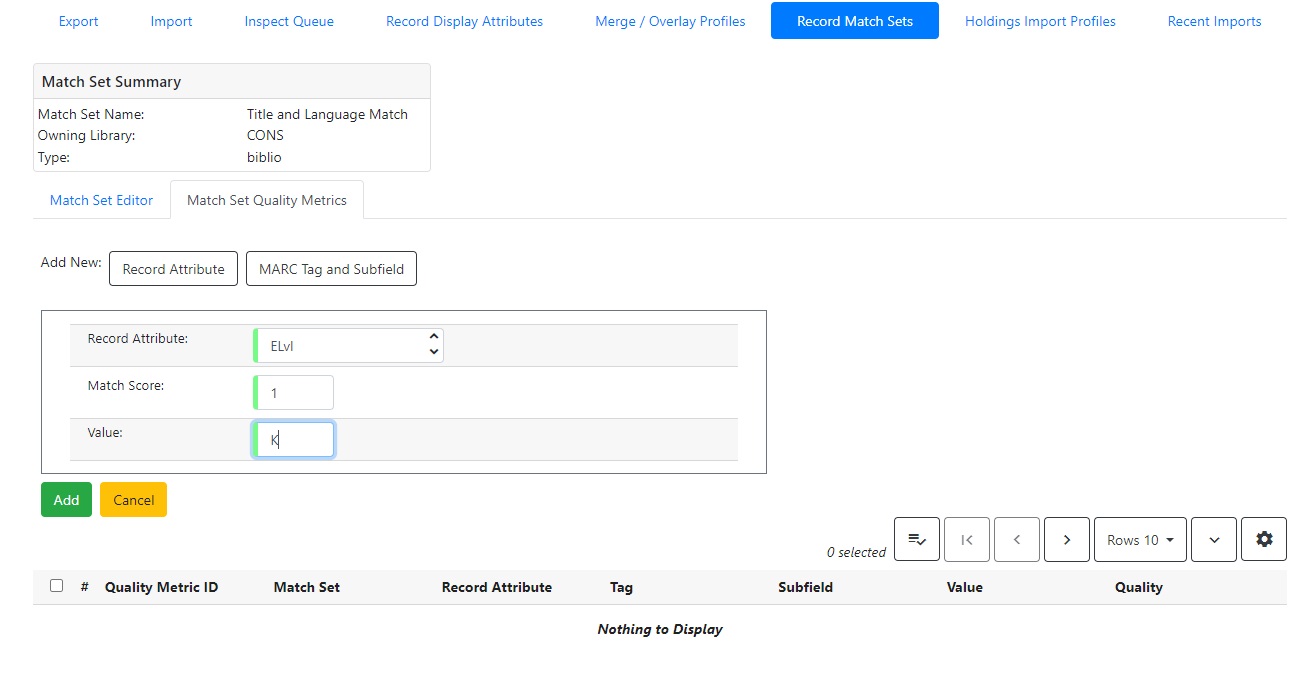
Quality Metrics
-
Set the Quality Metrics for this Match Set. Quality metrics are used to determine the overall quality of a record. Each metric is given a weight and the total quality value for a record is equal to the sum of all metrics that apply to that record. For example, a record that has been cataloged thoroughly and contains accurate data would be more valuable than one of poor quality. You may want to ensure that the incoming record is of the same or better quality than the record that currently exists in your catalog; otherwise, you may want the match to fail. The quality metric is optional.
-
You can create quality metrics based on the record attribute or the MARC Tag and Subfield.
-
Click Record Attribute.
-
Select an attribute from the drop down menu.
-
Enter a value for the attribute.
-
Enter a match score. You can enter any integer into this field. The number that you enter is only important as it relates to other quality values for the current configuration. Higher scores would indicate increasing quality of incoming records. You can, as in the expression match score, increase the quality points by increasing subsequent records by a power of 2 (two).
-
Click Add.
Merge/Overlay Profiles
If Evergreen finds a match for an incoming record in the database, you need to identify which fields should be replaced, which should be preserved, and which should be added to the record. Click the Merge/Overlay Profiles button to create a profile that contains this information.
You can use these profiles when importing records through the MARC Batch Importer or Acquisitions Load MARC Order Records interface.
You can create a new profile by clicking the New Merge Profile button. Available options for handling the fields include:
-
Preserve specification - fields in the existing record that should be preserved.
-
Replace specification - fields in existing record that should be replaced by those in the incoming record.
-
Add specification - fields from incoming record that should be added to existing record (in addition to any already there.)
-
Remove specification - fields that should be removed from incoming record.
-
Update bib source - If this value is false, just the bibliographic data will be updated when you overlay a new MARC record. If it is true, then Evergreen will also update the record’s bib source to the one you select on import; the last edit date to the date the new record is imported, and the last editor to the person who imported the new record.
You can add multiple tags to the specification options, separating each tag with a comma.
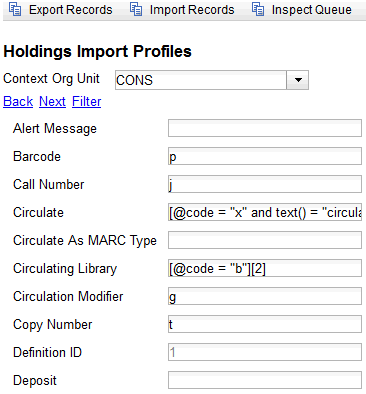
Import Item Attributes
If you are importing items with your records, you will need to map the data in your holdings tag to fields in the item record. Click the Holdings Import Profile button to map this information.
-
Click the New Definition button to create a new mapping for the holdings tag.
-
Add a Name for the definition.
-
Use the Tag field to identify the MARC tag that contains your holdings information.
-
Add the subfields that contain specific item information to the appropriate item field.
-
At a minimum, you should add the subfields that identify the Circulating Library, the Owning Library, the Call Number and the Barcode.
| All fields (except for Name and Tag) can contain a MARC subfield code (such as "a") or an XPATH query. You can also use the related library settings to set defaults for some of these fields. |
| Field | Recommended | Description |
|---|---|---|
Alert Message |
||
Barcode |
Yes |
|
Call Number |
Yes |
|
Circulate |
||
Circulate As MARC Type |
||
Copy Number |
||
Definition ID |
||
Deposit |
||
Deposit Amount |
||
Holdable |
||
Name |
Yes |
Name you will choose from the MARC Batch Import screen |
OPAC Visible |
||
Overlay Match ID |
The copy ID of an existing item to overlay |
|
Owner |
||
Owning Library |
Yes |
|
Parts Data |
Of the format |
|
Price |
||
Private Note |
||
Public Note |
||
Reference |
||
Shelving Location |
||
Stat Cat Data |
Of the format |
|
Status |
||
Tag |
Yes |
MARC Holdings Tag/Field (e.g. 949). Use the Tag field to identify the MARC tag that contains your holdings information. |
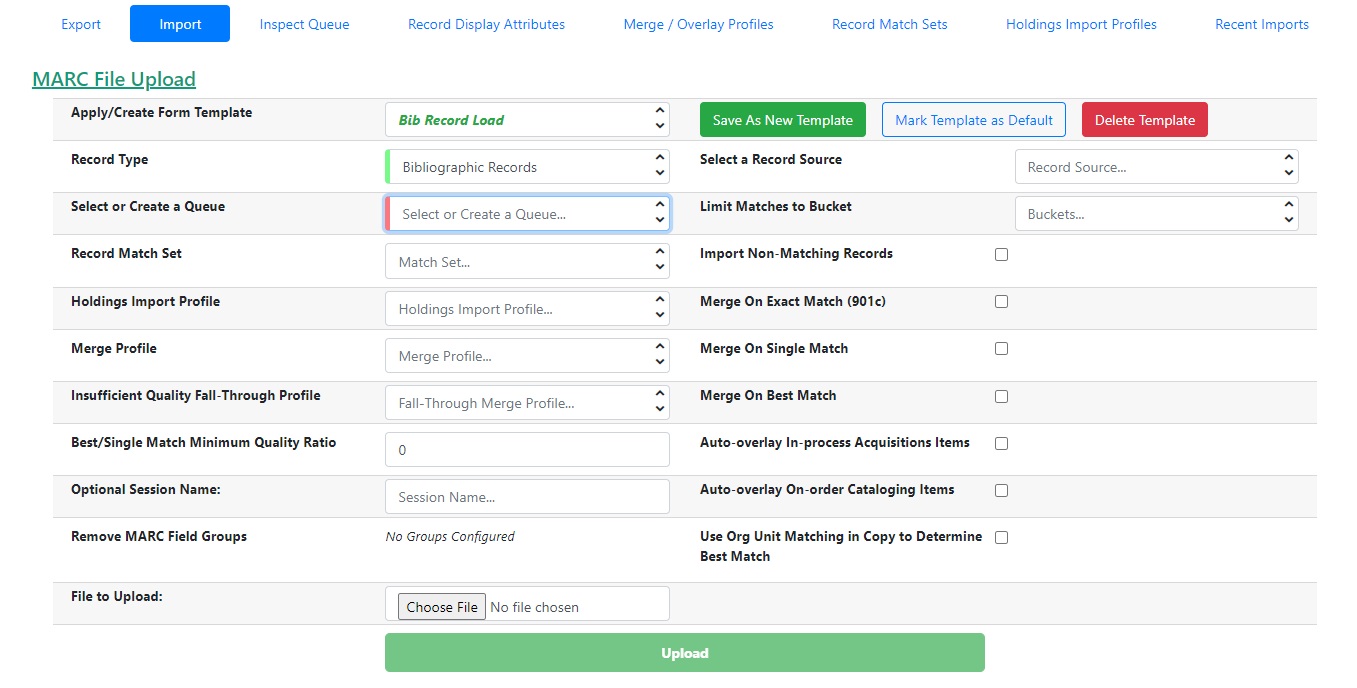
Import Records
The Import Records interface incorporates record match sets, quality metrics, more merging options, and improved ways to manage your queue. In this example, we will import a batch of records. One of the records in the queue will contain a matching record in the catalog that is of lower quality than the incoming record. We will import the record according to the guidelines set by our record match set, quality metrics, and merge/overlay choices that we will select.
-
Save or upload a template.
-
Select a Record Type from the drop down menu.
-
Create a queue to which you can upload your records, or add you records to an existing queue. Queues are linked to match sets and a holdings import profile. You cannot change a holdings import or record match set for a queue.
-
Select a Record Match Set from the drop down menu.
-
Select a Holdings Import Profile if you want to import holdings that are attached to your records.
-
Select a Merge Profile. Merge profiles enable you to specify which tags should be removed or preserved in incoming records.
-
Select an Insufficient Quality Fall-Through Profile if desired. This field enables you to indicate that if the inbound record does not meet the configured quality standards, then you may still import the record using an alternate merge profile. This field is typically used for selecting a merge profile that allows the user to import holdings attached to a lower quality record without replacing the existing (target) record with the incoming record. This field is optional.
-
Enter a Best/Single Match Minimum Quality Ratio. Divide the incoming record quality score by the record quality score of the best match that might exist in the catalog. By default, Evergreen will assign any record a quality score of 1 (one). If you want to ensure that the inbound record is only imported when it has a higher quality than the best match, then you must enter a ratio that is higher than 1. For example, if you want the incoming record to have twice the quality of an existing record, then you should enter a 2 (two) in this field. If you want to bypass all quality restraints, enter a 0 (zero) in this field.
-
Make an Optional Session Name if desired.
-
Remove MARC Field Groups if applicable.
-
Select a Record Source from the drop down menu.
-
Select from Limit Matches to Bucket if desired.
-
Select Import Non-Matching Records if applicable.
-
Choose one of the following import options if you want to auto-import records:
-
Merge on Single Match - Using the Record Match Set, Evergreen will only attempt to perform the merge/overlay action if only one match was found in the catalog.
-
Merge on Best Match - If more than one match is found in the catalog for a given record, Evergreen will attempt to perform the merge/overlay action with the best match as defined by the match score and quality metric.
Quality ratio affects only the Merge on Single Match and Merge on Best Match options. -
Choose Auto-overlay In-process Acquisitions Items if you want to overlay temporary copies that were created by the Acquisitions module. The system will attempt to overlay copies that:
-
have associated lineitem details (that is, they were created by the acquisitions process),
-
that lineitem detail has the same owning_lib as the incoming copy’s owning_lib, and
-
the current copy associated with that lineitem detail is In process.
-
-
Browse to find the appropriate file, and click Upload. The file will be uploaded to a queue. The file can be in either MARC or MARCXML format.
-
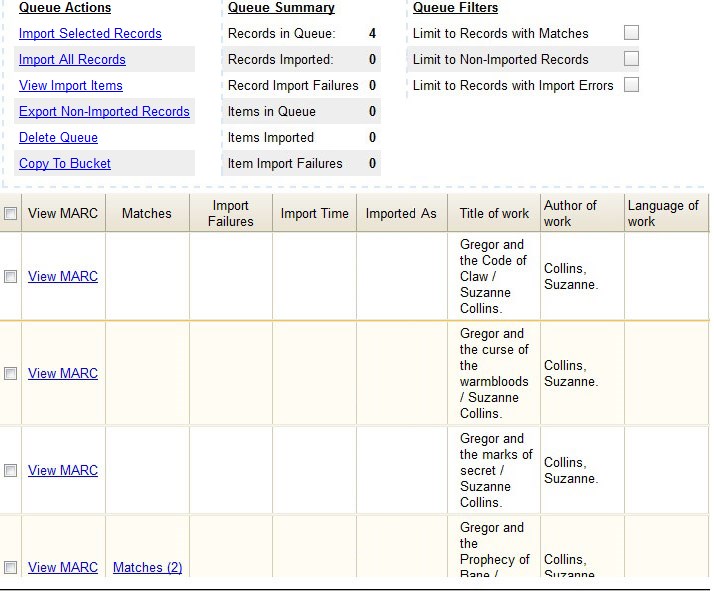
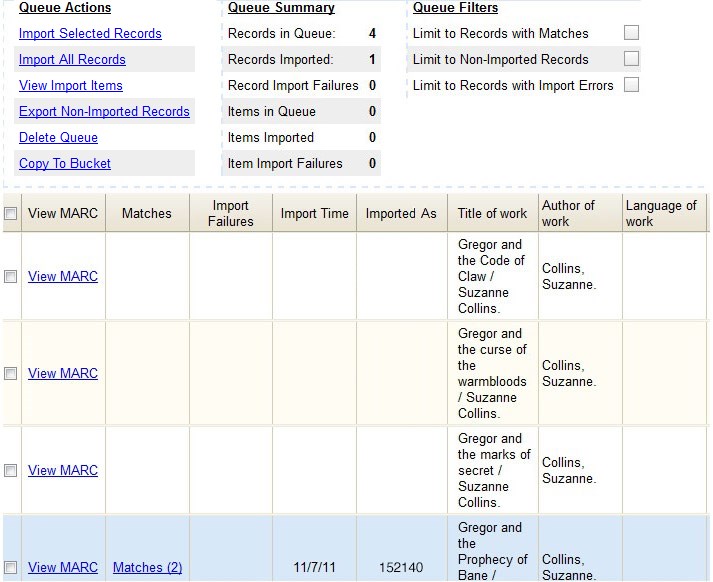
The screen will display records that have been uploaded to your queue. Above the table there are three sections:
-
Queue Actions lists common actions for this queue. Export Non-Imported Records will export a MARC file of records that failed to import, allowing those records to be edited as needed and imported separately. (Those records can be viewed by clicking the Limit to Non-Imported Records filter.)
-
Queue Summary shows a brief summary of the records included in the queue.
-
Queue Filters provides options for limiting which records display in the table.
-
-
If Evergreen indicates that matching records exist, then click the Matches link to view the matching records. Check the box adjacent to the existing record that you want to merge with the incoming record.

-
Click Back to Import Queue.
-
Check the boxes of the records that you want to import, and click Import Selected Records, or click Import All Records.
-
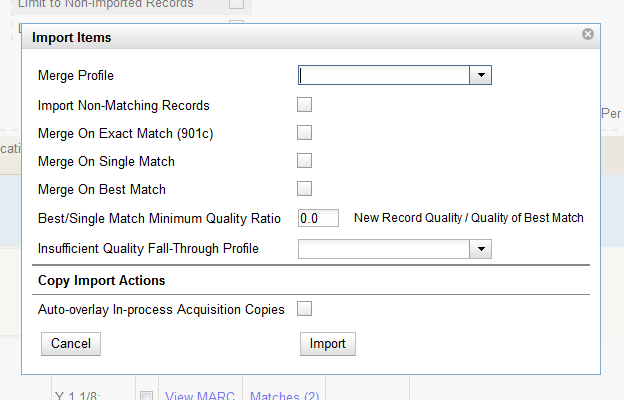
A pop up window will offer you the same import choices that were present on the Import Records screen. You can choose one of the import options, or click Import.
-
The screen will refresh. The Queue Summary indicates that the record was imported. The Import Time column records the date that the record was imported. Also, the Imported As column should now display the database ID (also known as the bib record number) for the imported record.
-
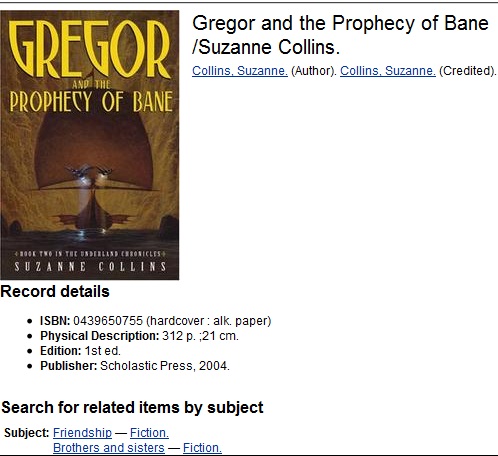
You can confirm that the record was imported by using the value of the Imported As column by selecting the menu Cataloging → Retrieve title by database ID and using the supplied Imported As number. Alternatively, you can search the catalog to confirm that the record was imported.
-
Default Values for Item Import
Evergreen now supports additional functionality for importing items through Cataloging → MARC Batch Import/Export. When items are imported via a Holdings Import Profile in Cataloging → MARC Batch Import/Export, Evergreen will create an item-level record for each copy. If an item barcode, call number, shelving location, or circulation modifier is not set in the embedded holdings, Evergreen will apply a default value based on the configured Library Settings. A default prefix can be applied to the auto-generated call numbers and item barcodes.
The following Library Settings can be configured to apply these default values to imported items:
-
Vandelay: Generate Default Barcodes —Auto-generate default item barcodes when no item barcode is present
-
Vandelay: Default Barcode Prefix —Apply this prefix to any auto-generated item barcodes
-
Vandelay: Generate Default Call Numbers —Auto-generate default item call numbers when no item call number is present
-
Vandelay: Default Call Number Prefix —Apply this prefix to any auto-generated item call numbers
-
Vandelay: Default Copy Location —Default copy location value for imported items
-
Vandelay: Default Circulation Modifier —Default circulation modifier value for imported items