Item Tags
Item Tags allow staff to apply custom, pre-defined labels or tags to items. Item tags are visible in the public catalog and are searchable in both the staff client and public catalog based on configuration. This feature was designed to be used for Digital Bookplates to attach donation or memorial information to items, but may be used for broader purposes to tag items.
Item tags can be created ahead of time in the Administration module (See the Administration section of this documentation for more information.) and then applied to items or they can be created on the fly during the cataloging process.
Adding Existing Item Tags to Items
Item Tags can be added to existing items or to new items as they are cataloged. To add an item tag:
-
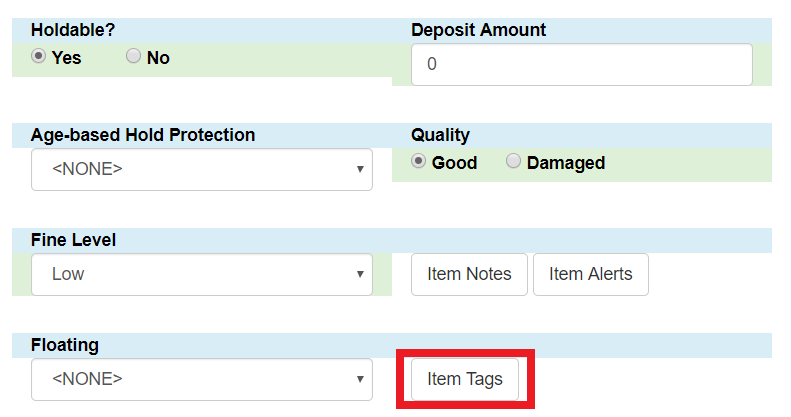
In the Holdings Editor, click on Item Tags. A dialog box called Manage Item Tags will appear.
-
Select the Tag Type from the drop down menu and start typing in the Tag field to bring up tag suggestions from the existing item tags. Select the tag and click Add Tag, then click OK.
-
If you are cataloging a new item, make any other changes to the item record.
-
-
Click Save & Exit. The item tag will now appear in the catalog.
Creating and Applying a Item Tag During Cataloging
Item tags can be created in the Holdings Editor on the fly while cataloging or viewing an item:
-
In the Holdings Editor, click on Item Tags. A dialog box called Manage Item Tags will appear.
-
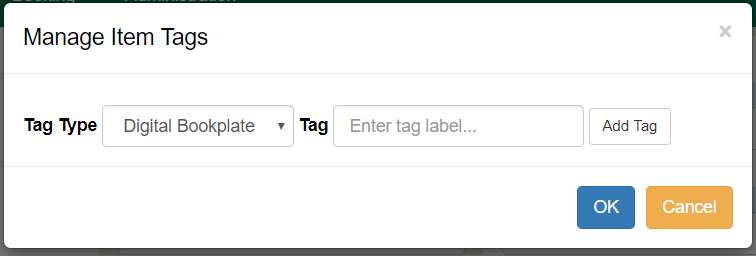
Select the Tag Type from the drop down menu and type in the new Tag you want to apply to the item. Click Add Tag, then click OK. The new tag will be created and attached to the item. It will be owned by the organization unit your workstation is registered to. The tag can be modified under Admin→Local Administration→Item Tags.
Removing Item Tags from Items
To remove an item tag from a item:
-
In the Holdings Editor, click on Item Tags. A dialog box called Manage Item Tags will appear.
-
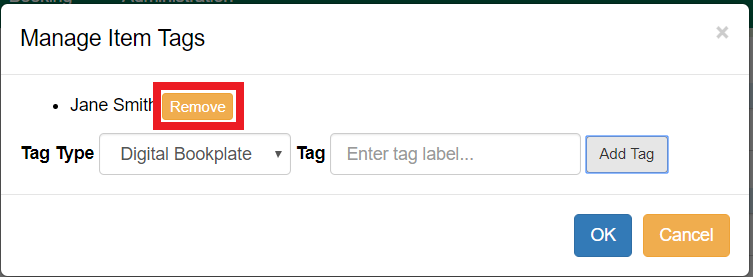
Click Remove next to the tag you would like to remove, and click OK.
-
Click Save & Exit. The item tag will now be removed from the catalog.
Adding Item Tags to Items in Batch
Item tags can be added to multiple items in batch using Item Buckets. After adding the items to a Item Bucket:
-
Go to Cataloging→Item Buckets→Bucket View and select the bucket from the Buckets drop down menu.
-
Select the items to which you want to add the item tag and go to Actions→Apply Tags or right-click and select Apply Tags. The Apply Item Tags dialog box will appear.
-
Select the Tag Type and enter the Tag. Click Add Tag, then click OK. The item tag will now be attached to the items.
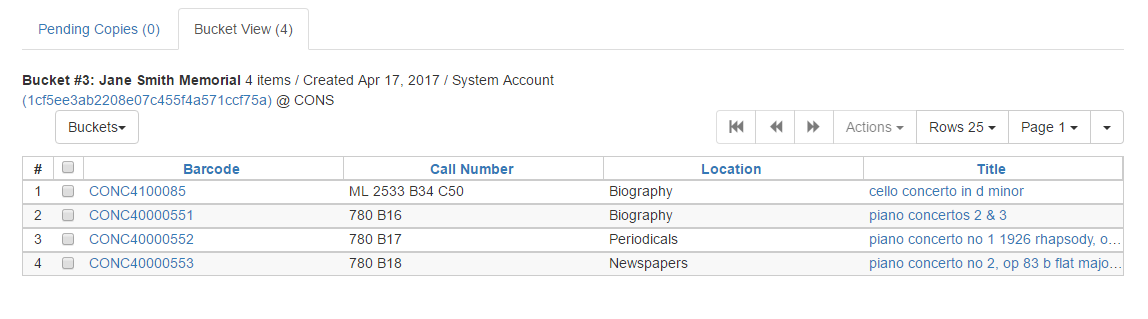
| It is not possible to remove tags using the Item Bucket interface. |
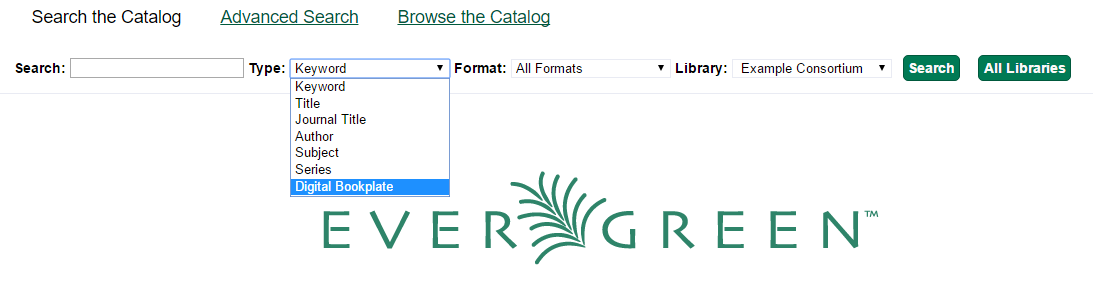
Searching Item Tags
Item Tags can be searched in the public catalog if searching has been enabled via Library Settings. Item Tags can be searched in the Basic and Advanced Search interfaces by selecting Digital Bookplate as the search field. Specific item tags can also be searched using a Keyword search and a specific search syntax.

Keyword Search
Item Tags can also be searched by using a Keyword search in the Basic and Advanced search interfaces. Searches need to be constructed using the following syntax:
copy_tag(item tag type code, search term)
For example:
copy_tag(bookplate, friends of the library)
It is also possible to conduct a wildcard search across all item tag types:
copy_tag(*, smith)