Emergency Closing Handler
Introduction
The Closed Dates Editor now includes an Emergency Closing feature that allows libraries to shift due dates and expiry dates to the next open day. Overdue fines will be automatically voided for the day(s) the library is marked closed. Once an Emergency Closing is processed, it is permanent and cannot be rolled back.
Create an emergency closing
The Emergency Closing feature is located within the Closed Dates Editor screen, which can be accessed via Administration → Local Administration → Closed Dates Editor.
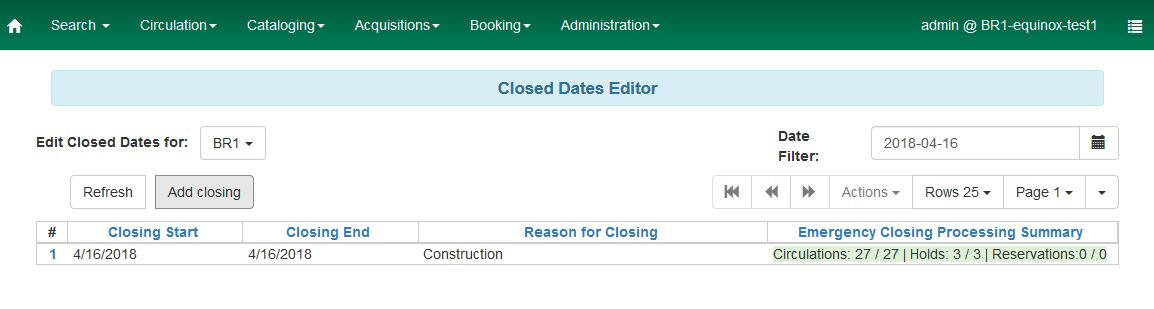
Within the closed dates editor screen, scheduled closed dates are listed and can be scoped by specific org unit and date. The date filter in the upper right-hand corner will show upcoming library closings on or after the selected date in the filter.
|
NOTE Before creating an Emergency Closure, delete any previously entered closures that overlap the Emergency Closure you wish to enter. Overlapping closed dates can cause issues in processing the Emergency Closure. |
Select Add closing to begin the emergency closing process.
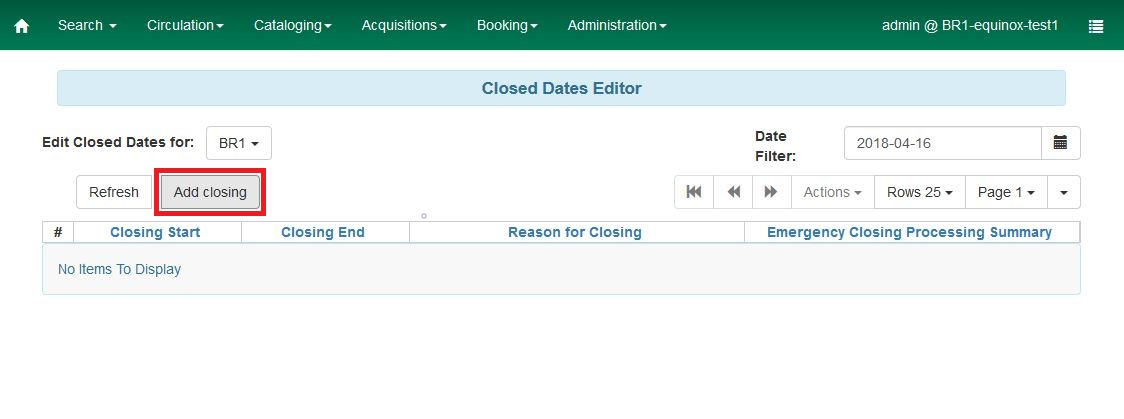
A pop-up will appear with fields to fill out.
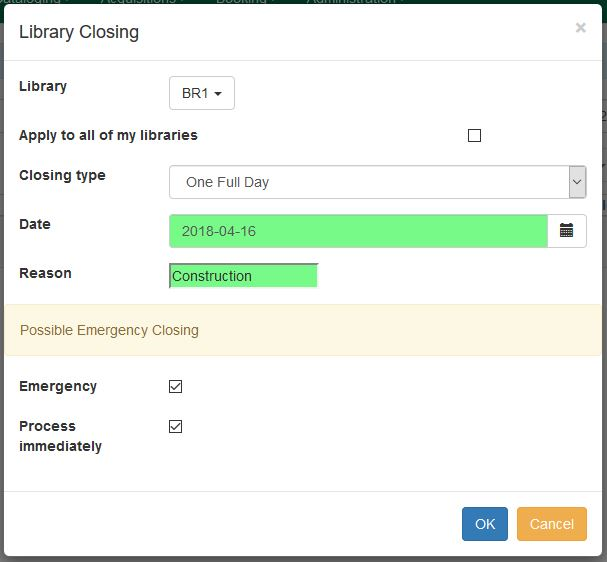
Library - Using the dropdown window, select the org unit which will be closing.
Apply to all of my libraries - When selected, this checkbox will apply the emergency closing date to the selected org unit and any associated child org unit(s).
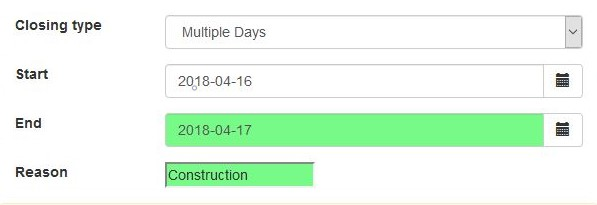
Closing Type - The following Closing Type options are available in a drop down window: * One full day * Multiple days * Detailed closing
The Multiple days and Detailed closing options will display different date options (e.g. start and end dates) in the next field if selected.
|
NOTE There is an existing bug that pushes the due dates to the first day after the Emergency Closure even if that day is normally closed. So, if you need to enter an Emergency Closure for a Friday, but you are normally closed on Saturday and Sunday, be sure to enter the Emergency Closure for Friday through Sunday. |
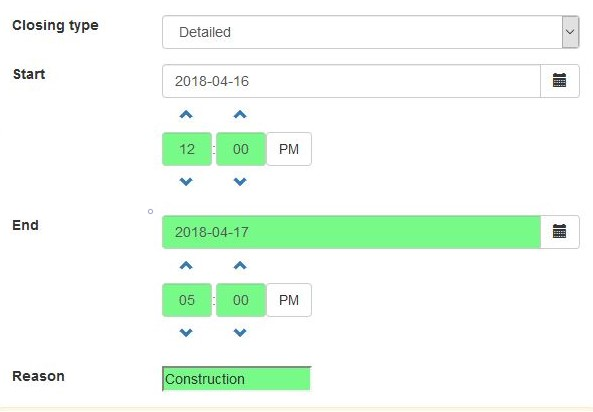
Date - Select which day or days the library will be closed.
|
NOTE The Closed Dates editor is now date-aware. If a selected closed date is either in the past, or nearer in time than the end of the longest configured circulation period, staff will see a notification that says "Possible Emergency Closing" in both the dialog box and in the bottom right-hand corner. |
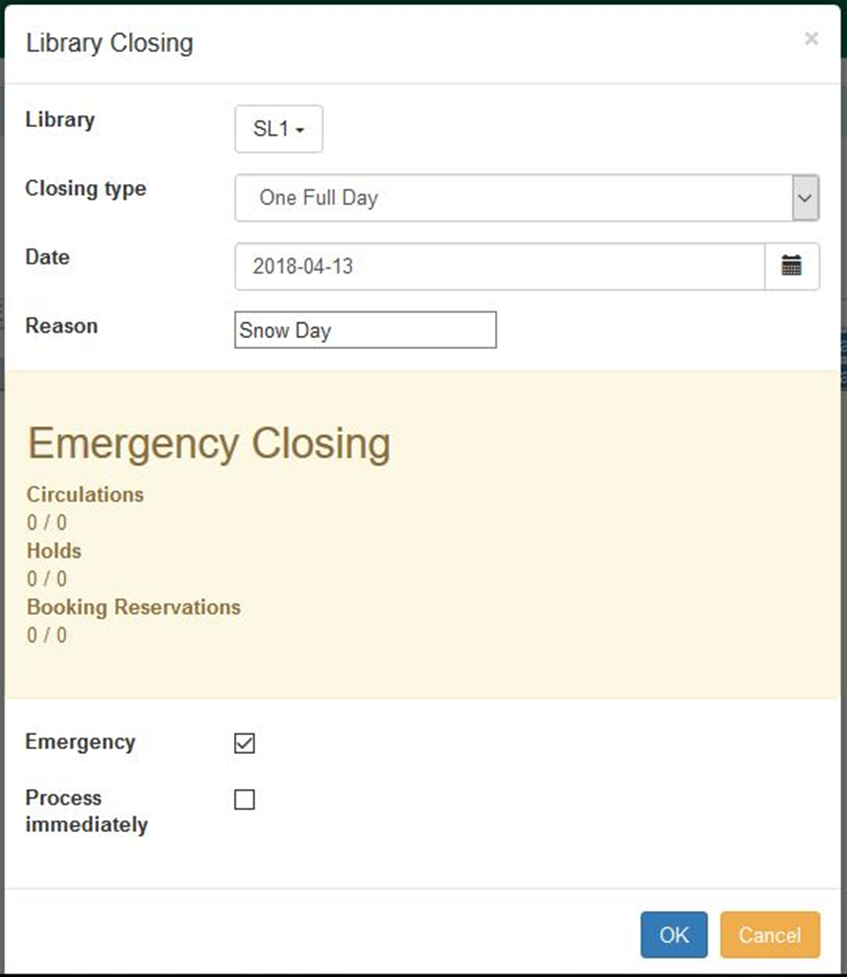
Reason - Label the reason for library closing accordingly, e.g. 3/15 Snow Day
Emergency Closing Handler
When a date is chosen that is nearer in time than the end of the longest configured circulation period or in the past, then a Possible Emergency Closing message will appear in the pop-up and in the bottom right-hand corner of the screen. Below the Possible Emergency Closing message, two checkboxes appear: Emergency and Process Immediately. Both checkboxes must be manually selected in
|
NOTE The Emergency checkbox must still be manually selected in order to actually set the closing as an Emergency Closing. |
By selecting the Emergency checkbox, the system will void any overdue fines incurred for that emergency closed day or days and push back any of the following dates to the next open day as determined by the library’s settings: * item due dates * shelf expire times * booking start times
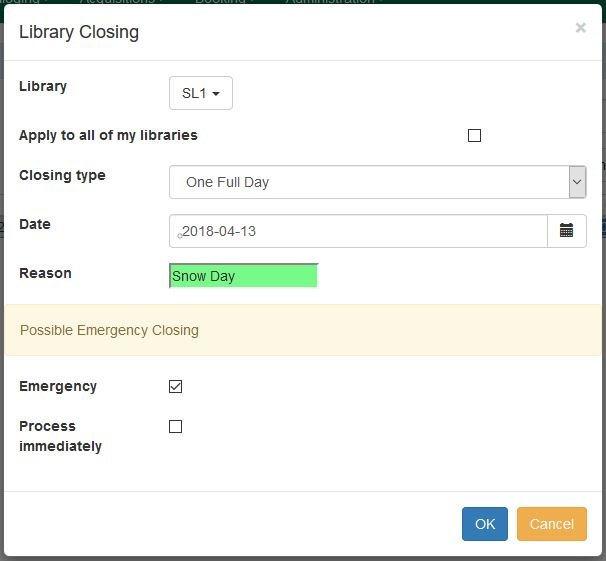
When selecting the Process immediately checkbox, Evergreen will enact the Emergency Closing changes immediately once the Emergency Closed Date information is saved. If Process immediately is not selected at the time of creation, staff will need to delete the original Emergency Closing and create a new one to make sure the Process immediately option is checked. If you go back to edit an entry to select the Process immediately checkbox, the Emergency processing will not occur.
Upon clicking OK, a progress bar will appear on-screen. After completion, the Closed Dates Editor screen will update, and under the Emergency Closing Processing Summary column, the number of affected/processed Circulations, Holds, and Reservations will be listed.
|
NOTE Processing can take some time, especially if you are creating an Emergency Closure at the system level and applying it to all branches. It’s best to let it run and check back later to make sure that all circulations and holds processed. A successful processing is indicated by the green bar in the Emergency Closing Processing Summary column (shown in the screenshot above). If the bar is blue after processing, this indicates the processing did not complete correctly. |
Editing Emergency Closings
If Process immediately is not selected during an Emergency Closing event creation, editing the existing Emergency Closing entry does not allow for proper processing. Staff will need to delete the original entry and create a new entry, making sure to select both the Emergency Closing and Process immediately options.
This caveat applies to editing the dates of an Emergency Closure as well. If the Emergency Closure dates need to be changed or extended, editing the existing entry does not process the circulations and holds properly. Either the original entry should be deleted and a new one created that encompasses the full date range, or a second Emergency Closure should be created to for the extended date range.
To edit the Reason field of an existing Emergency Closing event, go to Actions → Edit closing.
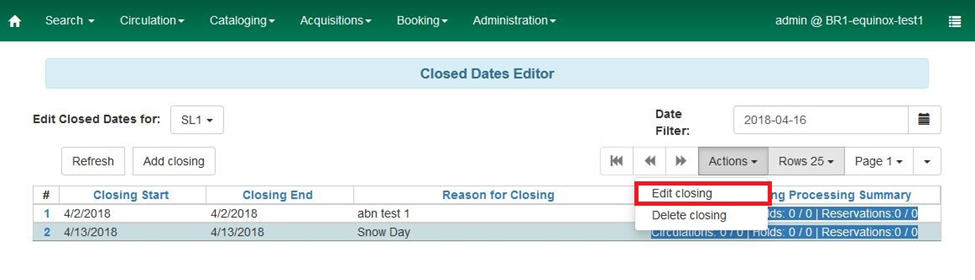
A pop-up display will appear with the same format as creating a Closed Dates event. Once you make the changes, click OK. The Closed Dates Editor display will update.