Routing Lists
Routing lists enable you to designate specific users and/or departments that serial items need to be routed to upon receiving.
Create a Routing List
-
To create a routing list for a subscription, go to the Manage Subscriptions tab for a serials record, select the subscription from the list and go to Actions→Additional Routing, or right-click and select Additional Routing. A dialog box will appear where you can create the routing list.
-
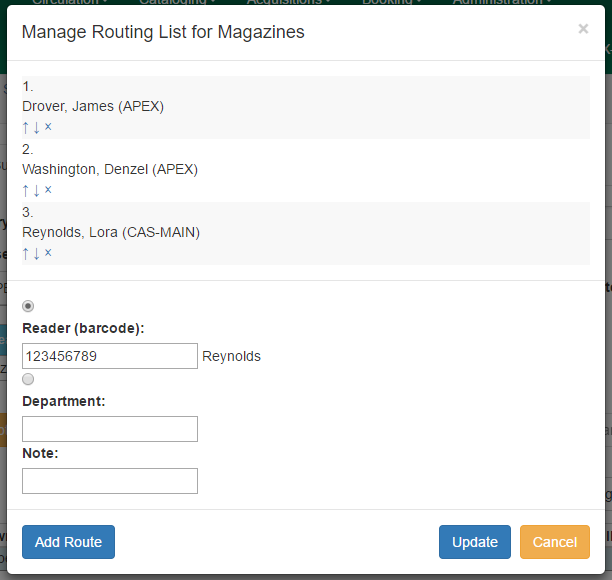
Scan or type in the barcode of the user the items should be routed to in the Reader (barcode) field and click Add Route. Continue adding barcodes until the list is complete.
-
To route items to a location, click the radio button next to Department, type in the routing location, and click Add Route.
-
A Note may be added along with each addition to the list.
-
The names and departments on the list will appear at the top of the dialog box and can be reordered by clicking the arrows or removed by clicking the x next to each name or department.
-
-
When the list is complete, click Update.
Routing lists can be printed as items are received (see the documentation on Receiving for more information). They can also be printed directly from the Manage Issues tab in a subscription by selecting the item(s) and going to Actions→Print routing lists or right-clicking on the item(s) and selecting Print routing lists from the menu.