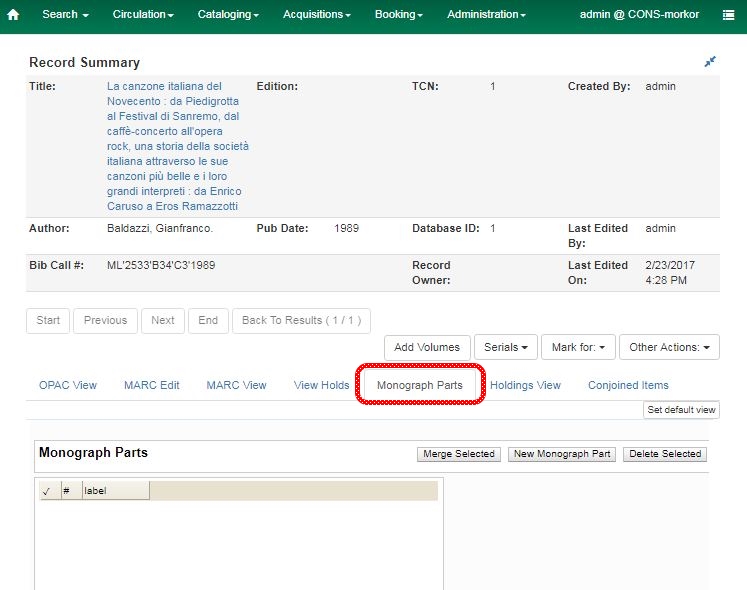
Monograph Parts
Monograph Parts enables you to differentiate between parts of monographs or other multi-part items. This feature enables catalogers to describe items more precisely by labeling the parts of an item. For example, catalogers might identify the parts of a monograph or the discs of a DVD set. This feature also allows patrons more flexibility when placing holds on multi-part items. A patron could place a hold on a specific disc of a DVD set if they want to access a specific season or episode rather than an entire series.
Four new permissions are used by this functionality:
-
CREATE_MONOGRAPH_PART
-
UPDATE_MONOGRAPH_PART
-
DELETE_MONOGRAPH_PART
-
MAP_MONOGRAPH_PART
These permissions should be assigned at the consortial level to those groups or users that will make use of the features described below.
Add a Monograph Part to an Existing Record
To add a monograph part to an existing record in the catalog:
-
Retrieve a record.
-
Click the Manage Parts tab.
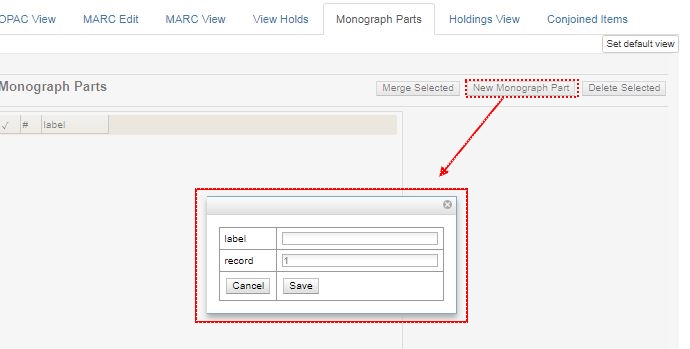
-
Click the New Monograph Part button
-
Enter the label that you want to appear to the user in the catalog, and click Save. This will create a list of monograph parts from which you can choose when you create holdings.
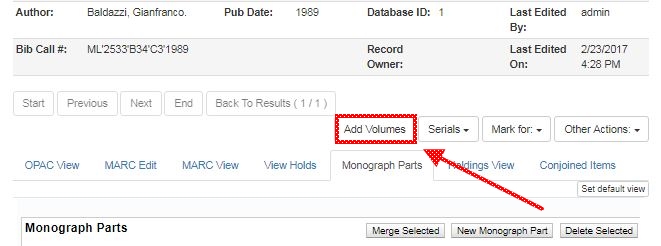
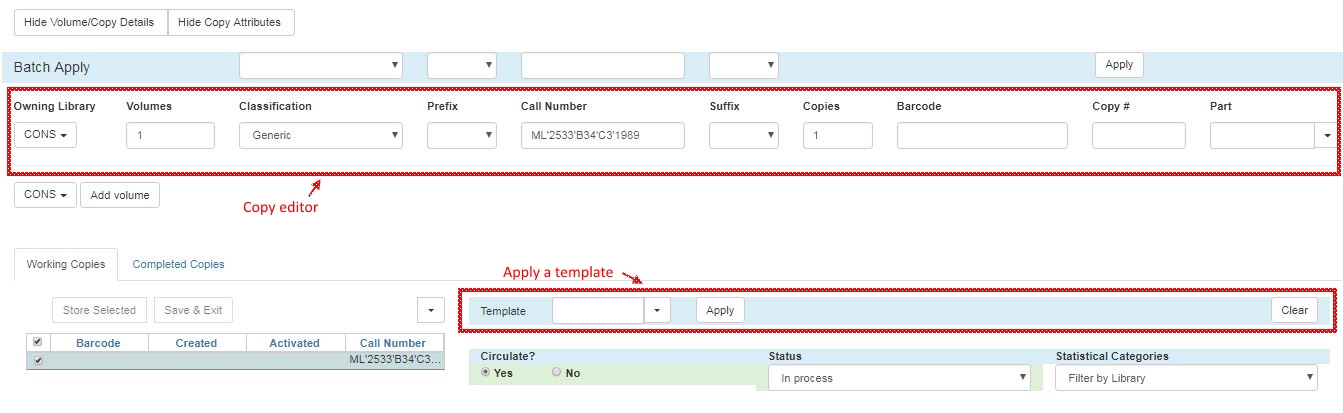
-
Add holdings. To add holdings to your workstation library, click the Add Holdings button in the Record Summary area above the tabs.
To add holdings to your workstation library or other libraries, click the Holdings View tab, right-click the appropriate library, and choose Add → Call numbers and Items.
-
The Holdings Editor opens. Enter the number of call numbers that you want to add to the catalog and the call number description.
-
Enter the number of items and barcode(s) of each item.
-
Choose the part label from the Part drop down menu.
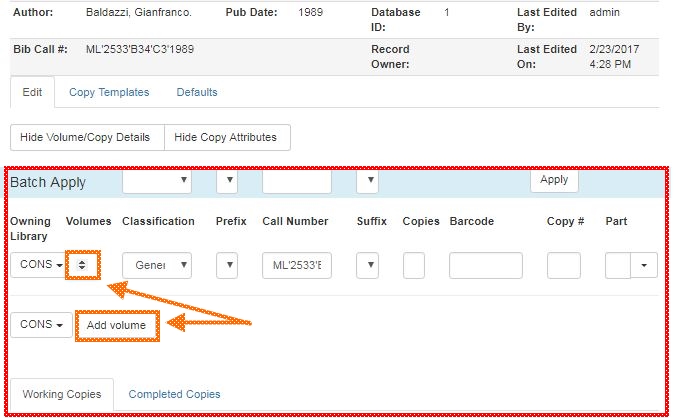
-
Apply a template to the items, or edit fields in the Working Items section below.
-
Click Store Selected when those items are ready.
-
Review your completed items on the "Completed Items" tab.
-
When all items have been stored and reviewed, click "Save & Exit".
If you are only making one set of changes, you can simply click Save & Exit and skip the Store Selected stage. -
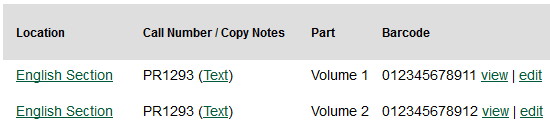
The Holdings View tab now shows the new part information. These fields also appear in the OPAC View.
Monograph Part Merging
The monograph part list for a bibliographic record may, over time, diverge from the proscribed format, resulting in multiple labels for what are essentially the same item. For instance, Vol.{nbsp}1 may have variants like V.1, Vol{nbsp}1, or {nbsp}Vol.{nbsp}1 (leading space). Merging parts will allow cataloging staff to collapse the variants into one value.
In the Monograph Parts display:
-
Click the checkbox for all items you wish to merge including the one you wish to prevail when done.
-
Click on the ``Merge Selected'' button. A pop-up window will list the selected items in a monospaced font, with blanks represented by a middle-dot character for more visibility.
-
Click on the item you wish to prevail.
The undesired part labels will be deleted, and any items that previously used those labels will now use the prevailing label